Loading Paper and Originals
Loading Paper
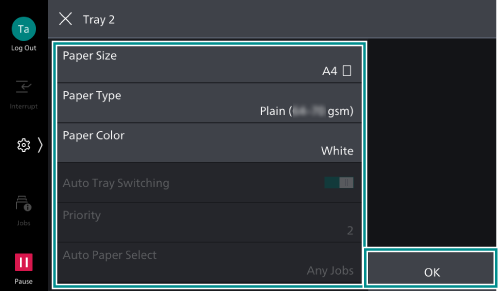
After loading paper, configure the paper tray settings on the touch panel display.
Important
Do not place paper or other objects in the reserved space of the tray. It might cause paper jams or machine malfunctions.
Note
While the printer is processing a job, do not remove the paper tray used for the job.
Before loading the paper into the Paper Tray, fan a stack of paper well. This will separate the sheets, and it can prevent paper jamming.
Paper Tray 1 to 4
The paper feeding method is the same for Paper Trays 1 (top tray) through 4 (bottom tray).
The top face of loaded paper is the surface printed on.
Loadable Paper
Paper Tray 1 |
Paper Tray 2 to 4 |
|||
|---|---|---|---|---|
When [Envelope Feeder] is Enabled |
When [Envelope Feeder] is Disabled |
|||
Paper size |
Width |
90 to 241 mm |
140 to 297 mm |
140 to 297 mm |
Length |
98 to 372 mm |
182 to 432 mm |
182 to 432 mm |
|
Paper Weight |
Single side printing |
106 to 300 g/m2 |
52 to 300 g/m2 |
52 to 300 g/m2 |
Maximum number of sheets (80 g/m2 paper) |
520 sheets |
|||
Note
[Envelope Feeder] is set at
 > [Device] > [Paper Tray Settings] > [Tray 1].
Loading Procedure
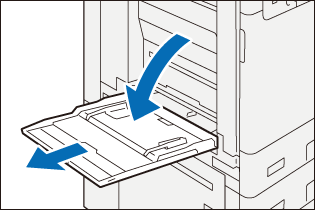
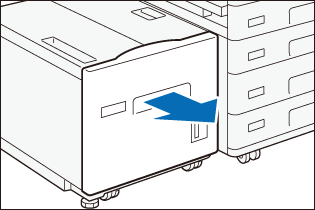
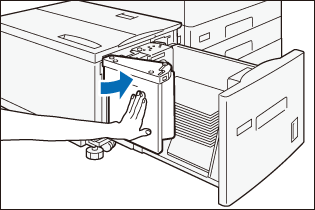
- Pull out the paper tray until it stops.
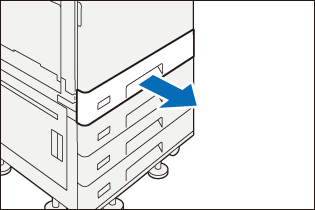
- When paper is already loaded in the tray, take out the paper.
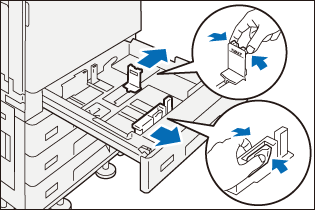
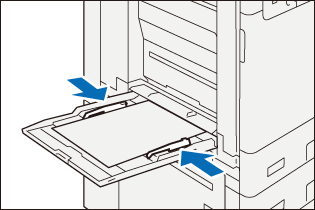
- Pinch the two guide clips, and adjust to the correct paper size.
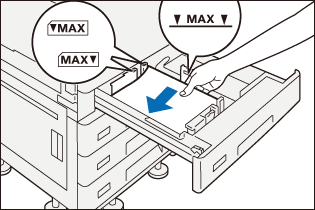
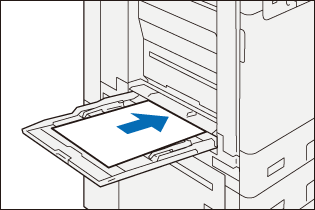
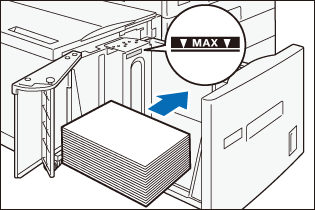
- Fan a stack of paper, face the print surface up, and then load the paper with edges aligned according to the direction of the arrow.
Important
Do not load paper exceeding the maximum fill line. It might cause paper jams or machine malfunctions.
Note
Align the guides correctly so that they fit to the paper size. If the position of the guides is incorrect, the machine cannot feed the paper properly, resulting in paper jams.
- Push in the paper tray.
- Modify the paper tray settings.
Refer
For how to change the paper tray settings, refer to Changing the Paper Tray Settings.
Loading Special Paper and Other Media
Hole punched paper
Paper orientation: Load paper with holes facing the left side when viewed from the front of the machine.
Postcard
Loadable Tray: Tray 1
Paper Orientation: Landscape
Envelope
Loadable Tray: Tray 1
Paper orientation when the flaps are open: Flaps come at the right when viewed from the front of the machine
Paper orientation when the flaps are closed: Flaps come at the left when viewed from the front of the machine
Note
Load envelopes with adhesive or a seal with the flaps closed.
When loading envelopes or postcards in Tray 1, install the envelope attachment according to the steps described below and make the settings using the touch panel display.
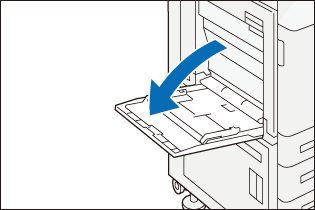
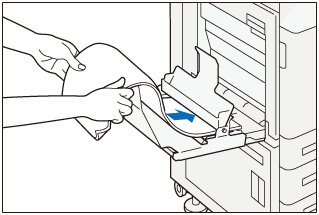
- Pull out Tray 1 until it stops.
- Open the cover located on the front part of the tray.
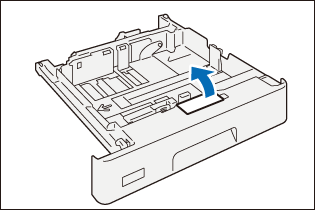
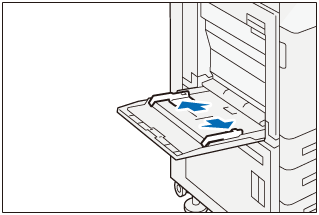
- Take out the envelope attachment.
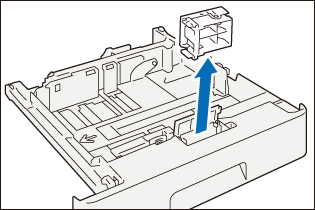
The envelope attachment is stored folded.
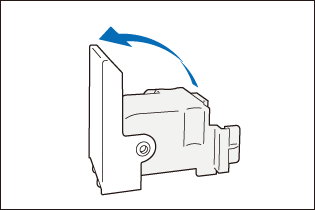
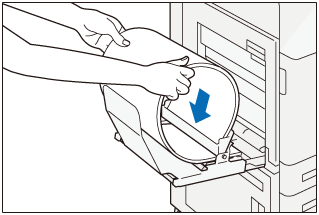
- Open the envelope attachment.
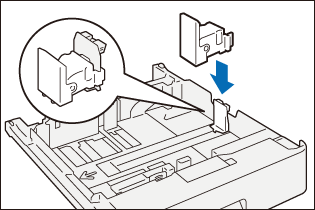
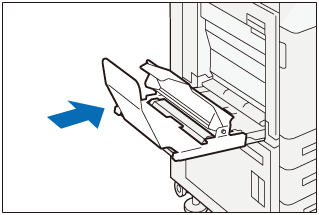
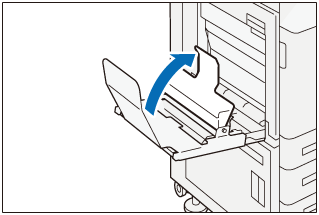
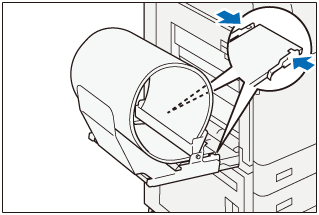
- Install the envelope attachment onto the end-edge guide.
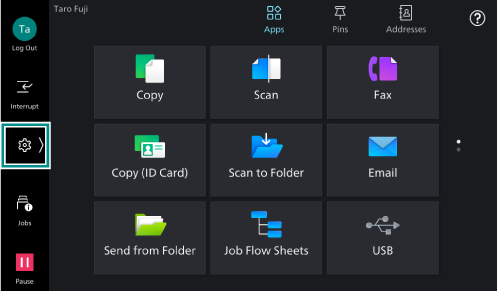
- Tap on on the Home screen.
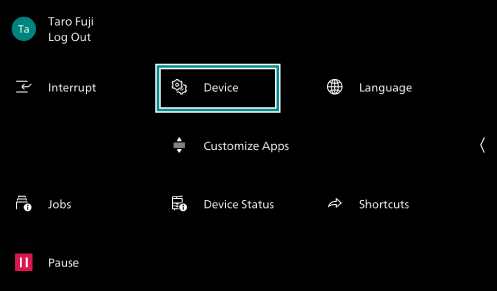
- Tap on [Device].
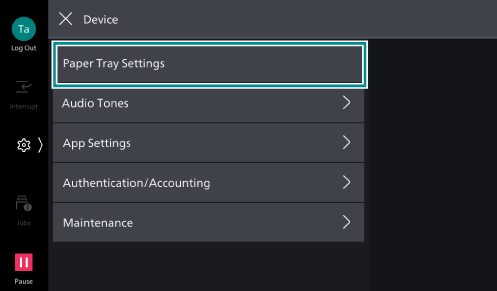
- Tap on [Paper Tray Settings].
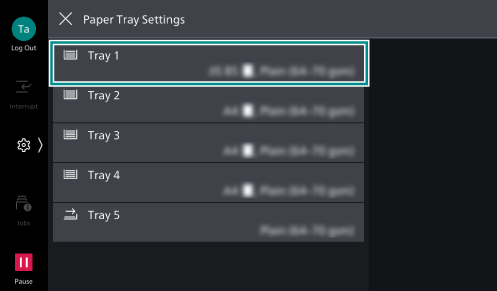
- Tap on [Tray 1].
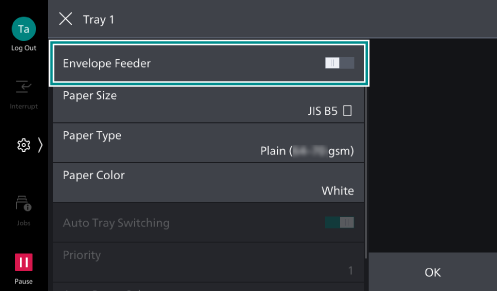
- Tap on [Envelope Feeder] to enable.
Paper Tray 5 (Bypass)
The Paper Tray 5 (Bypass) allows you to use a variety of paper sizes and types that cannot be used in paper trays 1 to 4.
The bottom face of loaded paper is the surface printed on.
Loadable Paper
Paper size |
Width |
89 to 297 mm |
Length |
98 to 432 mm |
|
Paper Weight |
Single side printing |
52 to 300 g/m2 |
Maximum number of sheets (80 g/m2 paper) |
96 sheets |
|
Loading Procedure
- Open the paper tray.
- Fan a stack of paper, face the print surface down, and insert the paper gently along the paper guides until it stops.
Important
Do not load paper exceeding the maximum fill line. It might cause paper jams or machine malfunctions.
- Adjust the paper guides to fit to the paper size.
- Modify the paper tray settings.
Refer
For how to change the paper tray settings, refer to Changing the Paper Tray Settings.
Loading Special Paper and Other Media
Hole punched paper
Paper orientation: Load paper with holes facing the right side when viewed from the front of the machine.
Postcard
Paper Orientation: Landscape
Envelope
Paper orientation when the flaps are open: Flaps come at the left when viewed from the front of the machine.
Paper orientation when the flaps are closed: Flaps come at the right when viewed from the front of the machine.
Long paper
Load one sheet of paper at a time.
Using an optional Long Paper Inserter prevents skewed feeding and the paper from falling.
Install the Long Paper Inserter according to the steps described below.
Note
Remove output paper one by one to prevent paper jam.
When you finish printing, make sure to remove the Long Paper Inserter and keep it in a safe place.
- Open the paper tray.
- Extend the paper guide to the maximum.
- Install the Long Paper Inserter.
- Open the paper holder.
- Face the print surface down, and insert the paper gently under the paper holder until it stops.
- Insert the trail edge of the paper into the paper holder.
- Adjust the paper guides to align with the paper size.
- Modify the paper tray settings.
Refer
For how to change the paper tray settings, refer to Changing the Paper Tray Settings.
High Capacity Feeder B1
The top face of loaded paper is the surface printed on.
Loadable Paper
Paper size |
JIS B5 |
|
Paper Weight |
Single side printing |
52 to 216 g/m2 |
Maximum number of sheets (80 g/m2 paper) |
2,000 sheets |
|
Loading Procedure
- Pull out the paper tray until it stops.
- When paper is already loaded in the tray, take out the paper.
- If changing the paper size, adjust the guide position.
- Open the end guide (
 ), remove the screw for the guide in the back (
 ), and remove the guide from the paper tray.
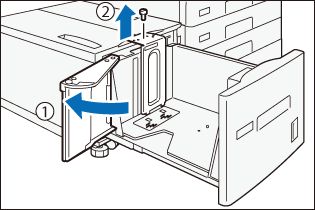
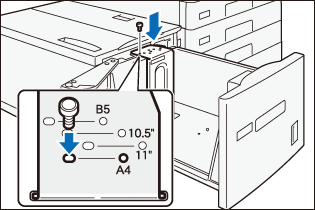
- Insert the protrusions of the lower part of guide into the corresponding holes for the paper size.
- Insert the paper tray protrusions into the corresponding holes for the paper size on the top of the guide, and tighten the screw.
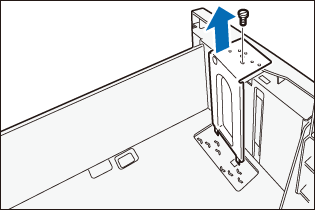
- Remove the screw for the guide in front and remove the guide from the paper tray .
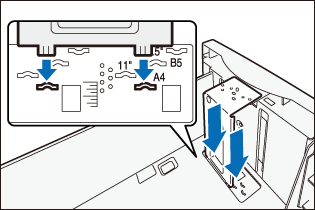
- Insert the protrusions of the lower part of guide into the corresponding holes for the paper size.
- Insert the paper tray protrusions into the corresponding holes for the paper size on the top of the guide, and tighten the screw.
- Pull the handle for the end guide up (), align with the paper size while moving the handle along the groove (), and lower the handle (
 ).
).
Note
The groove on the left side of the end guide 8.5″ is not used.
- Open the end guide (
- Fan a stack of paper, face the print surface down, and then load the paper with edges aligned according to the direction of the arrow.
Important
Do not load paper exceeding the maximum fill line. It might cause paper jams or machine malfunctions.
- Close the end guide completely.
- Push in the paper tray.
- Modify the paper tray settings.
Refer
For how to change the paper tray settings, refer to Changing the Paper Tray Settings.
Loading Special Paper and Other Media
Hole punched paper
Paper orientation: Load paper with holes facing the right side when viewed from the front of the machine.
Changing the Paper Tray Settings
- Tap on on the Home screen.
- Tap on [Device].
- Tap on [Paper Tray Settings].
- Tap the tray where you have loaded the paper.
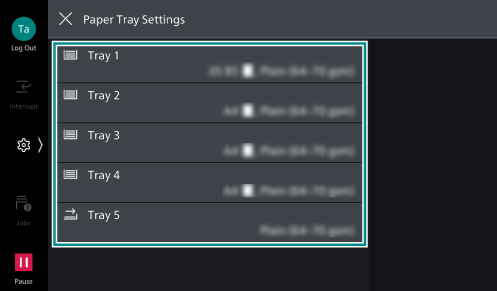
- Set each item according to the loaded paper and tap on [OK].