Setting up Scan to Computer
To scan a document and save the data to your client computer, you must perform the following settings:
Setting the IP Address
Set the IP address of the machine by referring to Setting the IP Address.
Setting the [FTP Client], [SFTP Client] and [SMB Client] Ports
- Log in to Administrator Mode.
- Tap on
 on the Home screen.
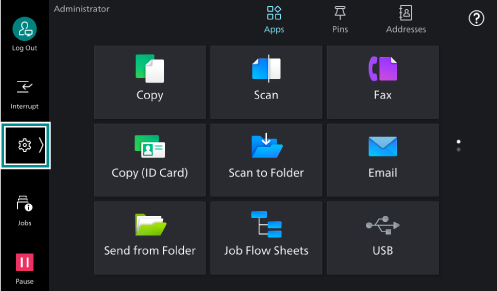
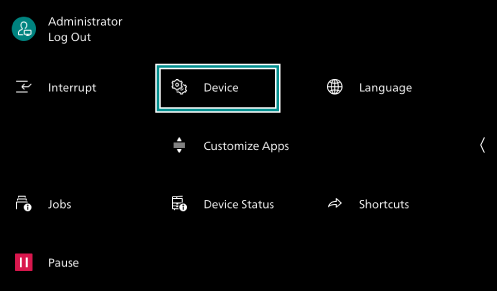
- Tap on [Device].
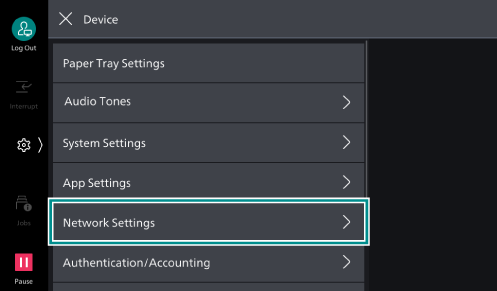
- Tap on [Network Settings].
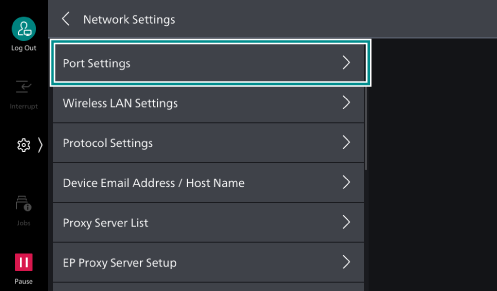
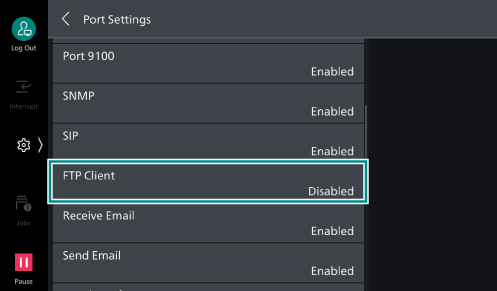
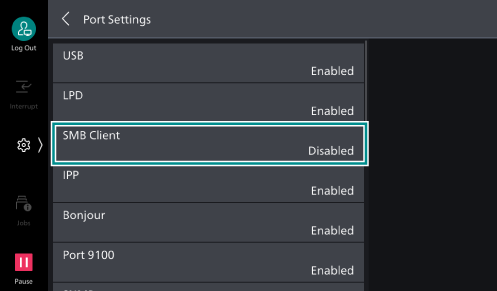
- Tap on [Port Settings].
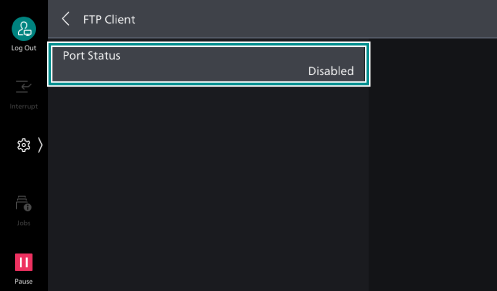
- Tap on [FTP Client].
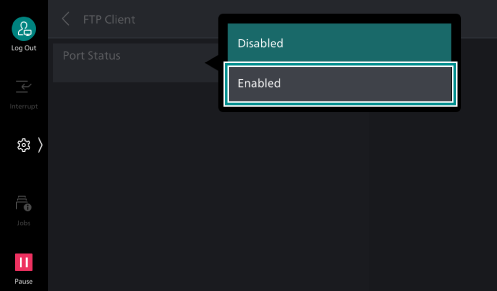
- Tap on [Port Status].
- Tap on [Enabled].
- Tap on [<] to return to the [Port Settings] screen.
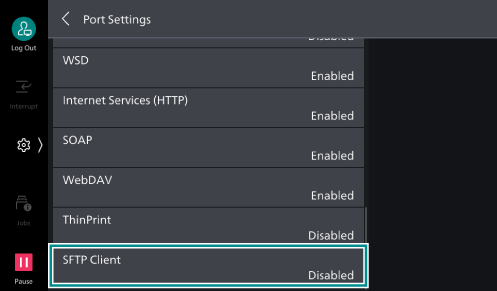
- Tap on [SFTP Client].
- Tap on [Port Status].

- Tap on [Enabled].
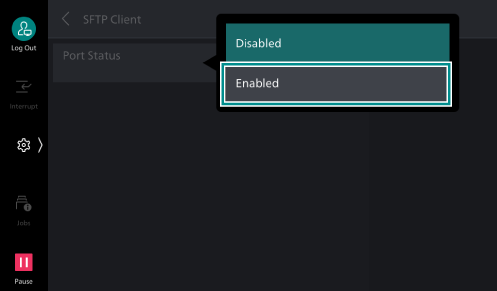
- Tap on [<] to return to the [Port Settings] screen.
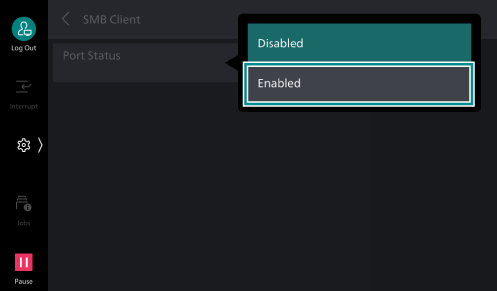
- Tap on [SMB Client].
- Tap on [Port Status].

- Tap on [Enabled].
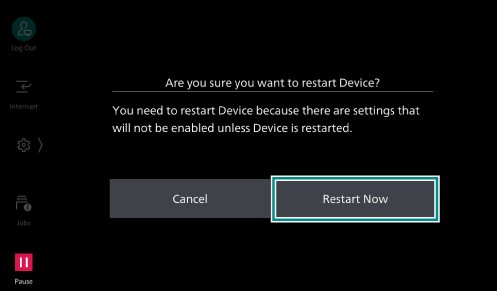
- Press the <Home> button.
- Tap on [Restart Now].
Create the Transfer Destination Folder
Before performing an operation on the machine, obtain necessary information from the client computer.
Here an example of operation with Windows 11 is explained.
Note
An account (login name and password) are required to use FTP/SFTP transfer.
When using SMB with macOS, it is necessary to set [System Settings] > [General] > [Sharing] > [File Sharing].
Checking Your User Name and Password
- Check your user name and password used to log on to Windows.
Note
Please contact your system administrator if you have any questions about the user name and password, for example if you:
do not know your user name
forgot your password
have not yet set your password
Checking the Computer Name
- Click [Start], and from the displayed menu select [Settings] to open Windows Settings.
- Click [System] > [About] in order.
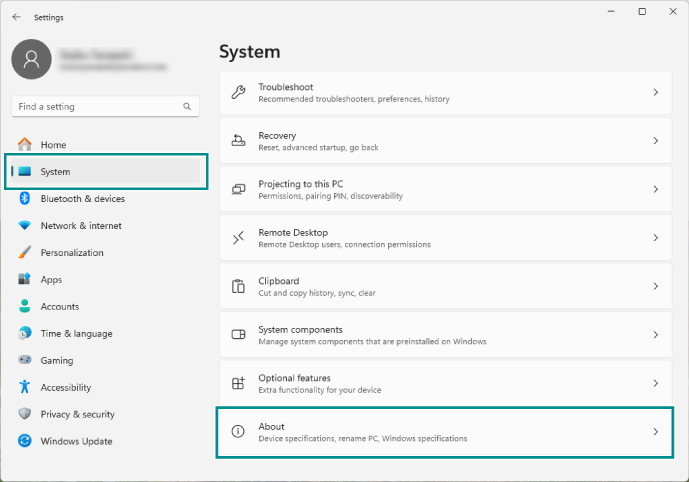
- Check the name of the computer displayed in [Device name].

Creating a Shared Folder on the Client Computer
Setting Access Rights
- Click [Start], and from the displayed menu select [Settings] to open Windows Settings.
- Click [Network & internet] > [Advanced network settings] in order.
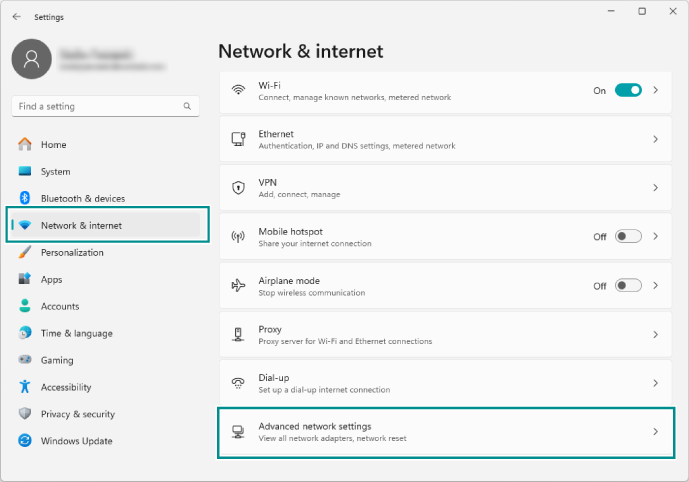
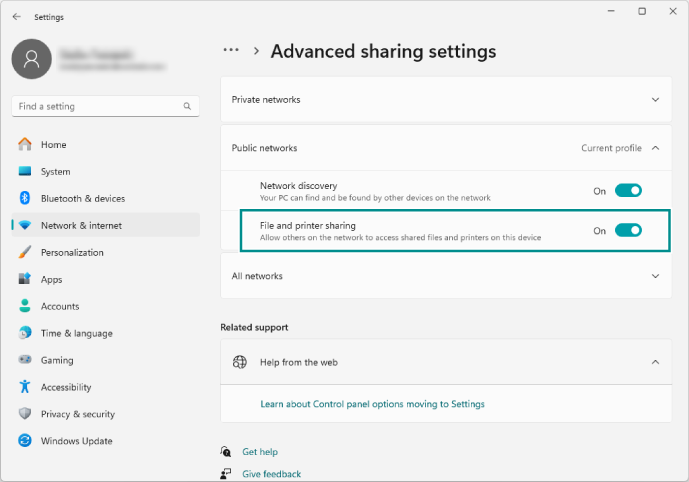
- Click [Advanced sharing settings].

- Set [File and printer sharing] to [On].
From either [Private networks] or [Public networks], change the settings of the one indicating [Current profile].
Creating a Shared Folder
- Create a folder in which to save scanned documents anywhere on your computer, and make a note of the folder name.
Note
It is recommended to enter the folder name with single-byte alphanumeric characters.
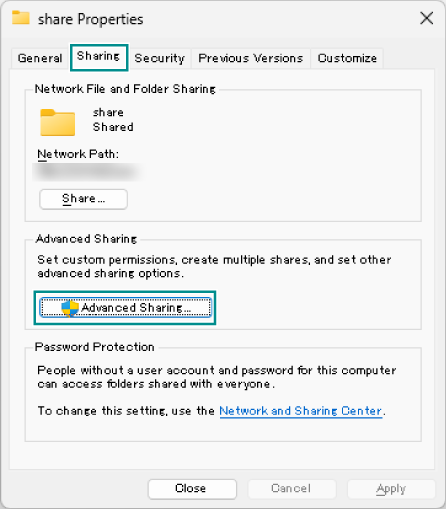
- Right-click the created folder, and select [Properties] from the displayed menu.
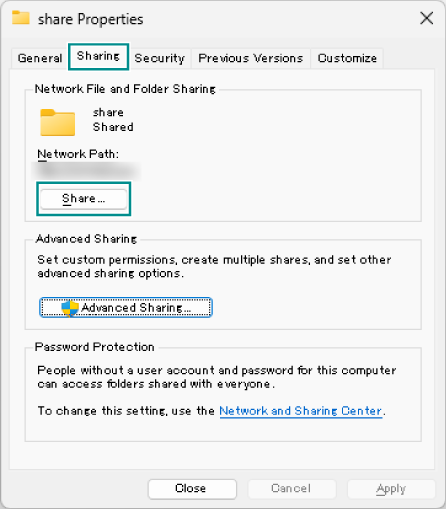
- Open the [Sharing] tab, and click [Advanced Sharing].
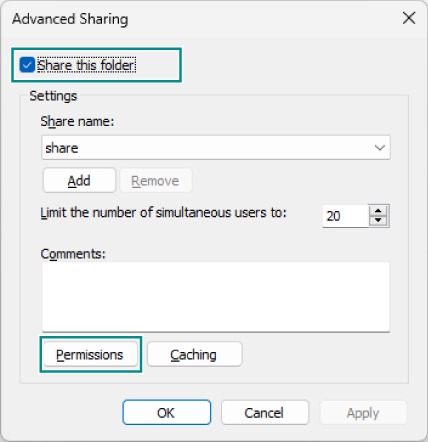
- Apply a check mark to [Share this folder], and click [Permissions].
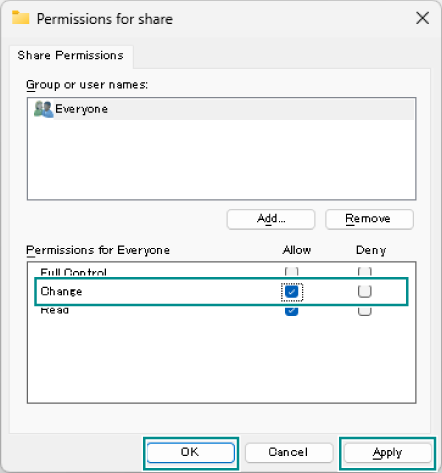
- Apply a check mark to [Allow] for [Change] in the [Permissions for Everyone] field, and click [Apply]. Then click [OK].
- Click [OK].
- Click [Share] on the [Sharing] tab.
- Select [Everyone] from the drop-down list, and click [Add]. Then click [Share].
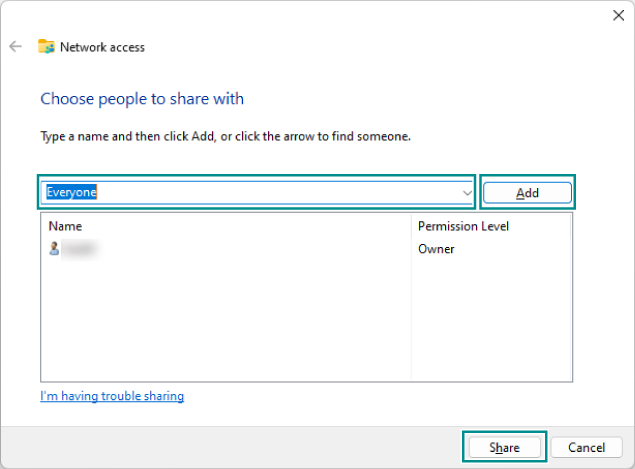
- Click [Done].
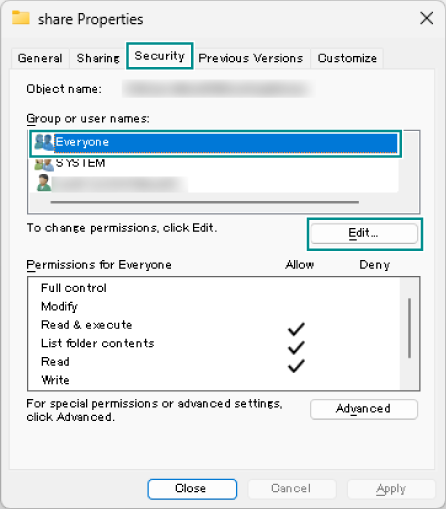
- Open the [Security] tab, select [Everyone] from the [Group or user names] field, and click [Edit].
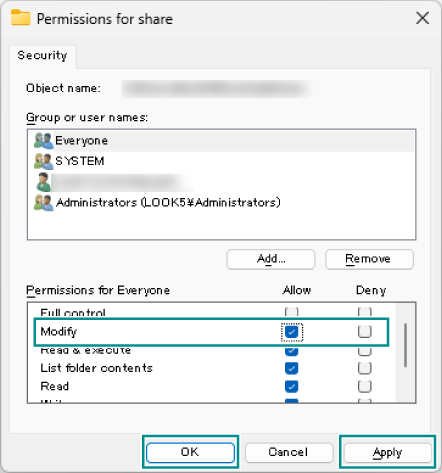
- Apply a check mark to [Allow] for [Modify] in the [Permissions for Everyone] field, and click [Apply]. Then click [OK].
- Click [Close] to close the properties screen.