Paper Jams (Main Unit)
When a paper jam occurred, the machine stops and an alarm beeps. Follow the instructions displayed on the screen to remove the jammed paper.
Gently remove the paper to avoid it to be torn. If the paper is torn, remove all the torn pieces, making sure that none remain inside the machine.
When the paper jam is cleared, printing is resumed from the point when the paper jam occurred. If you were during copying, tap [Start] to resume the copying from the point when the paper jam occurred.
Note
Check the paper jam location before pulling out a paper tray in case of a paper jam.
When clearing a paper jam, keep the machine power switched on.
Do not touch components inside the device. This may cause print defects.
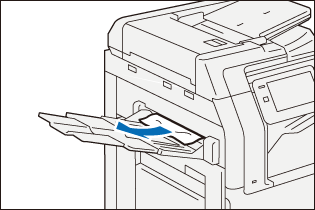
Left-Side Output Tray
- Remove any jammed paper.
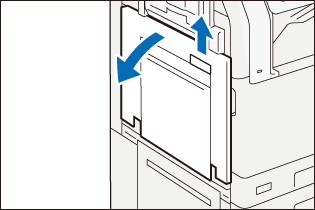
Inside Upper Left-Side Door
WARNING
The fusing unit is hot. It may cause burn injury. Do not touch this unit.
Important
Do not touch the machine’s transfer belt (black film-like belt) inside the upper left-side door when you remove the jammed paper. The image quality may be deteriorated or the transfer belt may be damaged and need replacement.
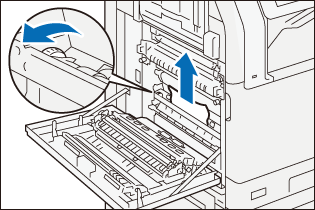
- While lifting up the release handle, open the upper left-side door.
Note
When the Left-Side Output Tray is installed, close the Left-Side Output Tray after removing any paper, and then open the upper left-side door.
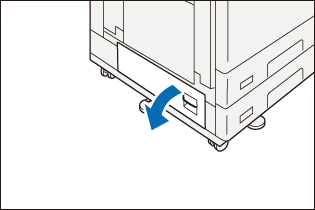
When High Capacity Feeder is installed, hold the handle and fully move the unit to the left.
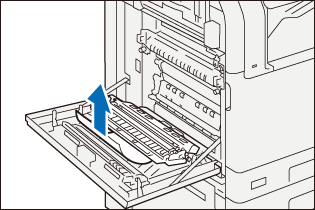
- Identify the location of the paper jam and then proceed to remove the jammed paper.
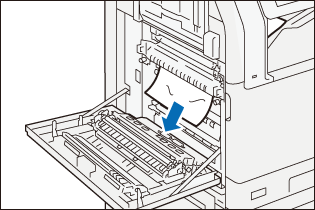
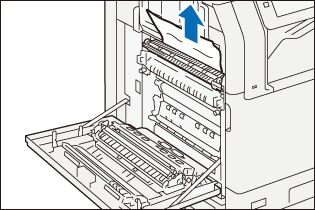
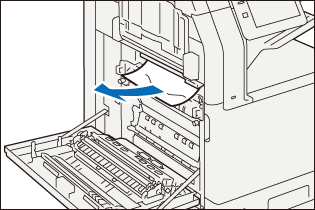
Fusing Unit
- Remove any jammed paper.
Note
When the lead edge of the jammed paper protrudes toward the Top Output Tray, pull the paper downward to remove it.
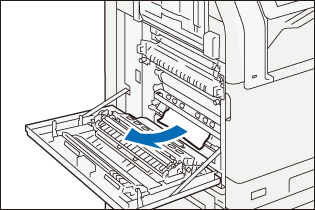
- Pull the handle [A1].
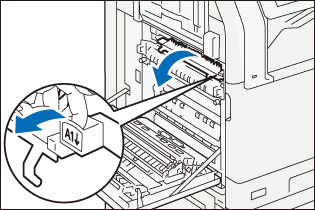
- Remove any jammed paper.
- Return the handle [A1] to the original position.
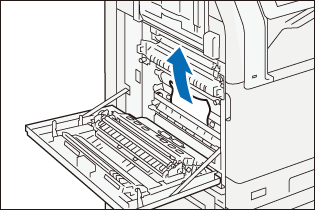
Center Tray Exit
- Pull the handle [A2].
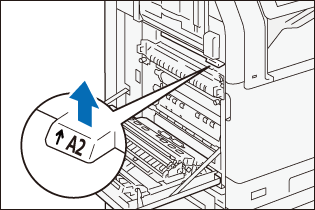
- While holding the handle [A2], remove the jammed paper.
- Return the handle [A2] to the original position.
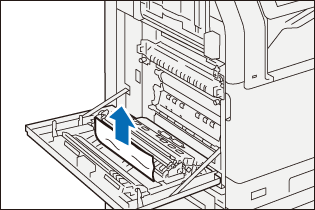
Duplex Unit
- Remove any jammed paper.
- Pull the handle [A3].
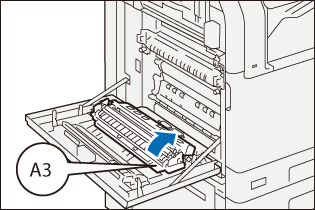
- While holding the handle [A3], remove the jammed paper.
- Return the handle [A3] to the original position.
- Close the upper left-side door.
How to Remove the Remaining Torn Paper
- Pinch the edge of the paper with your fingers, and pull it upwards.
- If you cannot pinch the paper at the top edge, pull it downwards.
- If you cannot pinch any paper edges, turn the knob and pull the paper out through the opening.
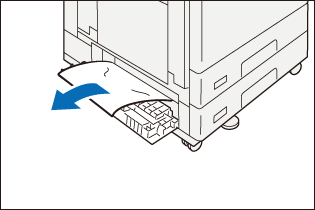
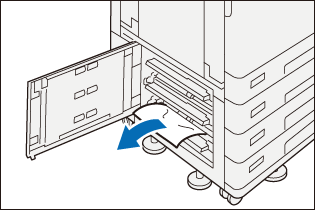
Inside Lower Left-Side Door (for Standard Single Tray Configuration + 1 Tray Module + Caster)
- While lifting up the release handle, open the lower left-side door.
- Remove any jammed paper.
Note
Paper may be jammed in upper areas that are difficult to see. Check carefully.
- Close the lower left-side door.
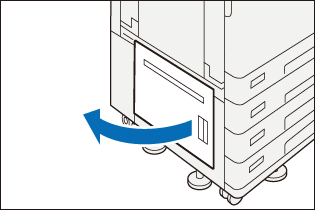
Inside Lower Left-Side Door (for 4-Tray Configuration)
- While pulling the release handle, open the lower left-side door.
- Remove any jammed paper.
Note
Paper may be jammed in upper areas that are difficult to see. Check carefully.
- Close the lower left-side door.
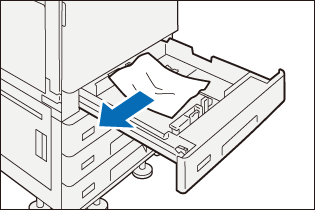
Paper Tray 1 to 4
- Pull out the paper tray where the paper jam occurred until it stops.
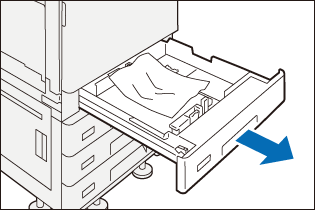
- Remove any jammed paper.
- Push in the paper tray.
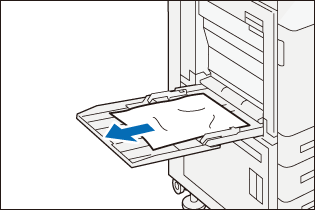
Paper Tray 5 (Bypass)
- Remove any jammed paper.
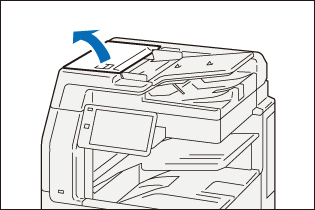
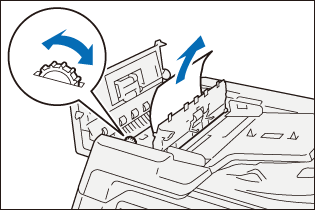
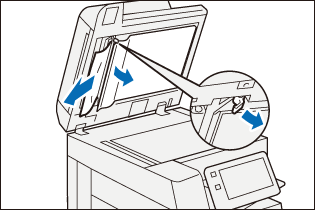
Document Feeder B1-C
- Remove all originals from the document tray.
- Pull up the front handle of the left cover and open the cover until it stops.
When the original is not caught in the entry of the document feeder
- Remove the original.
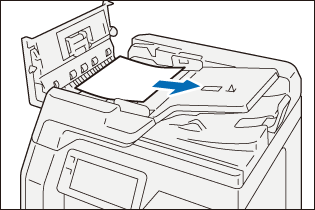
When the message on the screen instructs you to turn the knob
- Turn the knob to eject the original upwards then remove it.
Note
When the original is caught, do not pull it out forcibly. The original could be damaged.
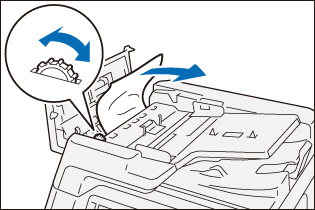
When the message on the screen instructs you to open the inner cover
- Lift the tab to open the inner cover.
- Turn the knob to eject the original upwards then remove it.
Note
When the original is caught, do not pull it out forcibly. The original could be damaged.
- Close the inner cover.
- Close the left cover.
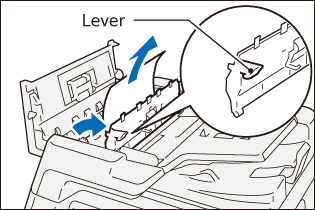
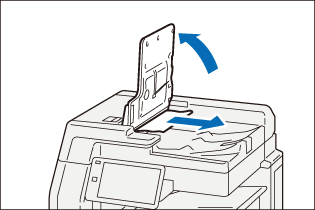
- When you cannot find the original, lift the document feeder gently and remove the original if it is there, then close the document feeder.
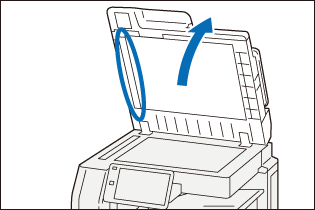
- Lift the document feeder tray and remove the original.
- Put the document feeder tray back into position.
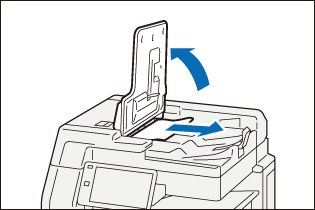
Document Feeder B5-PC/B4-PC
- Remove all originals from the document tray.
- Pull up the front handle of the left cover of and open the cover until it stops.

- Remove the original.
- Close the left cover.
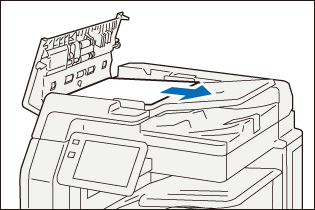
- If you cannot find the original, open the document cover, grip the handle to open the Side 2 scanner, and then remove the original.
- Close the Side 2 scanner, then close the document cover.
- Lift the document feeder tray and remove the original.
- Put the document feeder tray back into position.