Setting up Email Feature
To use the email feature, you need to configure various settings. Follow the steps below to configure the settings.
Note
A certificate is required in advance to send and receive Email after attaching a digital signature to the Email and encrypting the Email using S/MIME.
Setting the IP Address
Set the IP address, subnet mask, gateway address and others of the machine. This section explains the steps in IPv4 environment as an example.
Note
These steps are not required if the IP address of the machine has already been set.
- Log in to Administrator Mode.
- Tap on
 on the Home screen.
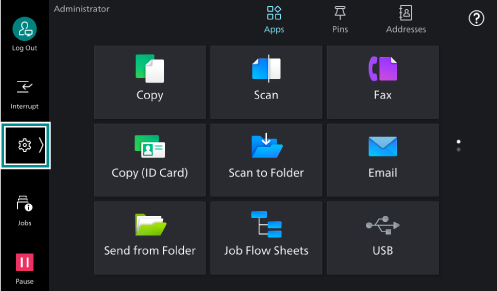
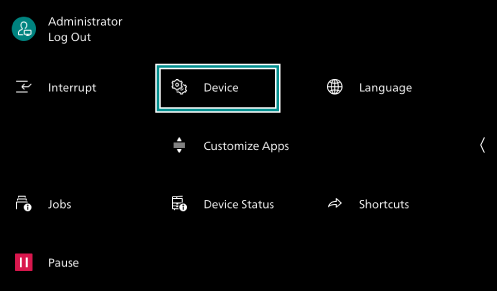
- Tap on [Device].
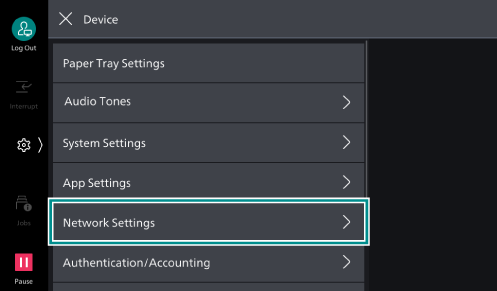
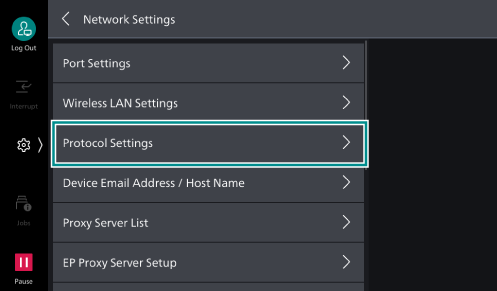
- Tap on [Network Settings].
- Tap on [Protocol Settings].
- Tap on [TCP/
IP - Network Settings ].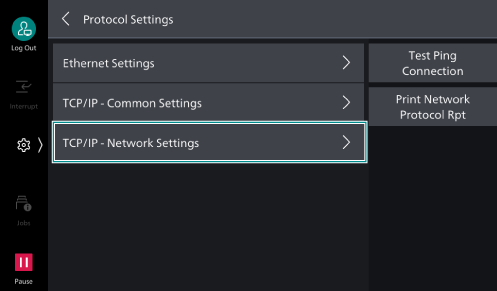
Note
If the machine is equipped with the secondary Ethernet port (optional), [TCP/
IP - Network Settings (Ethernet 1) ] and [TCP/IP - Network Settings (Ethernet 2) ] are displayed instead of the options above. When setting the IP address, you must select [TCP/IP - Network Settings (Ethernet 1) ].
- Tap on [IPv4 - IP Address Resolution].
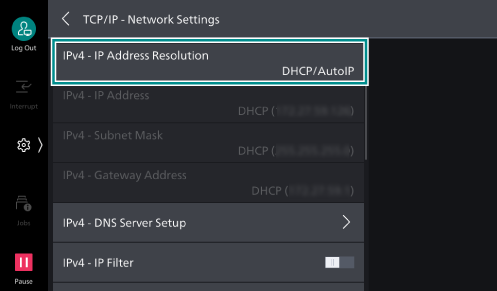
- Select how you want to get the IP address, and tap on [OK].
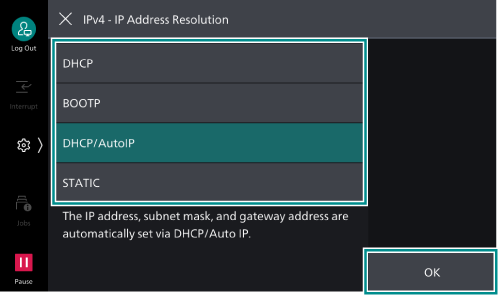
If you select [STATIC] here, tap [<] to return to the [TCP/
IP - Network Settings ] screen, and go to Manual Setup.If you select an option other than [STATIC] here, tap [<] to return to the [Network Settings] screen, and go to Setting the Port for Sending and Receiving Emails.
Manual Setup
- Tap on [IPv4 - IP Address] on the [TCP/
IP - Network Settings ] screen.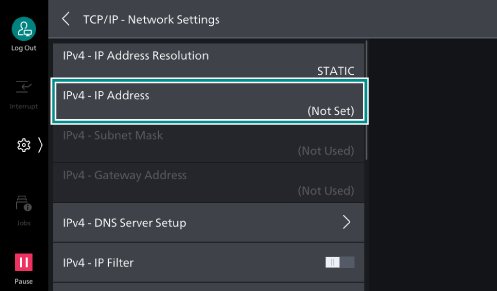
- Enter the IP address using the keyboard displayed, and tap on [OK].
Note
The IP address must be entered in the following format: xxx.xxx.xxx.xxx.
- In the same way as in steps 1 to 2, set [IPv4 - Subnet Mask] and [IPv4 - Gateway Address].
Note
The gateway address must be entered in the following format: xxx.xxx.xxx.xxx.
- Tap on [<] to return to the [Network Settings] screen.
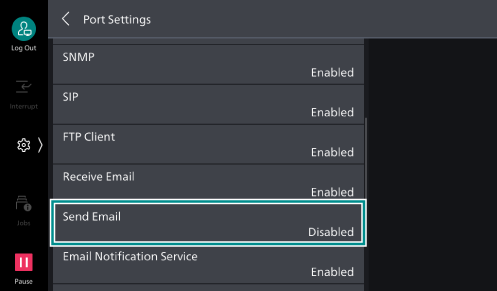
Setting the Port for Sending and Receiving Emails
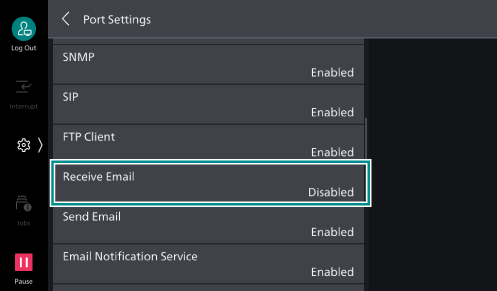
Enable the ports for sending and receiving email.
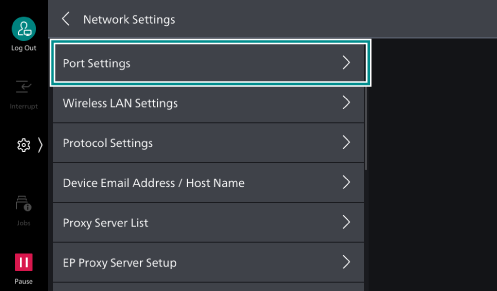
- Tap on [Port Settings] on the [Network Settings] screen.
- Tap on [Receive Email].
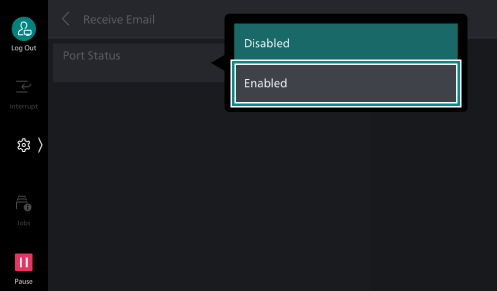
- Tap on [Port Status].

- Tap on [Enabled].
- Tap on [<] to return to the [Port Settings] screen.
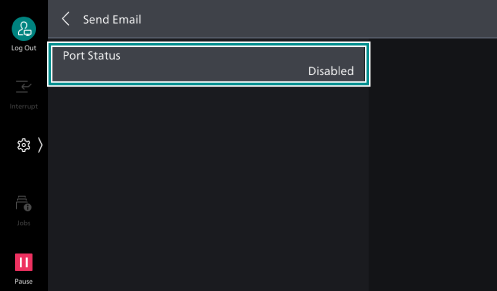
- Tap on [Send Email].
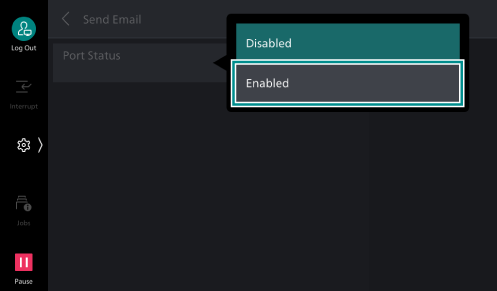
- Tap on [Port Status].
- Tap on [Enabled].
- Tap on [<] to return to the [Network Settings] screen.
Registering the Email Address or Host Name
Set the machine’s email address, name, host name, and domain name.
- Tap on [Device Email Address /
Host Name ] on the [Network Settings] screen.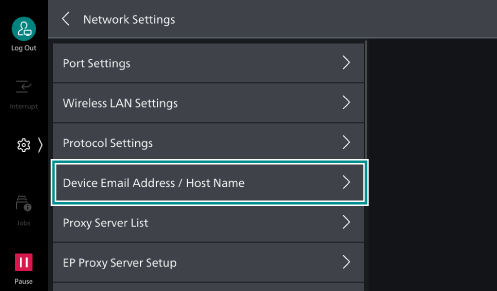
- Set each items.
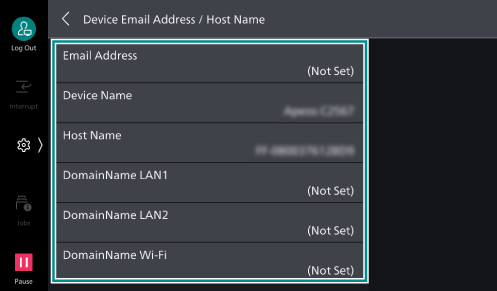
Item
Description
[Email Address]
Input the Email address of the machine up to 128 characters.
SMTP Reception
Any name can be set for the account (part to the left of the @ mark). Set the combination of the host name and domain name as the address part (part to the right of the @ mark). An alias cannot be set. For example,
- Account name: mymail
- Host name: myhost
- Domain name: example.com
In this case, the email address is mymail@myhost.example.com.
POP3 Reception
Specify the Email Address for receiving emails.
[Device Name]
Input the name of the machine up to 32 characters.
[Host Name]
Input the host name in 32 half-size characters or less.
Note
In communication with SMB, the part from the beginning to 15 half-size characters is used as a host name. To correctly identify the machine, set the host name to 15 half-sized characters or less.
[Domain Name]
Input the domain name up to 255 characters.
- Tap on [<] to return to the [Network Settings] screen.
Setting Email Receiving Protocol
Set [SMTP] or [POP3] according to your environment.
[POP3] cannot be selected if Internet fax direct is to be used.
- Tap on [Other Settings] on the [Network Settings] screen.
- Tap on [Protocol to Receive Email] and from the displayed menu select [SMTP] or [POP3].
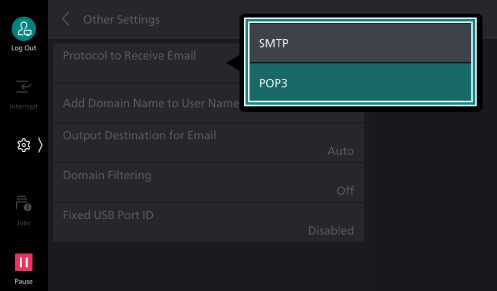
- Tap on [<] to return to the [Network Settings] screen.
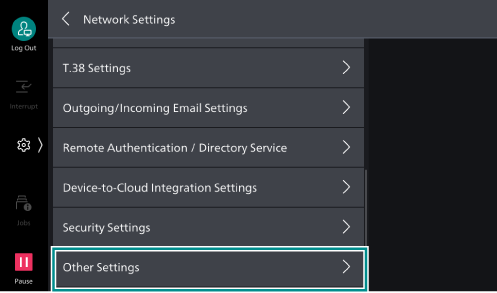
Configuring the Settings for Sending and Receiving Emails
Configure the outgoing and incoming email servers.
Note
To configure Exchange Online/Outlook.com for server, use Internet Services.
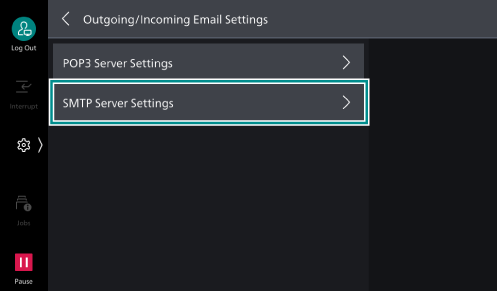
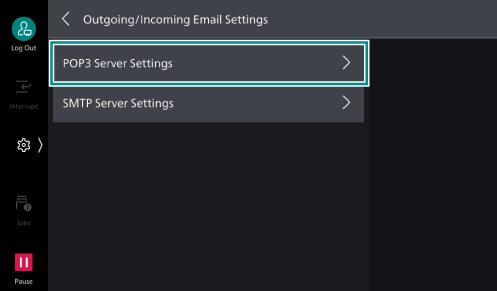
- Tap on [Outgoing/
Incoming Email Settings ] on the [Network Settings] screen.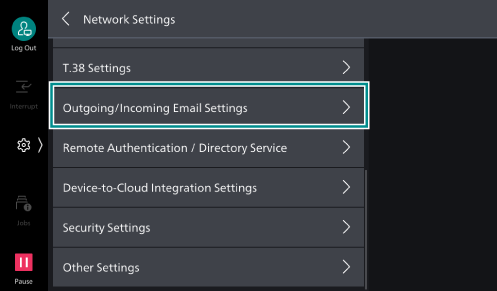
SMTP
- Tap on [SMTP Server Settings].
- Set each items.
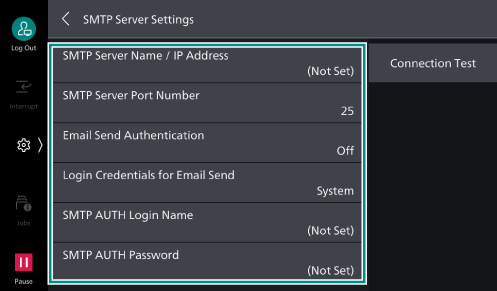
Item
Description
[SMTP Server Name /
IP Address ]Input server name or IP address of SMTP server.
For IPv4, enter the IP address in the format of xxx.xxx.xxx.xxx.
For IPv6, enter the IP address in the format of xxxx:xxxx:xxxx:xxxx:xxxx:xxxx:xxxx:xxxx.
[SMTP Server Port Number]
Sets port number of SMTP server.
[Email Send Authentication]
Sets method of authentication for sending via SMTP.
Note
As authentication methods, the system supports AUTH GSSAPI (only when specifying Kerberos), AUTH NTLMv2, AUTH NTLMv1, AUTH PLAIN, AUTH LOGIN, and AUTH CRAM-MD5.
[Login Credentials for Email Send]
Sets Login Credentials for Email Send.
If set to [Remotely Authenticated User], login to the SMTP server is performed with the remote authentication user name/password if log in to remote accounts is performed on the machine prior to running a job. You can also select Operation in case login fails. If log in to remote accounts is not used, then the user name/password set for the machine is used.
[SMTP AUTH Login Name]
Sets login name for SMTP server.
[SMTP AUTH Password]
Sets login password for SMTP server.
[Connection Test]
You can check the connection status between the machine and SMTP server by sending a test email to the specified email address from the machine. Also, if [Connection Test] > [Print SMTP Comm Report] is selected, a report is printed showing the specifics of the SMTP communication protocol sent/received by the machine.
Note
If something went wrong sending an email, in order to determine whether the problem is due to the authentication method, select [Off] in [Email Send Authentication], and in [SMTP Server Name /
IP Address ] set a server that does not require authentication.To clear the password being set, on the [SMTP AUTH Password] screen, with nothing entered, tap on [Next] > [OK].
- Tap on [<] to return to the [Outgoing/
Incoming Email Settings ] screen.
POP3
Note
If you selected [SMTP] in [Protocol to Receive Email], you do not need to configure the POP3 settings.
- Tap on [POP3 Server Settings].
- Set each items.
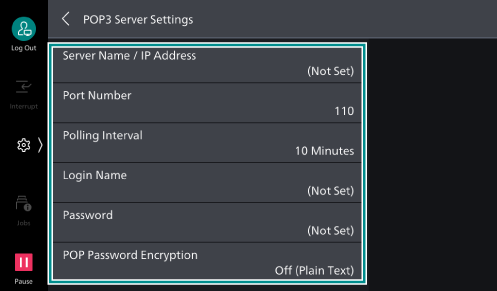
Item
Description
[Server Name /
IP Address ]Input server name or IP address of POP3 server.
[Port Number]
Sets port number of POP3 server.
[Polling Interval]
Sets interval for checking POP3 server for Email.
[Login Name]
Input name for logging in to POP3 server.
[Password]
Sets password for POP reception.
[POP Password Encryption]
Enables password encryption.
- Tap on [<] to return to the [Network Settings] screen.
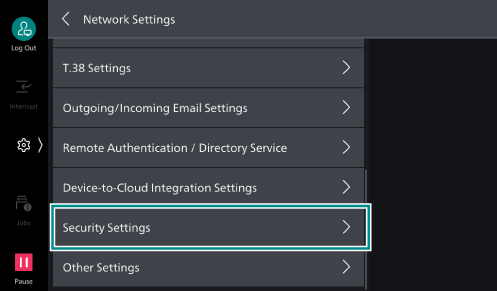
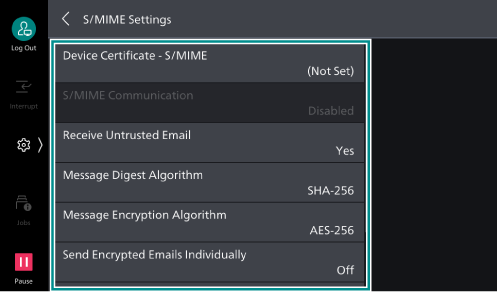
Setting S/MIME
Set when sending and receiving emails and Internet faxes using encryption or signature features.
- Tap on [Security Settings] on the [Network Settings] screen.
- Tap on [S/
MIME Settings ].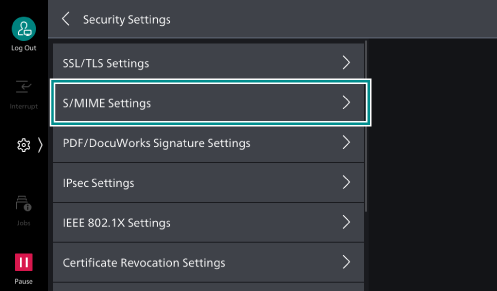
- As needed, configure the setting items.
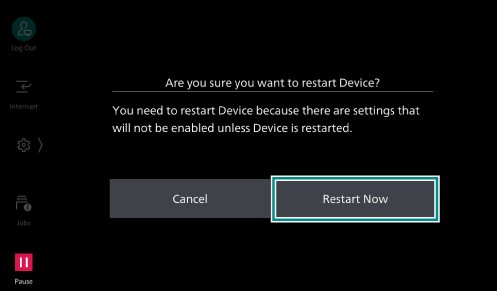
- After you have configured the settings, press the <Home> button.
- Tap on [Restart Now].