Installing the Printer Driver
Install the printer driver for the machine on the client computer so that you can specify a variety of print settings and submit print jobs to the machine.
Note
The printer driver can be obtained from our official website.
For Windows Users
Install the printer driver by using the Printer Driver Installation Tool to automatically detect the machine connected to your network. If the machine is not detected automatically, you can also add the machine manually.
Note
You also can use “Easy Setup Installer” to enable batch installation of drivers and software for multiple machines on the network, which are automatically detected.
“Easy Setup Installer” can be obtained from the Home screen of Internet Services or our official website.
The steps differ depending on how the machine is connected to the client computer.
For Network Connection
This section explains the steps you should follow when the machine is connected to the same subnet as the client computer via TCP/IP.
- Double-click the printer driver you downloaded from our official website.
- Click [Start Installation].
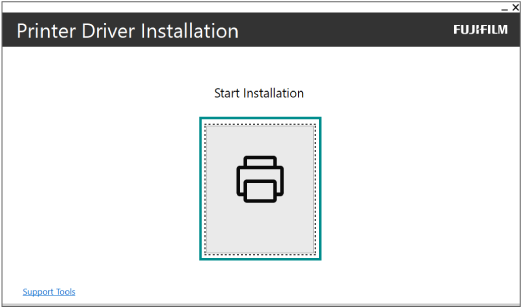
Note
If a message related to the Windows user account control, click [Yes].
- Apply a check mark to [I accept the terms of the license agreement], and click [Next].

Note
If you want to install the printer driver via USB connection, follow step 2 and subsequent steps in For USB Connection to continue on installation.
If you want to install the printer driver manually, follow step 2 and subsequent steps in For Manual Connection to continue on installation.
- Select [Wireless or Ethernet Connection], and click [Next].

- If more than one model name is displayed, clear the check mark for other models other than the machine.
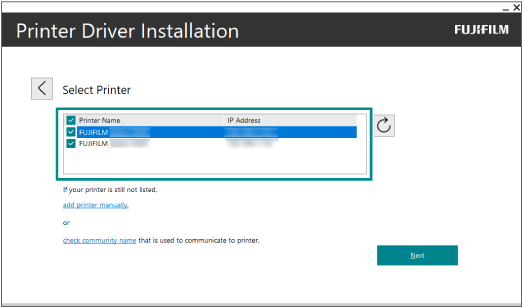
Note
If the machine is not displayed, follow step 4 and subsequent steps in For Manual Connection to continue on installation.
You can check the IP address of the machine in
 > [Device] > [Device Status].
- Check that the machine’s name and IP address are correct, and click [Next].

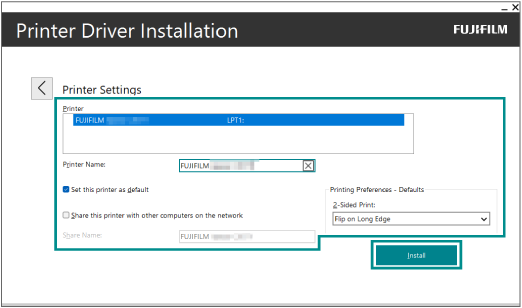
- Check that the machine is displayed, configure other settings, and click [Install].
- After the installation has completed, click [Finish].
Note
If the screen shown below appears, it indicates that restarting the client computer is required for installation to complete.
Clicking [Finish] restarts the client computer.
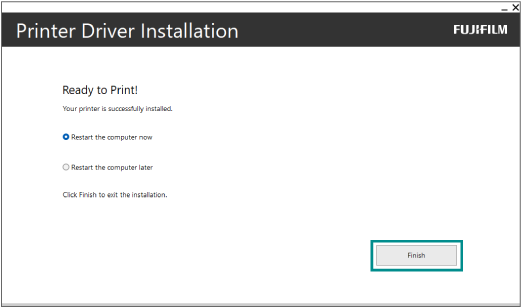
If you want to restart the computer manually, select [Restart the computer later].
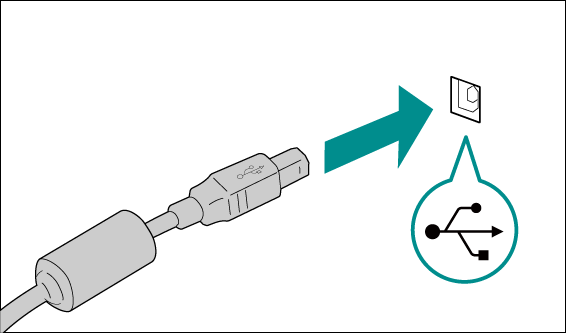
For USB Connection
Note
Before proceeding, make sure the USB cable is connected to the machine correctly.
- Follow steps 1 to 3 in For Network Connection to initiate installing the printer driver.
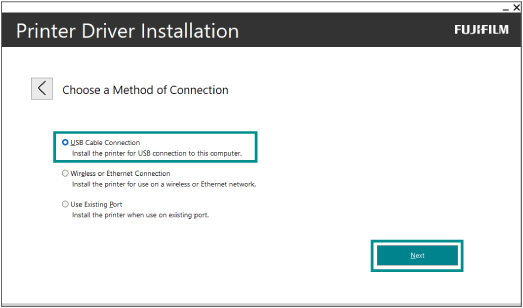
- Select [USB Cable Connection], and click [Next].
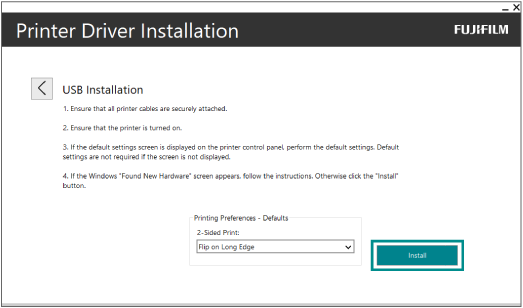
- Check information displayed on the screen, configure other settings, and click [Install].
- After the installation has completed, click [Finish].
Note
If the screen shown below appears, it indicates that restarting the client computer is required for installation to complete.
Clicking [Finish] automatically restarts the client computer.
If you want to restart the computer manually, select [Restart the computer later].
For Manual Connection
This section explains how to install the printer driver by adding the printer manually.
This method can also be used when the printer is not detected automatically.
- Follow steps 1 to 3 in For Network Connection to initiate installing the printer driver.
- Select [Wireless or Ethernet Connection], and click [Next].
- Click [OK].

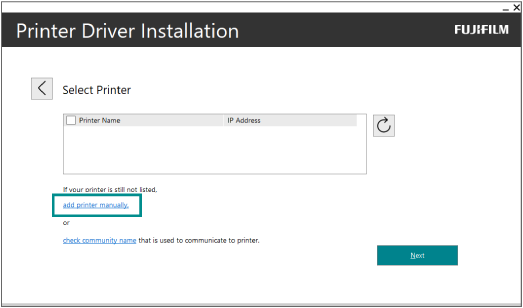
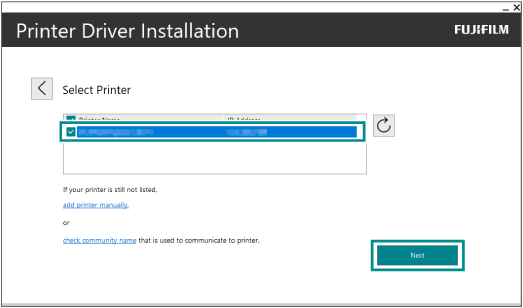
- Click [add printer manually].
- Select the model name for the machine.
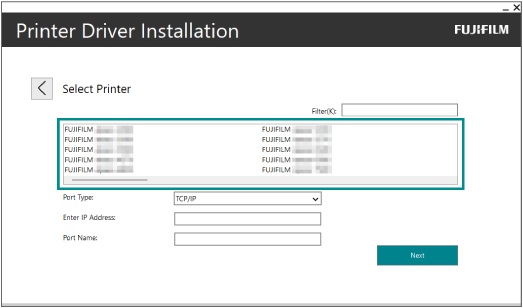
Note
You can search for the model name from [Filter].
- Select [Port Type].
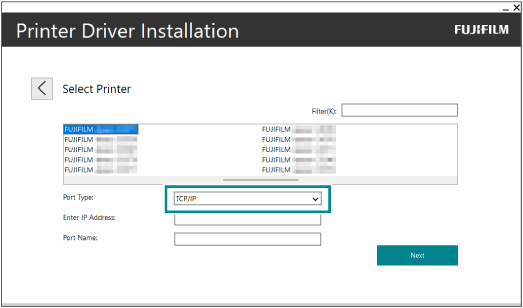
- Depending on the choice you selected in [Port Type], follow the steps below.
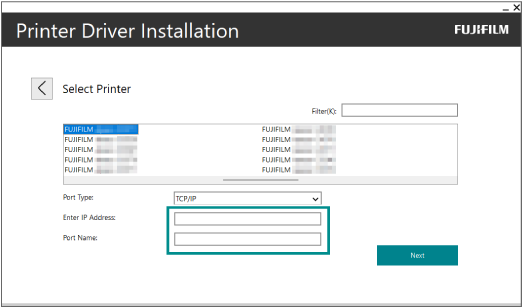
If you selected [TCP/
IP ]
- Enter the IP address in [Enter IP Address]. [Port Name] is populated with the specified IP address.
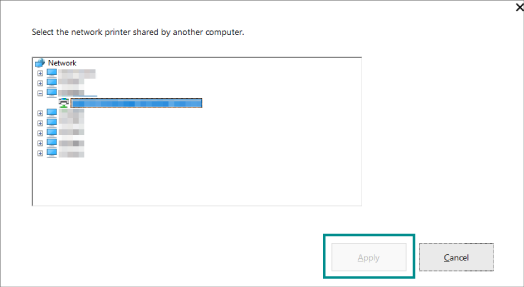
If you selected [UNC (Shared Printer)]
- Click [Browse] for [Network Path].
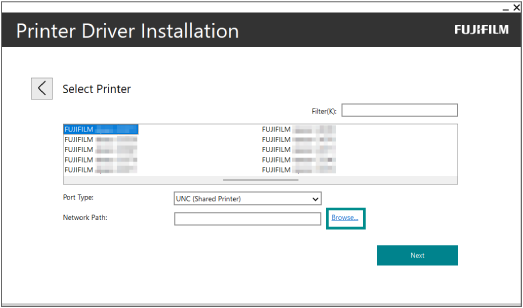
- Click the print server, select the shared printer, and click [Apply].
- Click [Next].
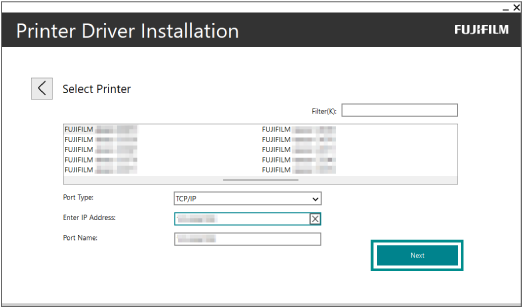
Note
The screen above shows an example of selecting [TCP/
IP ] in [Port Type].
- Check that the machine is displayed, and click [Next].
- Check the machine name, configure other settings, and click [Install].
- After the installation has completed, click [Finish].
Note
If the screen shown below appears, it indicates that restarting the client computer is required for installation to complete.
Clicking [Finish] restarts the client computer.
If you want to restart the computer manually, select [Restart the computer later].
Refer
For information on how to submit print jobs to the machine using the installed printer driver, refer to Printing Using the Printer Driver.
For Mac Users
Note
You must log in to the client computer as a user with administrator rights.
- Double-click the printer driver you downloaded from our official website.
- Double-click the icon for the decompressed installer.
- After the installer appears, follow the instructions on the screen to install the driver.
Adding the Printer
Add the machine to the list of printers. The following steps describe how to install the printer by selecting the IP address on the screen where you can specify a connection protocol.
Note
These steps differ depending on how the machine is connected to the client computer.
- Open [System Preferences] from the [Apple] menu, and select [Printers and Scanners].
- Click [+] in the bottom left of the window.
- Click
 on the displayed window.
 - Enter the IP address of the machine in [Address].
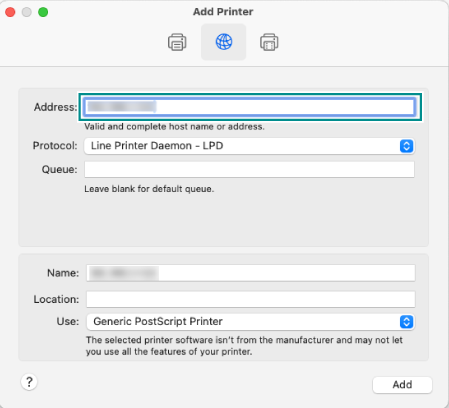
Note
You can check the IP address of the machine in
> [Device] > [Device Status].In [Protocol], select "LPD (Line Printer Daemon)" from the pulldown menu.
- From [Driver], select [Select Software].
- From the displayed list of drivers, select the relevant driver, and click [OK].
Note
If you downloaded "Printer driver for Mac OS X", select "FF Print Driver for Mac OS X vX.X". "X.X" represents the version.
If you downloaded "Mac OS X PPD file installer", select the driver having the relevant model name.
- Click [Add].
- Configure the optional settings as needed, and click [OK].
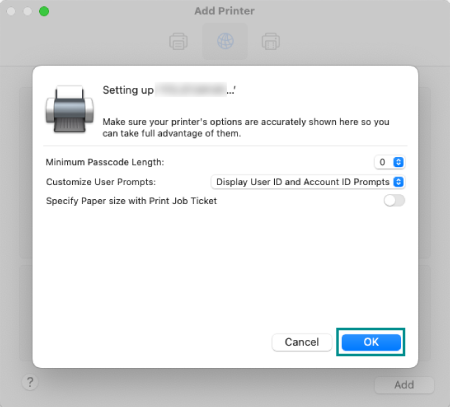
Note
The optional settings can also be changed after installation.