Configuring Initial Settings for Printing from Your Mobile Device
The machine supports the following services:
Print Utility (Android OS/iOS)
AirPrint (iOS)
Mopria (Android OS)
Printing from Chrome OS
Universal Print
Note
Print Utility is a free application downloaded from Google Play or App Store.
To utilize the NFC feature with Print Utility, you must configure the Internet Services settings.
To utilize Wi-Fi or Wi-Fi Direct with Print Utility, tapping on [Connect to Print Utility] on the Home screen displays the QR code for connection.
Refer
For information on Print Utility, refer to our official website.
For information on Mopria, refer to Mopria Alliance's official website.
For information on printing from Chrome OS, refer to Google LLC's official website.
Connecting to Mobile Devices
Connect the machine to mobile devices via Wi-Fi or Wi-Fi Direct.
Note
Universal Print can be used without needing to connect the machine to Wi-Fi or Wi-Fi Direct as long as your environment has Internet access.
Setting up AirPrint
AirPrint is a printing service provided by Apple Inc. By using AirPrint, you can submit documents from devices with iOS such as iPad and iPhone or any macOS computers to print on the machine, without installing any printer drivers or special software.
You need to set up AirPrint from the web browser.
- Access Internet Services.
Refer
For details, refer to Using Internet Services.
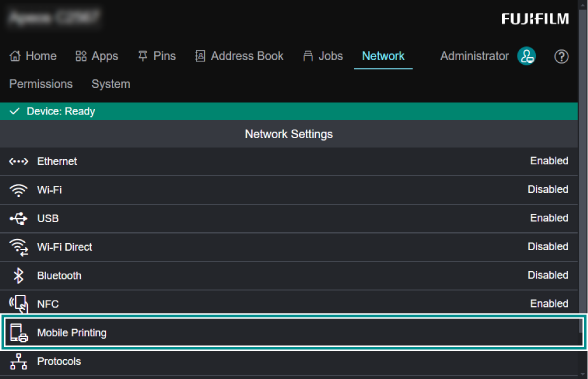
- Log in as the system administrator.
- Click [Network].
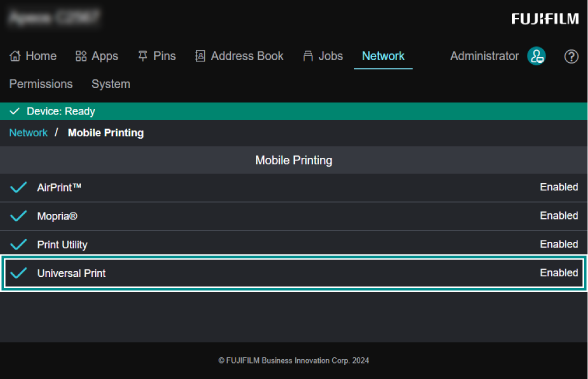
- Click [Mobile Printing].
- Click [AirPrint™].
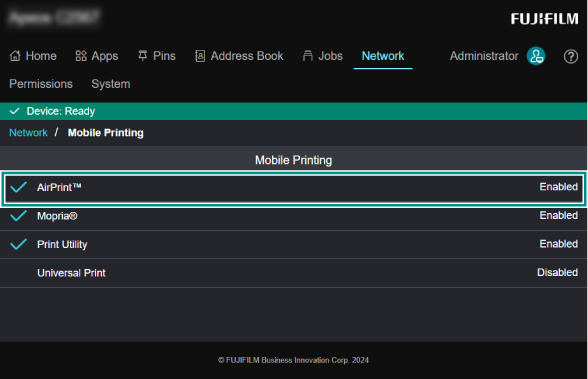
- Apply a check mark to [Enable].
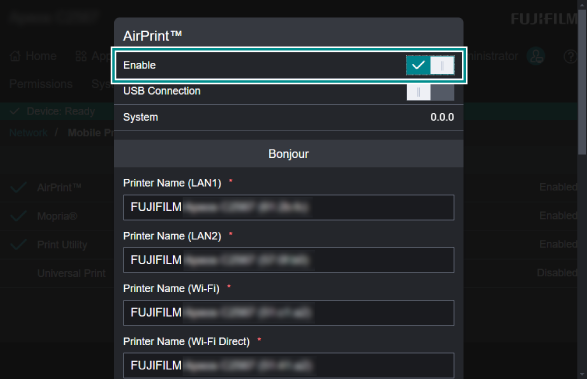
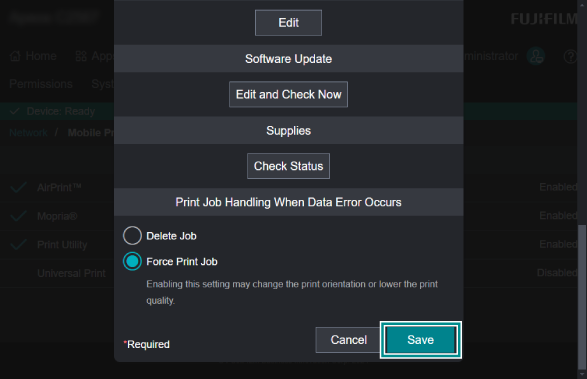
- Set each item as needed, and click [Save].
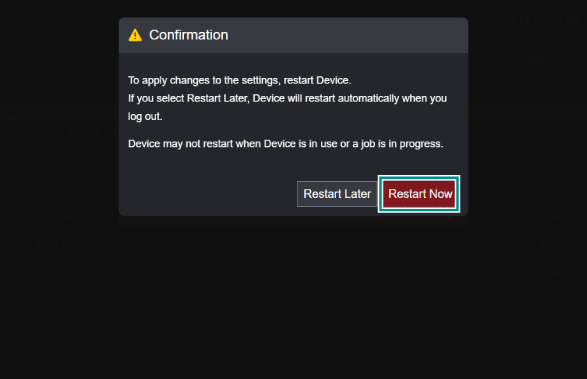
- Click [Restart Now] to restart the machine.
Refer
For information on how to print, refer to Printing with AirPrint.
Setting up Universal Print
Universal Print is a cloud printing service provided by Microsoft Corporation. You can print with the machine everywhere using the Microsoft Entra ID authentication without installing any printer driver or specific software.
Note
IPv6 is not supported.
Depending on the usage environment, some network settings, such as DNS or proxy server, are required in advance.
Enabling Universal Print
- Access Internet Services.
Refer
For details, refer to Using Internet Services.
- Log in as the system administrator.
- Click [Network].
- Click [Mobile Printing].
- Click [Universal Print].
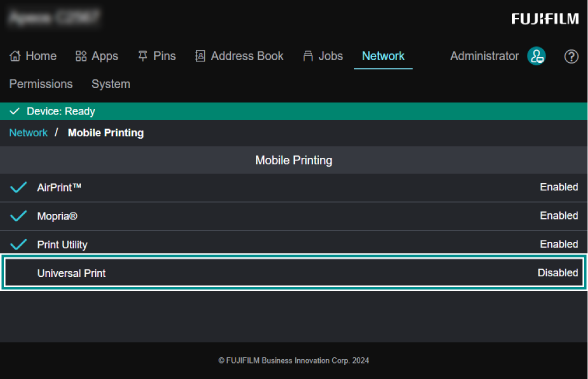
- Change the setting to [Enable], and click [Save].
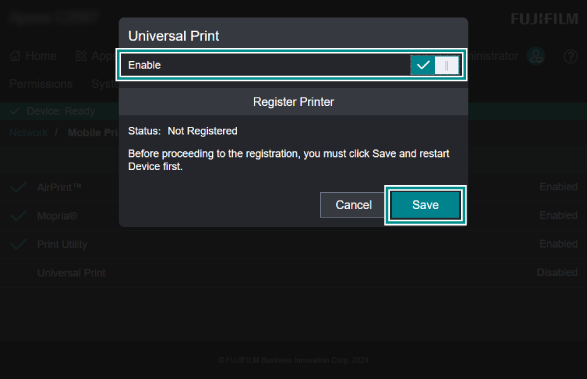
- Click [Restart Now] to restart the machine.
Registering the Machine as the Universal Print Printer
- Access Internet Services.
Refer
For details, refer to Using Internet Services.
- Log in as the system administrator.
- Click [Network].
- Click [Mobile Printing].
- Click [Universal Print].
- Click [Register].
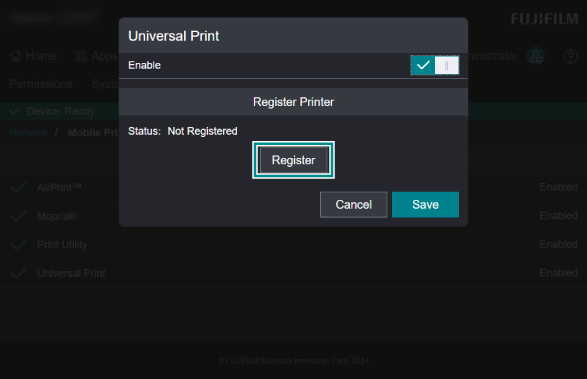
- Click [Register].
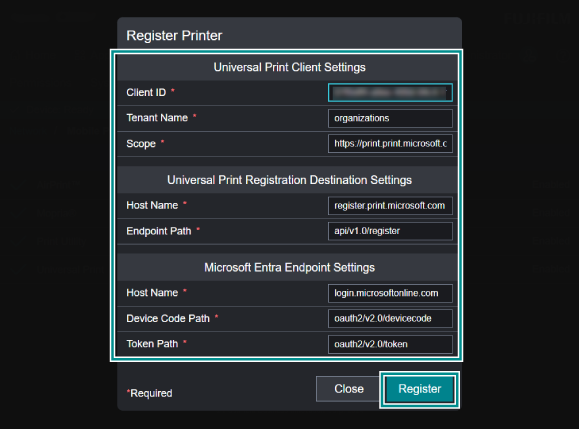
Note
Unless there is a specific reason, do not change any setting.
- Copy the displayed authentication code, and then click [Next].
- Enter the authentication code you have copied at step 8.
- Enter the account information of the printer administrator or global administrator of Microsoft Entra ID to be the Universal Print registration destination for the machine, and click [Next].
Note
If [Remote Authentication Settings] is set to [Microsoft Entra ID], the account must belong to the same Directory.
- Enter the password and click [Sign in].
- Close the web browser after the screen indicates that the sign-in process is complete.
Refer
For information on assigning users that can use the machine, or on how to print from a client computer, refer to the Microsoft official website.