Staple Jams
If paper is not being stapled or if staples are bent, follow the procedures mentioned below.
If the issue isn’t resolved even after the procedure, contact your local representative.
Paper is not stapled 
|
Staple is bent 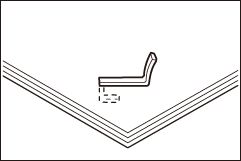
|
If the staple looks like any of the following images, contact your local representative.
One side of the staple is loose 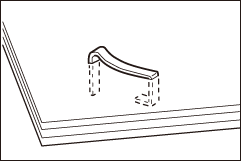
|
Staple is bent in the wrong direction 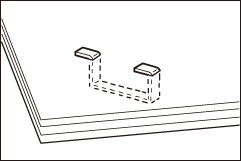
|
Staple is collapsed 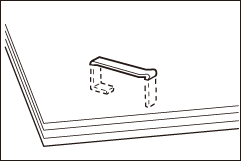
|
Staple is loose 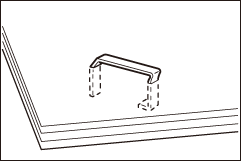
|
Staple is loose, and the center sinks 
|
CAUTION
Please be very careful not to hurt your fingers, etc. when removing the jammed staple.
Note
Depending on the usage condition, such as the paper type, staples may be bent or bent staples may be caught inside of the unit, causing paper jams.
If you open the staple cartridge cover, be sure to remove all bent staples. Not removing bent staples may cause staple jams. Only open the staple cartridge cover when you remove the jammed staples.
Finisher A3
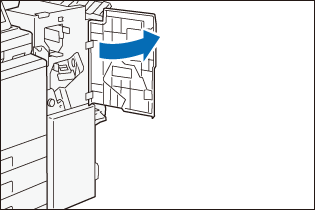
- Confirm that the machine is not operating, and open the finisher front door.
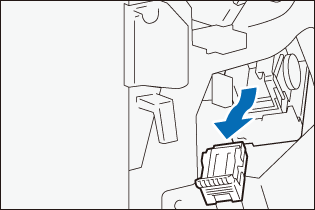
- Take the cartridge out.
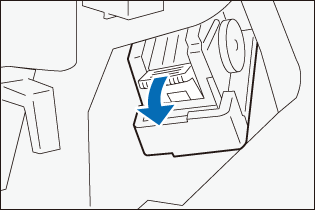
- Check to make sure that there is no staple inside of the finisher.
- Push the metal part of the cartridge up.
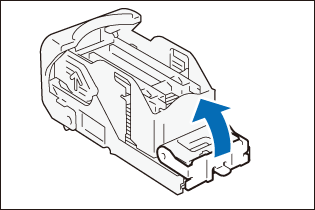
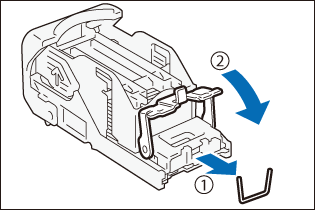
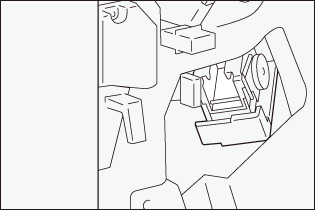
- Remove the jammed staple (
 ) and return the pushed up metal part back to the original position (
 ).
).
- Insert the cartridge into the original position.
Hold the handle and lightly press it up until you hear a click.
- Close the finisher front door.
Finisher B
Note
In this guide, “Finisher B4”, “Finisher B5”, “Finisher B with Booklet Maker Unit”, “Finisher B with 2/4 Hole Punch Module”, and “Finisher B with US 2/3 Hole Punch Module” are generally referred to as “Finisher B”.
Staple Cartridge (for side stitch)
When [Staple-Free] is set in [Stapling Preference], on the message or by navigating from ![]() > [Device Status] > [Supplies] > [Staple Cartridge (R1)], first tap [Check], and then remove the jammed staples according to the instructions on the screen.
> [Device Status] > [Supplies] > [Staple Cartridge (R1)], first tap [Check], and then remove the jammed staples according to the instructions on the screen.
Note
In case the staple jams occur when using the Booklet Staple Cartridges, contact your local representative.
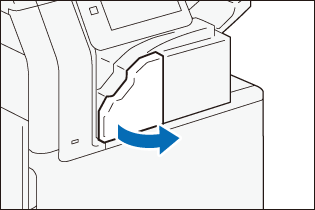
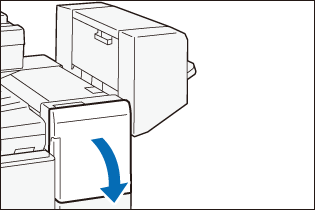
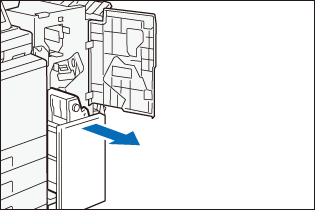
- Confirm that the machine is not operating, and open the front door.
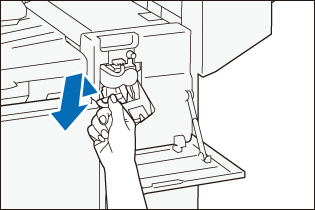
- Hold [R1] and move the stapler unit to the front.
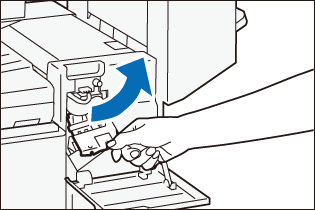
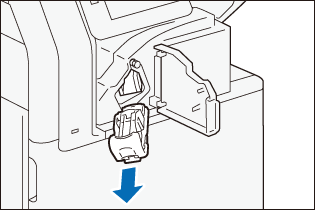
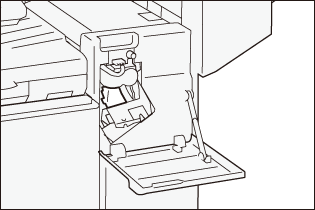
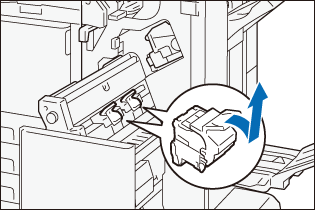
- Hold the handle and take the cartridge out.
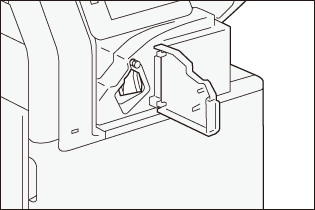
- Check to make sure that there is no staple inside of the finisher.
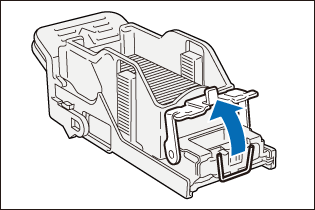
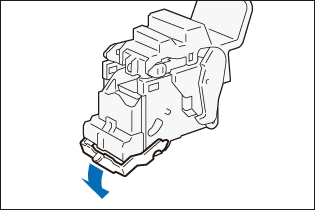
- Push the metal part of the cartridge up.
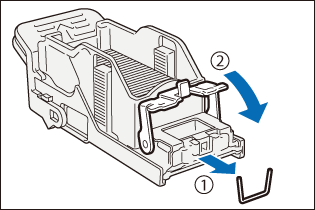
- Remove the jammed staple () and return the pushed up metal part back to the original position ().
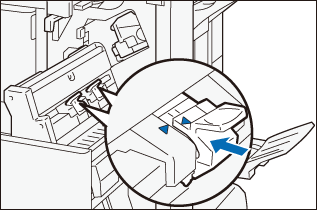
- Insert the cartridge into the original position.
Hold the handle and lightly press it up until you hear a click.
- Close the front door.
Finisher C
Note
In this guide, “Finisher C4”, “Finisher C4 with Booklet Maker Unit”, “Finisher C5”, and “Finisher C5 with Booklet Maker Unit” are generally referred to as “Finisher C”.
Staple Cartridge (for side stitch)
On the message or by navigating from ![]() > [Device Status] > [Supplies] > [Staple Cartridge (R1)], first tap [Check], and then remove the jammed staples according to the instructions on the screen.
> [Device Status] > [Supplies] > [Staple Cartridge (R1)], first tap [Check], and then remove the jammed staples according to the instructions on the screen.
- Confirm that the machine is not operating, and open the finisher front door.
- Hold the handle and take the cartridge out.
When using the 65 sheet cartridge, flip the handle down and take the cartridge out.
- Check to make sure that there is no staple inside of the finisher.
- Push the metal part of the cartridge up.
- Remove the jammed staple () and return the pushed up metal part back to the original position ().
- Insert the cartridge into the original position.
Hold the handle and lightly press it up until you hear a click.
- Close the finisher front door.
Booklet Staple Cartridges
- Confirm that the machine is not operating, and open the finisher front door.
- Pull out Booklet Maker [4].
- Hold the cartridge handle and pull it out.
- Remove any jammed staples.
- Insert the cartridge into the original position.
Hold the handle and lightly press it up until you hear a click.
Note
Align the “▲” marks.
- Slowly insert Booklet Maker [4] all the way.
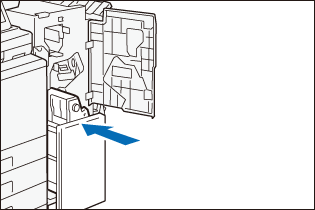
- Close the finisher front door.