Enabling User Authentication
When using local accounts, configure settings in the following order.
When using remote accounts, configure settings in the following order.
Note
To require password entry for authentication, set [Password for Control Panel Login] or [Password for IC Card Login] to [On]. For details, refer to [Authentication].
It is necessary to log in to Administrator Mode to perform the following settings.
Authentication and Accounting Method
Note
You can set the authentication/accounting method also in [Authentication/
Accounting Settings ] in [Accounting].
- Tap on
 > [Device] > [Authentication/
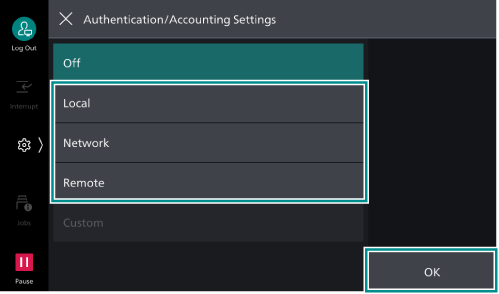
Accounting ] > [Authentication/Security Settings ] > [Authentication] > [Authentication/Accounting Settings ]. - Select [Local] or [Remote], tap on [OK].
Access Control
- Tap on
 > [Device] > [Authentication/
Accounting ] > [Authentication/Security Settings ] > [Authentication] > [Access Control]. - Tap on [Device Access], select [Unlocked] or [Locked].
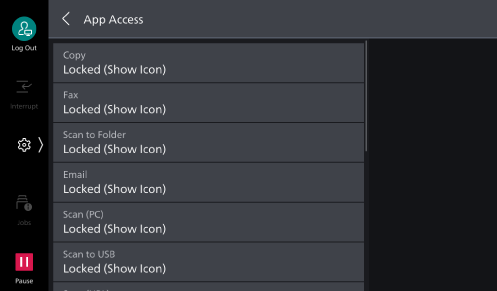
- Tap on [App Access].
- Configure authentication requirements for actions by service.
Note
If [Locked (Show Icon)] is set, the confirmation screen displays when you tap on the icons on the Home screen without authentication.
If [Locked (Hide Icon)] is set, the icons for the corresponding function button are not displayed on the Home screen without authentication.
- Tap on [<].
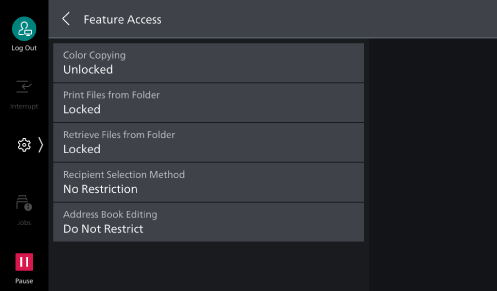
- Tap on [Feature Access].
- Select [Unlocked] or [Locked] for the feature being changed.
Permission Groups
Register permission groups to assign to users.
- Tap on
 > [Device] > [Authentication/
Accounting ] > [Authentication/Security Settings ] > [Authentication] > [Create Permission Groups]. - Select the permission group number to register, and then tap on [Create/
Delete ].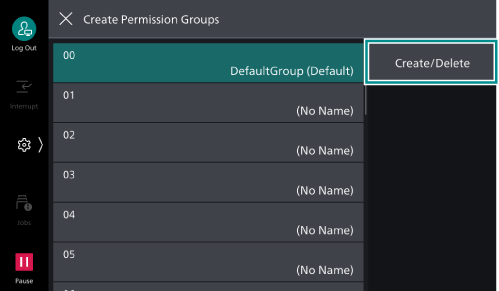
Note
The following users will belong to the No. 00 [DefaultGroup (Default)] (default permission group).
Newly created users
Users that have not yet been authenticated
Authenticated users for which the [Authentication System] is not set to [Authentication Agent] in remote accounts
The default permission group can be changed in the same manner as other permission groups.
- Tap on [Group Name], enter the name and then tap on [OK].
- Tap on the permission to change, and select the setting.
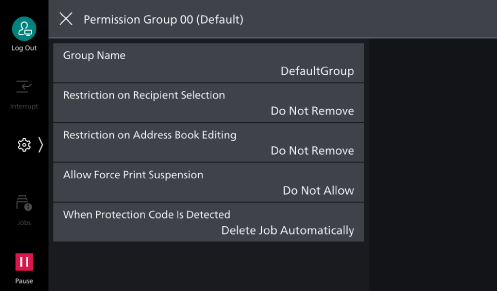
[Restriction on Recipient Selection]
When communications sent to addresses not listed in the Address Book are restricted, this can lift the restriction.
[Restriction on Address Book Editing]
When editing the Address Book is restricted, this can lift the restriction.
[Allow Force Print Suspension]
When a Force Watermark, Force Secure Watermark, Print Universal Unique ID, Force Annotation or other forced printing is set, this can temporarily lift the forced printing settings.
[When Protection Code Is Detected]
If embedded job disabled code is detected, this can temporarily allow the job to continue.
User Registration (Log In to Local Accounts)
Register the local user accounts on the machine.
Administrator permissions, service access and account limit settings can be configured for each user.
Note
Users can also be registered in [Authentication/
Accounting Settings ] under [Accounting].
- Tap on
 > [Device] > [Authentication/
Accounting ] > [Authentication/Security Settings ] > [Authentication] > [Create/View User Accounts ]. - Tap on the field to register a user.
Note
The unique number with 4 digit (user registration number) are assigned to the field to register a user.
- Enter the User ID and then tap on [OK].
- Tap on [User Name].
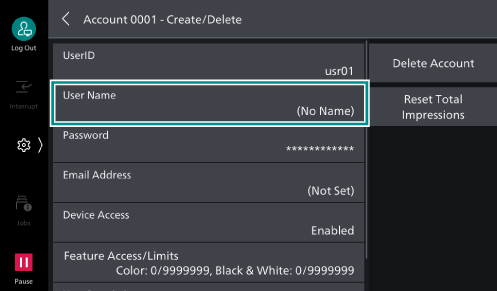
- Enter the user display name, and then tap on [OK].
- If there is a [Password], set the password.
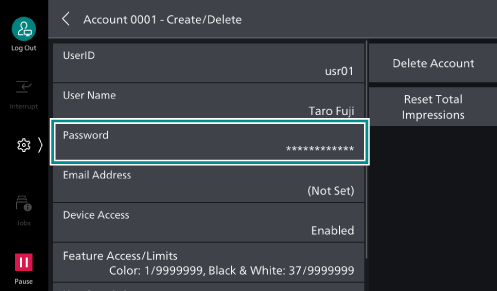
- Tap on [Enter Password], and then enter the password.
- Tap on [Next], and then enter the same password.
- Tap on [OK].
- Set access restrictions and permissions as needed.
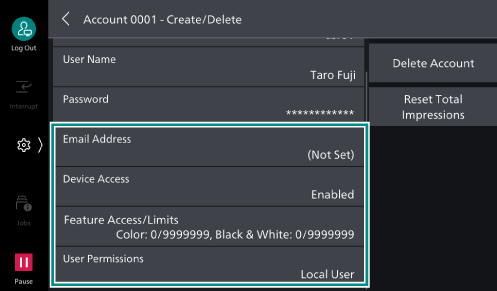
[Email Address]
This is used as the default ["From" Address] address when sending Emails when authenticating.
[Device Access]
Allows machine use.
Note
If an IC card reader is connected, this permission can be set for each authentication method.
[Feature Access/
Limits ]
Specify use restrictions and account limit settings for each service. Select the service, and then set either [Feature Access] or [Account Limit], and tap on [OK].
[User Permissions]
You can grant permissions to users. Configure permission group settings in [Add to Permission Group].
[Local User]
Permissions for regular users who do not have administrator permissions.
[System Administrator]
The same permissions as the system administrator can be granted. However, folders and job flow sheets cannot be modified, and the system administrator password cannot be changed.
[Account Administrator]
The following accounting-related permissions can be granted.
Registering/deleting/changing (some) user information
Registering/deleting/changing accounting data
Changing alternative name for user ID/mask user ID (***)
Changing alternative name for account ID/mask account ID (***)
Printing accounting reports
Deleting Registered Users (Log In to Local Accounts)
Note
Any job flow sheets, folders and files inside folders that the user being deleted is an owner of will also get deleted.
Deleting Individual Users
- Tap on
 > [Device] > [Authentication/
Accounting ] > [Authentication/Security Settings ] > [Authentication] > [Create/View User Accounts ]. - Select the user registration number to delete.
- Tap on [Delete Account].
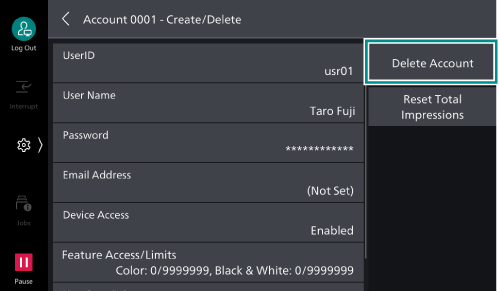
- Tap on [Delete].
Deleting All Users
- Tap on
 > [Device] > [Authentication/
Accounting ] > [Authentication/Security Settings ] > [Authentication] > [Delete/Reset Account Data ]. - Tap on [All User Accounts] > [Delete/
Reset ].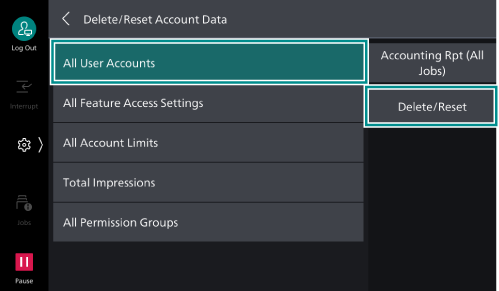
- Tap on [Delete].
Authentication System Setup (Log In to Remote Accounts)
This registers an external authentication server to the machine.
- Tap on
 > [Device] > [Network Settings] > [Remote Authentication /
Directory Service ] > [Authentication System Setup] > [Authentication System]. - Select the type of external authentication server, and then tap on [OK].
Note
If using our products (sold separately) as the remote accounts, select [Authentication Agent].
- If an option other than [Authentication Agent] is selected, tap on [<], and then register the authentication server details.
Refer
Refer to Internet Services help for details of Microsoft Entra ID.
Other Settings (LDAP)
Encrypting Communications Between the Machine and the LDAP Server
- Tap on
 > [Device] > [Network Settings] > [Security Settings] > [SSL/
TLS Settings ]. - Set [LDAP - SSL/
TLS Communication ] to [Enabled].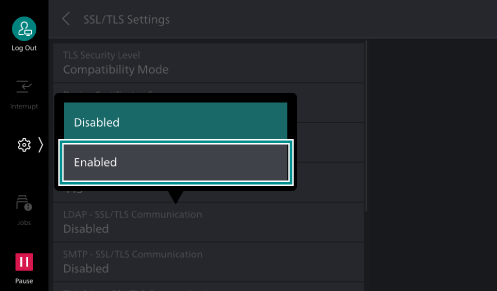
- Tap on [<] twice.
- Tap on [Remote Authentication /
Directory Service ]. - Tap on [LDAP Server /
Directory Service Settings ] > [Primary Server - Port Number].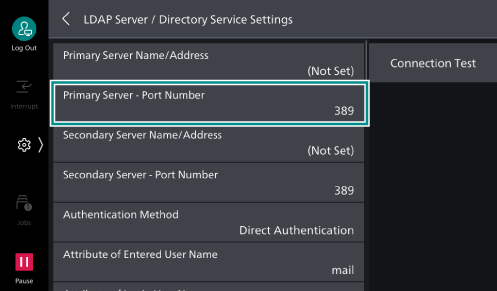
- Enter the port number to run LDAPS, and then tap on [OK].
Note
Note that the standard port number is 636.
Logging In as an LDAP Server User that has Established a Trust Relationship in Active Directory
The procedure for logging in to the machine as a user on a trusted domain server is described below, assuming the following conditions have been met as an example.
The domain name is set to “w2k8adtest.local”.
A trust relationship has been established in [Active Directory Domains and Trusts].
Refer
For more information about [Active Directory Domains and Trusts], refer to the official website of Microsoft.
- Tap on
 > [Device] > [Network Settings] > [Remote Authentication /
Directory Service ] > [LDAP Server /Directory Service Settings ]. - Set [LDAP Referrals] to [Enabled].
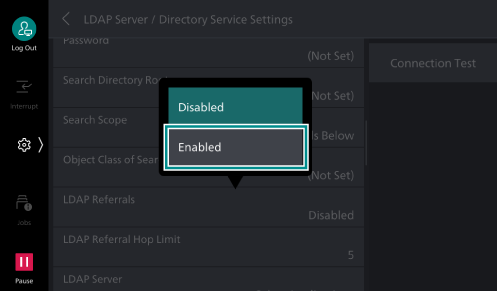
- Set [LDAP Referral Hop Limit] as needed.
Note
The maximum number of servers that can be connected is the value set for the [LDAP Referral Hop Limit]. If this is set to “5”, up to five trust relationship connections can be made.
With regard to [Login Credentials to Search Entries], users must also be qualified to access the trusted LDAP server.
From a security feature perspective, connections will not be made to unencrypted trusted domains while LDAPS is in use.
If Logging In Takes an Excessive Amount of Time, and the Same User Succeeds and Fails Login Attempts
This can be thought to be due to the following.
The scope for searching LDAP servers is too broad
There are too many entries contained within the search scope
Review [Search Directory Root] and [Search Scope]. For details, refer to [LDAP Server /
Additionally, login failures may be avoided by setting a sufficiently long timeout duration for connecting to the LDAP server for the machine. However, as this will not reduce the time required to log in, this should only be considered a provisional measure.
Follow the procedure below to set the connection timeout duration.
- Tap on
 > [Device] > [Network Settings] > [Remote Authentication /
Directory Service ] > [Authentication System Setup]. - Confirm and change the following settings as required.
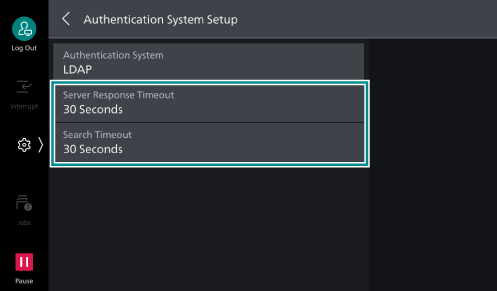
[Server Response Timeout]
This sets the maximum timeout duration for a response from the server when an authentication request is sent to the LDAP server.
Change this setting when the network load is thought to be causing the issue.
[Search Timeout]
This sets the maximum timeout duration for a response from the server when an search request is sent to the LDAP server.
Change this setting when the LDAP server load is thought to be causing the issue.