Scan
Basic Scan Operations (Email)
Note
As the scanning methods there are also [Scan to Folder], [Scan], [Scan to USB] and [Scan to Desktop].
To send an email, the email settings need to be configured in the machine beforehand.
Standard Email Sending Steps
- Load the document.
Refer
For how to load originals, refer to User Guide.
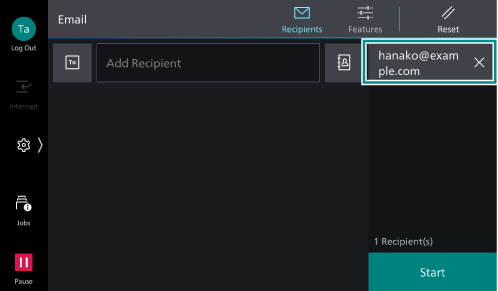
- Tap on [Email].
- Specify the recipient by directly entering using the keyboard or by tapping on
 (Address Book).
Note
To change the recipient type (To/Cc/Bcc), tap on
 .
.The displayed screen differs depending on the setting of [Screen Default] in Customizing the Apps Screen.
Refer
Refer to One-touch Button for specifying the recipient using one-touch button.
- Tap on
 ([Features]) at the top of the screen, and set each item.
Note
Tap on
 ([Reset]) when turning the setting value to default.
Refer
Refer to Features List for the description of each item.
- Tap on [Start].
Deleting
- Tap on
 or [Pause].
 - Tap on [Cancel].
Continuous Scanning
- Tap on [Add Next Original].
Note
Enabling [Next Original] in the features list also activates continuous scanning.
- Select the following operation.
Scan Next Document
- Load the next document.
- Tap on [Scan].
Changing the Settings of the Next Document
- Load the next document.
- Tap on [Change Settings].
- Change the features list settings.
- Tap on [Scan].
- When all the documents have been scanned, tap on [Complete Scan (Send)].
Editing Recipient
- Tap on the recipient.

- Select the following operation.
Item
Description
[Recipient Type]
[To], [Cc], or [Bcc] can be specified for Email. For Scan, only [To] can be set.
[Delete]
Delete a recipient.
[Edit]
Correct a recipient.
[Add to Address Book]
Create a new contact. Or, add an address to an existing contact.
One-touch Button
If registering recipients to one-touch button in advance, you can specify the recipient only by tapping a button.
Refer
Refer to [One-Touch Button Settings]/[One-Touch Button and Address Number Settings]/[Address Number Settings] for registering the recipient to one-touch button.