Uploading Files in a Web Browser
This section describes the procedures for uploading as a private user and as a shared user.
- Check with the administrator for the account information of a shared user.
- Only one file can be uploaded at a time.
- The uploaded files are automatically deleted when the period set by the administrator elapses.
- File conversion is performed during the upload process. For information on the document file formats that can be registered and other limitations, see File Conversion and Thumbnails.
Uploading as a Service User
- Log in to FUJIFILM IWpro with the account of a private user.
- For information on logging in, see Logging In in "Getting Started with FUJIFILM IWpro".
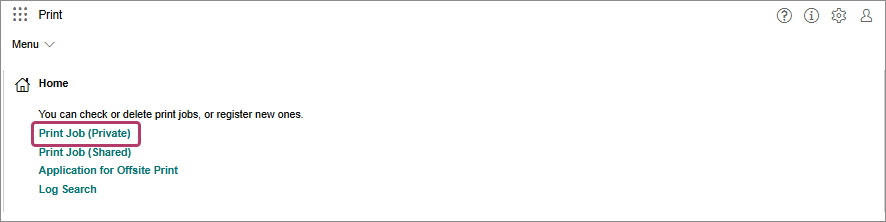
- In the launcher menu, click [Print].
- In the [Print] menu, click [Print Job (Private)] in [Home].
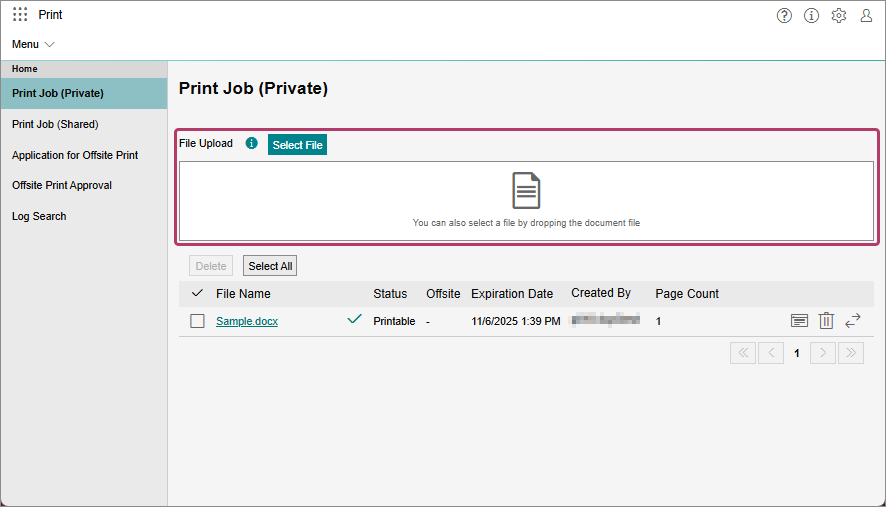
- On the [Print Job (Private)] screen, click [Select File] or drop the file to upload to the drop area.
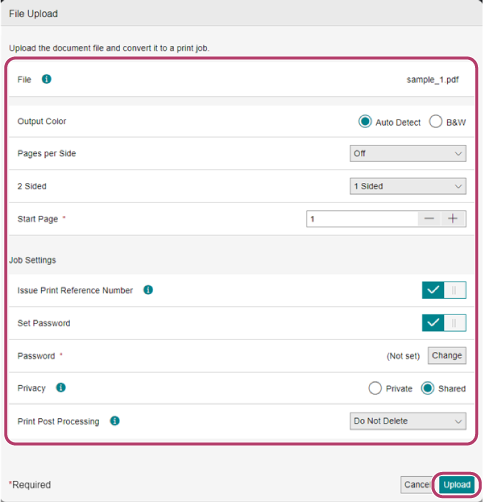
- On the [File Upload] screen, configure the settings such as the print settings, offsite settings, and print reference number, then click [Upload].
Uploading as a Shared User
- Shared users can only be used with a tenant that has purchased the shared print option.
- On the login screen for shared users, log in with the account of a shared user.
- Perform the following operations on the [File Upload] screen for shared users.
- Click [Select] or drop the file to upload to the drop area.
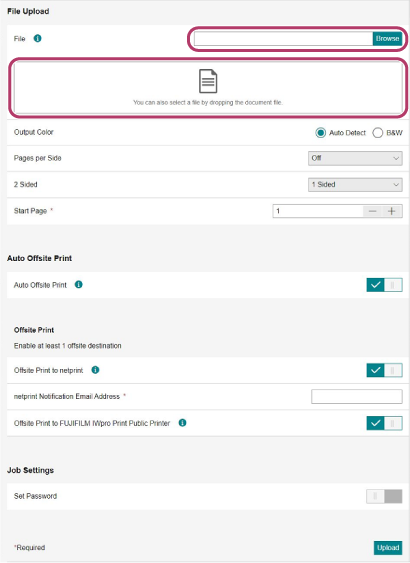
- Configure the various items as required, and click [Upload].

- Click [Select] or drop the file to upload to the drop area.
- On the [Upload Completed] screen, make a note of the print reference number in [Print Reference Number].
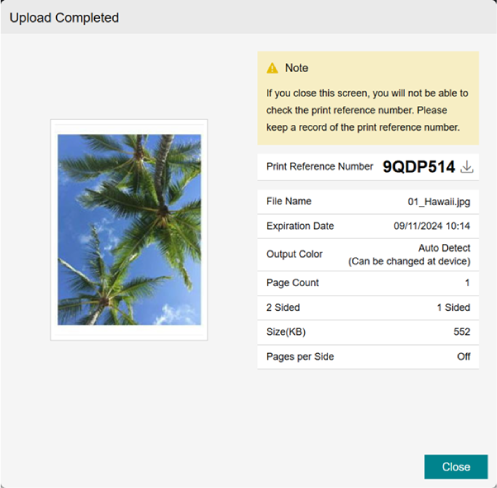
- The print reference number is required when printing. It cannot be checked after closing the [Upload Completed] page. Make a note of it.