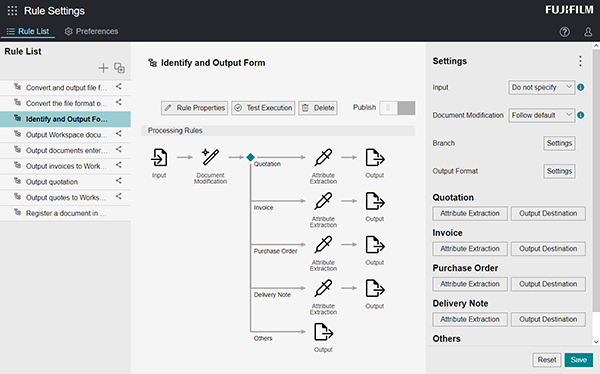
[Settings] Screen
When a rule is selected on the [Rule List] screen, the settings of the selected rule are displayed on the right side of the screen.
Change the settings and click [Save] to reflect the settings in the rule chart.
- The changes made on the [Settings] screen are also reflected to published rules.
- The displayed screen depends on the selected rule and configured items.
[ ]
]
Click [![]() ], and configure the following items as required.
], and configure the following items as required.
[Change Form Type]
Changes the form type handled by the rule.
[Change Form Language]
Select the language of the form to input from the list of supported languages.
- Rule-based OCR processing is also performed with the language selected here.
[Time Zone Setting]
Sets the time zone to apply to time information when generating strings and performing mapping.
- Daylight saving time is not supported. The regular standard local time of the set time zone is applied.
[Performance Settings]
Select whether to prioritize processing speed or recognition rate when extracting attributes.
Select [High Speed] to improve processing speed by simplifying the preprocessing for attribute extraction. When handling forms that include seal impressions, select [Higher Recognition Rate 1]. When handling forms that include watermarks, select [Higher Recognition Rate 2].
[Input]
Select the source for uploading documents.
If you selected [Scan], you can configure the initial values of the settings for scanning from a multifunction printer on the screen displayed by clicking [Settings]. In [Subfolder Settings] and [File Name Setting] in [Output Destination], you can also use the multifunction printer information retrieved when scanning.
If you selected [Workspace], specify the attribute name to input from the workspace on the screen displayed by clicking [Settings]. You can add up to 1,000 items.
In [Subfolder Settings] and [File Name Setting] in [Output Destination], you can also use the multifunction printer information retrieved when receiving a fax if you selected [Fax].
If you selected [Email], you can use the [Output Email Message as PDF] setting in [Output Destination]. In [Subfolder Settings] and [File Name Setting] in [Output Destination], you can also use the information retrieved when receiving e-mail.
[Document Modification]
Select [Default] or [Custom].
If you selected [Custom], the document modification settings screen is displayed by clicking [Settings].
[Document Splitting]
Select the method for splitting documents.
[Split by Form]
The document is split by the form type specified on the [Form Type Setting] screen.
[Split by Barcode]
Select the barcode type on the screen displayed by clicking [Settings]. You can also configure whether to delete the pages that include a barcode.
[Split by QR Code]
Specify the string for determination for the QR code extraction results on the screen displayed by clicking [Settings]. You can also configure whether to delete the pages that include a barcode.
[Split by Blank Page]
Select whether to delete blank pages on the screen displayed by clicking [Settings].
[Split by Specified Page]
The document is divided by the number of pages set on the screen displayed by clicking [Settings].
- If a file input with document splitting has a different horizontal and vertical resolution and is color/grayscale, QR codes added to the image cannot be read correctly. Therefore, the document cannot be split correctly by specifying [QR Code Split Setting].
- If blank page splitting is set and [Remove Blank Sheet] is disabled, a blank page is inserted at the start of the latter file after splitting.
[Branch Settings]
Configures the branch. Click [Settings] to display the [Rule Branch Settings] screen.
[Output Format Settings]
Click [Settings] to display the [Output Format Settings] screen.
[Attribute Extraction Settings]
Displays the [Attribute Extraction Settings] screen.
[Output Destination Settings]
Displays the [Output Destination Settings] screen.
[Save]
Reflects the changes in the rule.