Registering a Printer to Entra ID
- Log in to FUJIFILM IWpro with the account of an administrator.
- For information on logging in, see Logging In in "Getting Started with FUJIFILM IWpro".
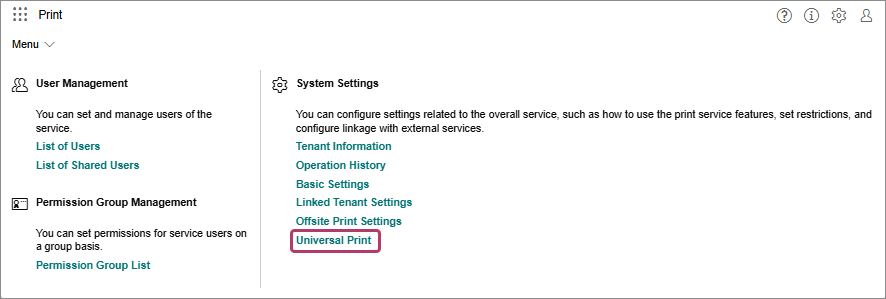
- In the launcher menu, click [Admin Menu] > [Print].
- In the [Print] menu, click [Universal Print] in [System Settings].
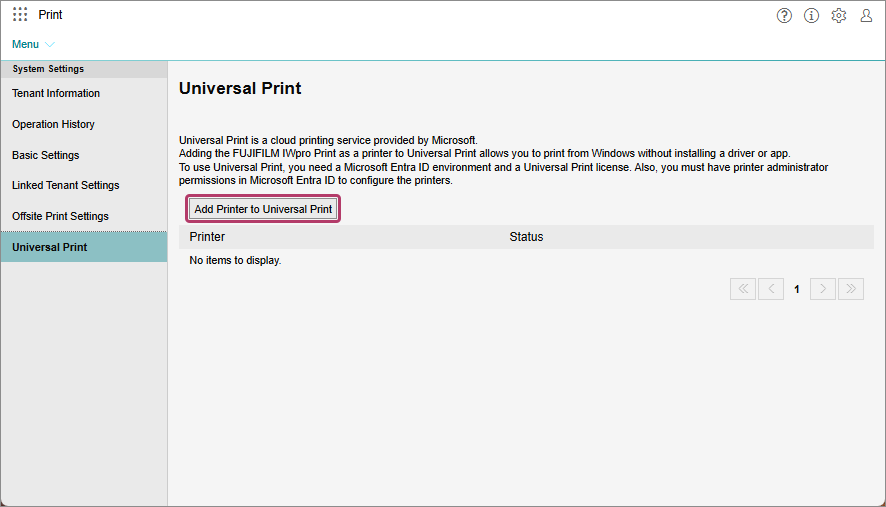
- On the [Universal Print] screen, click [Add Printer to Universal Print].
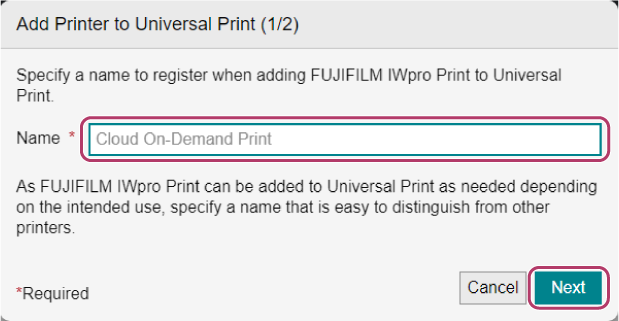
- On the [Add Printer to Universal Print (1/2)] screen, enter the name of the printer to register, then click [Next].
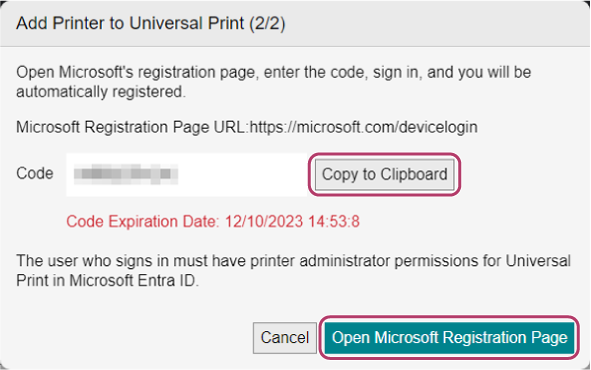
- On the [Add Printer to Universal Print (2/2)] screen, click [Copy to Clipboard] to copy the code, then click [Open Microsoft Registration Page].
- On the code entry screen, paste the copied code, and click [Next].
- On the sign in screen, sign in as the global administrator of Microsoft Entra ID for the first time.
- If a consent screen regarding the privileges is displayed, check the information, and click [Consent].The Universal Print virtual printer is registered to the tenant. Proceed to configure the settings.
- A Universal Print license is required to use this service.
- You must agree to the following processes to use this service.
- Accessing Universal Print
- Registering printers to Universal Print
- Referencing the basic information of the tenant that the user belongs to
- When you click [Consent], the "FUJIFILM IWpro Print for Universal Print" service principal for Universal Print linking is added to the enterprise application in Microsoft Entra ID.
- If the global administrator of Microsoft Entra ID agrees, printers can be registered by the printer administrator of Universal Print from the next time.
- On the screen indicating that registration is complete, click [Open Microsoft Universal Print Page].
- On the Entra ID screen, click the registered printer.
- Click [Share].
- On the printer sharing screen, add members to share the printer with, then click [Shared Printer].
- For information on the settings in Entra ID, check the Web page of Entra ID.