Setting Drawer Information
To the drawer, set the basic information, authenticity management, and access permissions. These operations are available in each tab on the [Drawer Information] screen.
Setting Basic Information
Note
Perform this operation in maintenance mode. Set [Current Mode] to Maintenance Mode in [Basic Information] in advance.
1.
In the [Drawers] tab, click a drawer name.
The [Drawer Information] screen appears.
2.
Click the [Basic Information] tab.

Setting Name and Description
1.
Click [Update].
The [Update Basic Drawer Information] screen appears.
2.
Enter [Name] and [Description], and click [Update].
The drawer name and description will be updated.
Setting Capacity Limit
Important
Once the capacity of the cabinet reaches its upper limit, uploading or checking in documents cannot be done even if the capacity of the drawer has not reached its upper limit.
Note
Perform this operation in maintenance mode. Set [Current Mode] to Maintenance Mode in [Basic Information] in advance.
1.
Click [Update].
The [Update Drawer Capacity Limit] screen appears.
2.
To set the drawer capacity limit, select the checkbox of [Set Storage Capacity Limit].
3.
Change [Storage Capacity (Unit: GB)], and click [Update].
The drawer capacity limit will be updated.
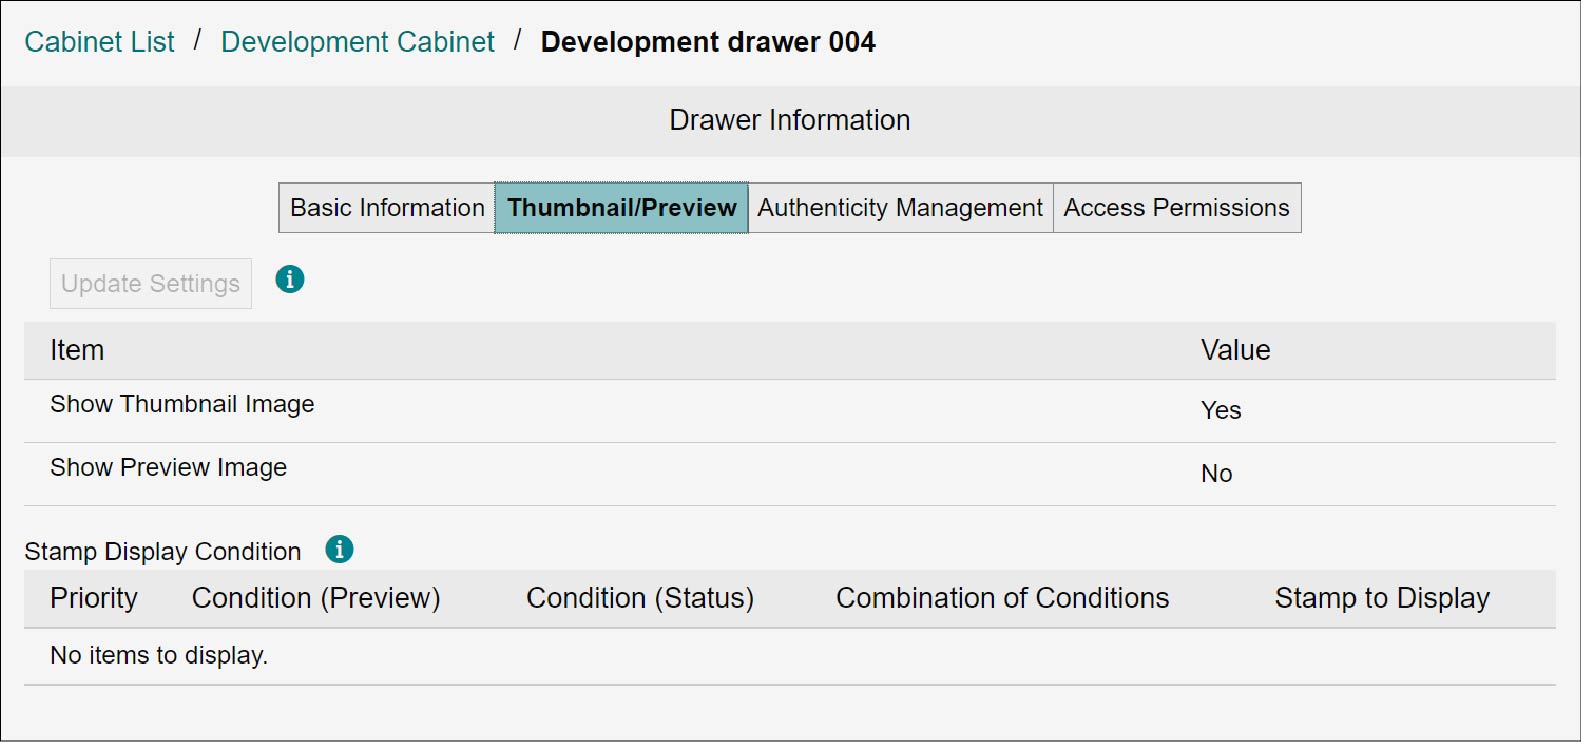
Setting File Formats for Thumbnails or Preview Display
Note
Perform this operation in maintenance mode. Set [Current Mode] to Maintenance Mode in [Basic Information] in advance.
1.
Click the drawer name on the [Drawers] tab.
The [Drawer Information] screen appears.
2.
Click the [Thumbnail/Preview] tab.
3.
Click [Update Settings].
The [Update Thumbnail/Preview Settings] screen appears.
4.
Change the setting for thumbnail or preview, and click [Update].
The thumbnail or preview setting is updated.
Note
- Selecting the [Show Preview Image] checkbox allows you to set [Prohibit Saving or Printing of Preview Image by Access Permission], [Retention Period for Save-or Print-Prohibited Preview Image] and [Stamp Display Condition].
- Clicking [Add] for [Stamp Display Condition]. Displays the [Create Stamp Display Condition] screen, where you can create conditions under which to display stamps.
Setting Drawer Information Authenticity Management
The settings related to authenticity management will not appear unless the timestamp option (optional feature for Japan) is contracted.
Note
- When a document is stored in the drawer, the setting for authenticity management cannot be changed.
- Perform this operation in maintenance mode. Set [Current Mode] to Maintenance Mode in [Basic Information] in advance.
1.
In the [Drawers] tab, click a drawer name.
The [Drawer Information] screen appears.
2.
Click the [Authenticity Management] tab.

3.
Click [Update Settings].
The [Update Authenticity Management] screen appears.
Note
If the checkbox of [Manage Authenticity] is not selected when creating the drawer, an update is not possible.
4.
Change the settings and click [Update].
The authenticity management setting is updated.
Setting Drawer Information Access Permissions
1.
In the [Drawers] tab, click a drawer name.
The [Drawer Information] screen appears.
2.
Click the [Access Permission] tab.
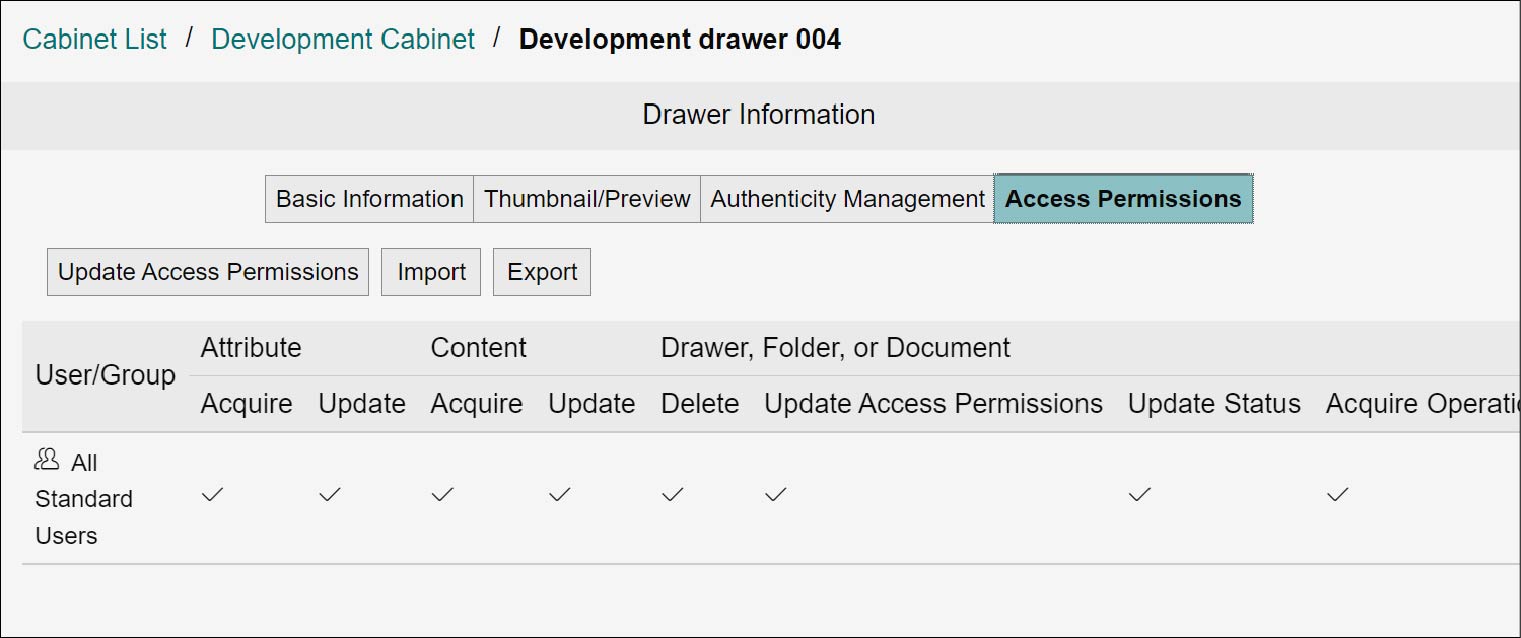
Update
1.
Click [Update Access Permissions].
The [Update Access Permissions] screen appears.
2.
Change the checkbox for the right of user or group, and click [Update].
The access permission will be updated.
Note
- By selecting [Add from Address Book] from [Add], you can add users or groups.
- By selecting [All Standard Users] from [Add], you can add built-in groups.
- Select the checkbox of a user or member and click [Delete], and the user or the group can be deleted.
- Select [Allow All], [Allow All Except Delete], [Allow Acquire/Create], [Allow Acquire], or [Reject All] from [Select Check Pattern], and the presence/absence of rights for an arbitrary user or group can be changed collectively.
Refer
For setting items, refer to "Appendix A Access Permissions of Drawers, Folders, and Documents".
Importing
1.
Click [Import].
The [Import Access Permissions] screen appears.
2.
Click [Select].
The file selection screen appears.
3.
Select the XML file you want to import, and click [Open].
In [XML files], the selected XML file name appears.
4.
Click [Import].
The [Confirm Import] screen appears.
5.
Click [OK].
The access permissions are imported, and the [Import Complete] screen appears.
Click [Close].
Click [Close].
Exporting
1.
Click [Export].
The information of displayed access permissions is downloaded as an XML file.
Note
The file name becomes as follows: "drawerAcl_{Drawer Name}_{yyyyMMddHHmmss}.xml"