About OCR
The text of image pages cannot be selected or copied as is. You can use OCR to convert the image page into text data, and perform a search or copy in the result.
OCR processing
- You can select to perform noise reduction and deskewing so that the characters will be more recognizable during OCR. Note that the result of noise reduction and deskewing are not reflected in the processed document.
- You can specify the recognition area.
- When a color or a grayscale image is processed, you can specify to place priority on either the recognition rate or the speed. Two colors (monochrome) image pages are always processed with a priority on speed. The OCR processing with a priority on recognition is effective for recognizing outline characters or characters in pale colors, as well as the characters laid out on the background images. However, it may take longer time to process compared to OCR processing with priority on speed.
Note
You can also perform OCR by using the OCR plug-in in Desk. The plug-in function is useful if you are processing multiple DocuWorks files, binders, or if you perform OCR after rotating pages in a readable orientation.
Performing OCR Processing
Procedure
1.
In document view, select [OCR] from the [Page] menu.
The [OCR] dialog box appears.
You can specify advanced settings including the language of the document, number of columns in the document, whether to specify a recognition area, and whether to perform deskew, by clicking [Advanced] to show the [OCR Advanced Settings] dialog box.
2.
Specify each item as needed and click [Start] in the [OCR] dialog box.
If the [Specify Areas and Recognize] dialog box is displayed, specify a recognition area.
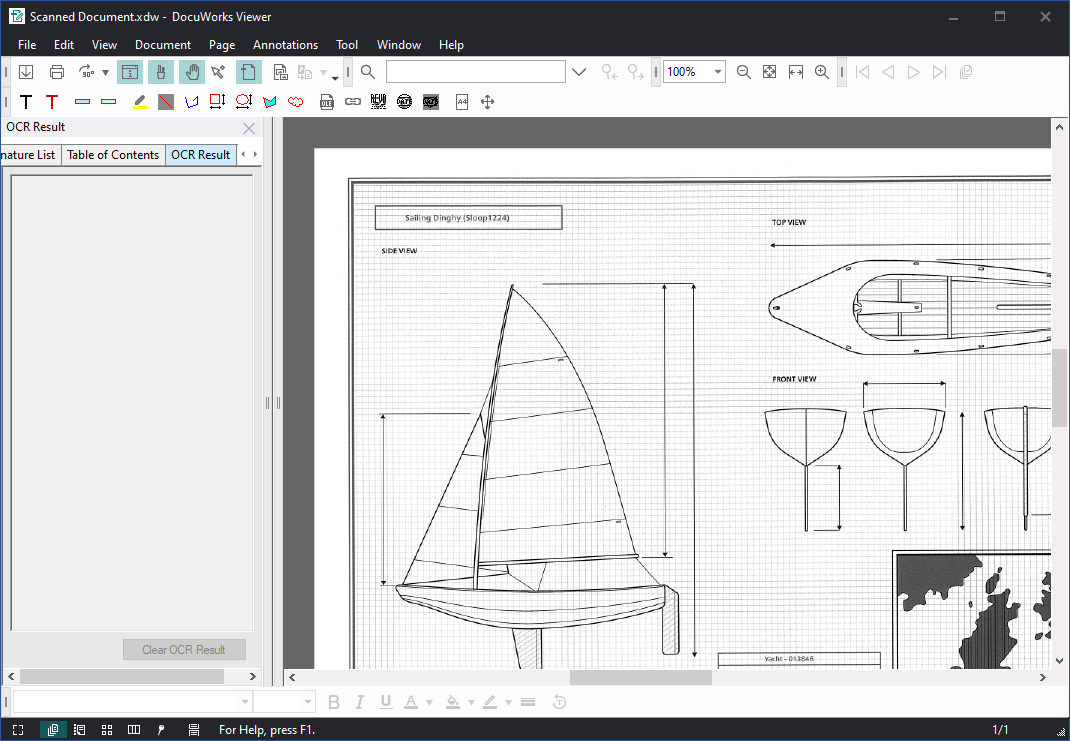
If [Confirm OCR result] is selected in the [OCR] dialog box, the result will be displayed in the [OCR Result] tab of the InfoView when the process completes.
If [Confirm OCR result] is selected in the [OCR] dialog box, the result will be displayed in the [OCR Result] tab of the InfoView when the process completes.
Note
- The accuracy of OCR will decrease if the image is skewed or not in a readable orientation. Rotate or deskew the image before recognition to get the best results.
- If you try to perform OCR on pages that have been processed before, a confirmation message appears asking if you want to continue. Continuing the process will cause the recognition results already embedded in the page to be overwritten by the new recognition results.
- The maximum number of characters that can be recognized in a process is 20,000. If you try to process more than 20,000 characters, an error occurs and the process aborts. In this case, you may be able to bypass the error by reducing noise or by excluding images or noise using the [Specify Areas and Recognize] dialog box before the OCR processing.
Specifying a recognition area
Procedure
1.
Select [Specify the area and recognize] in the [OCR Advanced Settings] dialog box and click [OK].
2.
Click [Start] in the [OCR] dialog box.
The [Specify Areas and Recognize] dialog box appears.
3.
To specify the recognition area automatically, click [Layout Analysis].
A rectangular frame appears automatically on the displayed document image.
To specify the recognition area manually, drag the mouse to draw a rectangular frame on the image.
After creating the recognition frame automatically or manually, you can move or resize it by selecting and dragging it.
After creating the recognition frame automatically or manually, you can move or resize it by selecting and dragging it.
4.
Click [Start].
OCR processing begins.
Editing OCR Results
You can display the OCR result of a page and edit it. You can select a text and copy, cut, paste, or delete it, or enter new texts. The edits are reflected when you perform a search or copy a text in text selecting mode or in Flexi mode.
Procedure
1.
In document view, open the page that has been OCR processed and select the [OCR Result] tab in the InfoView.
If the InfoView is not displayed, select [InfoView] from the [View] menu.
If the InfoView is not displayed, select [InfoView] from the [View] menu.
The OCR result is displayed.
2.
Edit the displayed result as needed.
When you select an OCR result, the corresponding area in the Viewer window will be inverted.


You can select a text and copy, cut, paste, or delete it, or enter new texts. However, you cannot add or delete carriage returns.
If you edit the text, the edit will be automatically embedded in the current page.
Click [Clear OCR Result] to delete all OCR results and return to the state before performing OCR processing.
If you edit the text, the edit will be automatically embedded in the current page.
Click [Clear OCR Result] to delete all OCR results and return to the state before performing OCR processing.