Setting Document Location Definition
Define the drawer that is to be used as the information collection target. Also, define the access permission to the drawer in question. Define the access permission with the read permission and write permission separated. You can delete the user to whom the permission was granted. These settings are available on the [Edit Document Location Definition] screen. Display the [Edit Document Location Definition] screen by the following procedure.
1.
On the business item definition editor screen, click [Document Location Definition].
Access Permission
Regarding the folders of each case set with the drawer, grant the read permission and write permission using the user information that is set in the case property. Multiple permissions exist with the file management component, and the read permission and write permission are granted for each of those permissions. However, the file management component permissions that are to be granted differ between the read permission and write permission. The table below shows the file management component permissions that are granted by the read permission and write permission.
○: Available
-: Unavailable
| File management component permissions | Read permission | Write permission | |
|---|---|---|---|
| When not prohibiting saving or printing of preview images*1 | When prohibiting saving or printing of preview images*2 | ||
| Acquire attribute permission | ○ | ○ | ○ |
| Acquire content permission | ○ | - | ○ |
| Create child element permission | - | - | ○ |
| Delete child element permission | - | - | ○ |
| Update attribute permission | - | - | ○ |
| Update lock permission | - | - | ○ |
| Revise permission | - | - | ○ |
| Update content permission | - | - | ○ |
| Correct/delete permission | - | - | ○ |
| Update status permission | - | - | ○ |
| Delete permission | - | - | ○ |
| Acquire operation log permission | ○ | ○ | ○ |
| Print permission | ○ | - | ○ |
| Preview permission | ○ | ○ | - |
*1: When the [Prohibit Saving or Printing of Preview Image] checkbox is not selected.
*2: When the [Prohibit Saving or Printing of Preview Image] checkbox is selected.
Note
[Prohibit Saving or Printing of Preview Image] can be set on the [Drawer Information] or [Edit Document Location Definition] screen.
Refer
- For information on the [Drawer Information] screen, refer to "2.7 Setting Drawer".
- For information on the [Edit Document Location Definition] screen, refer to "5.5 Editing Business Item Structure (Business Item Administrator)".
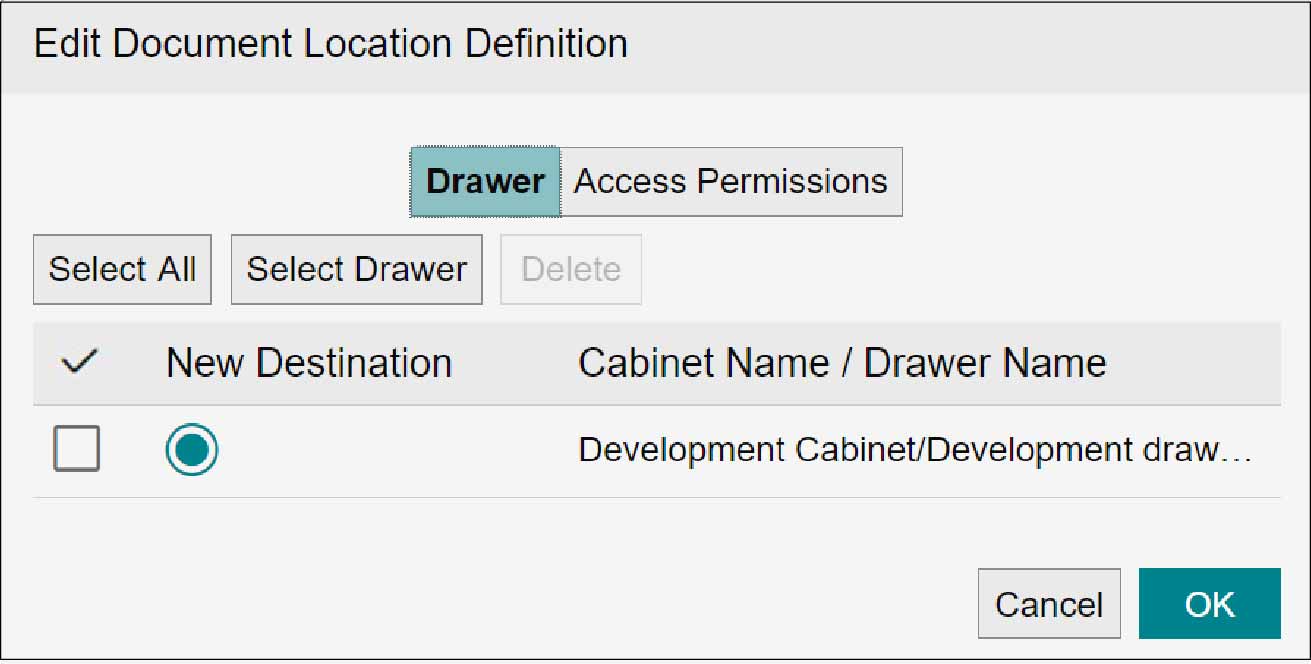
Setting and Deleting a Drawer to Use
Setting a Drawer
1.
Click [Select Drawer].
The [Select Drawer/Cabinet] screen appears.
2.
Click  of cabinet name, select the drawer you want to use from the displayed drawer list, and then click [Select].
The selected drawer name is displayed in [Cabinet Name/Drawer Name].
Note
- Any drawer that is used with another business item cannot be used.
- Up to 10 drawers can be set. Up to 10,000 cases can be registered per drawer. Thus, 100,000 cases can be registered at maximum.
- The selected drawer is appended at the end of the list.
- The drawer you set here will be monitored for its activities related to [Process]. When you work with a document in the corresponding drawer from the [Document] screen, the result is automatically reflected in the corresponding case.
3.
Select a drawer with which to register new documents.
Note
- In [New Destination], select a drawer to use as a storage destination with which you register a document for the case for the first time.
- For a case where documents are already registered, the relationship of storage destination between the case and documents remains the same even if you change [New Destination]. If you register a new document with the corresponding case, it will be stored in the appropriate folder within the same drawer as that for previously registered documents.
Deleting a Drawer
Note
- Deleting a drawer set as the destination for a new document, i.e. New Destination, will result in a condition where no New Destination drawer is selected. Make sure to set the New Destination.
- Any deleted drawers will not be monitored for their activities related to processing. Even if you work with a document in the corresponding drawer from the [Document] screen, the result is not reflected in the corresponding case.
- If the deleted drawer contained documents associated with a case, the relationship of a storage destination between the case and documents remains the same. If you register a document with the corresponding case, the document is stored in the folder corresponding to that in the deleted drawer.
1.
Select the checkbox of the drawer to delete, and click [Delete].
Note
More than one drawer can be selected for deletion.
The [Confirm Deletion] screen appears.
2.
Click [OK].
The selected drawer is deleted.
Setting and Deletion of Users with Read Permission
Set the user to whom you will grant the read permission for the case folder. You can delete the set user.
Setting User
1.
Click the [Access Permissions] tab.
2.
Select the checkbox of [Set Access Permissions in Case Folder] or [Set Access Permission in Evidence Folder of Step Group].
3.
In [Users with Read Permission], click [Select Property].
The [Select Property] screen appears.
4.
Select the property, and click [Select].
The selected property is added to the list of [Users with Read Permission].
Note
You can select multiple properties.
Deleting User
1.
Select the checkbox of the user or group you want to delete, and click [Delete].
The [Confirm Deletion] screen appears.
Note
You can select multiple users or groups for deletion.
2.
Click [OK].
The selected user or group is deleted.
Setting and Deletion of Users with Write Permission
Set the user to whom you will grant the write permission for the case folder or [Set Access Permission in Evidence Folder of Step Group]. You can delete the set user.
Setting User
1.
In [Users with Write Permission], click [Select Property].
The [Select Property] screen appears.
2.
Select the property, and click [Select].
The selected property is added to the list of [Users with Write Permission].
Note
You can select multiple properties.
Deleting User
1.
Select the checkbox of the user or group you want to delete, and click [Delete].
The [Confirm Deletion] screen appears.
Note
You can select multiple users or groups for deletion.
2.
Click [OK].
The selected user or group is deleted.