Setting Linkage with the Capture
Attribute information delivered from an external service can be reflected to evidence attributes. To do this, you need to specify to what items among evidence attributes the attribute information delivered from the external service will be reflected.
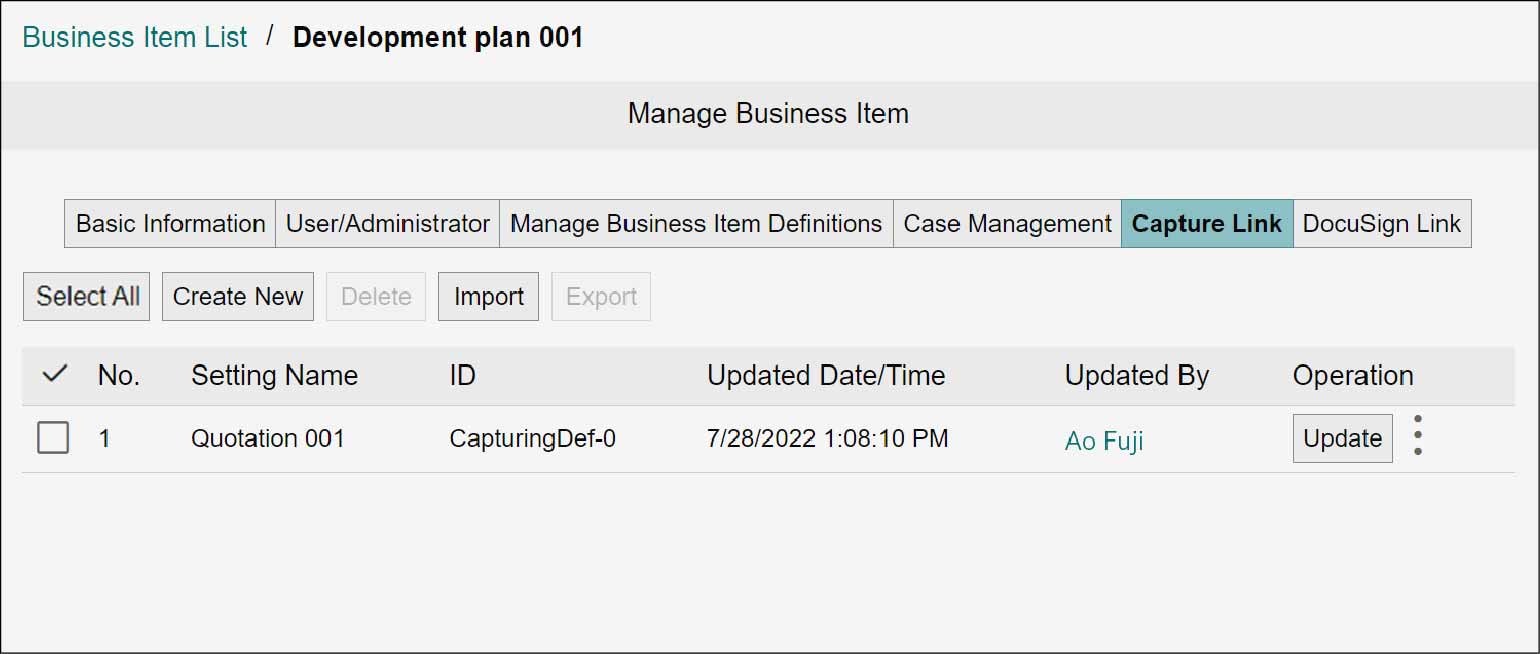
This setting can be done on the [Capture Link] tab in the [Manage Business Item] screen. To display the [Capture Link] tab, use the following procedure.
Important
"Capture" and "Rules" described on this page refer to the features in the old product Smart Workstream Data Entry option. These are provided in File Management as compatibility features available only to customers who have purchased the old product.
1.
On the [Manage Business Item] screen, click the [Capture Link] tab.
Creating a New Capture Link Settings Configuration
Important
"Capture" and "Rules" described on this page refer to the features in the old product Smart Workstream Data Entry option. These are provided in File Management as compatibility features available only to customers who have purchased the old product.
1.
Click [Create New].
The [Create Capture Link Settings] screen appears.
Note
Selecting [Copy and Create New] will inherit the settings from the copy source.
2.
Set items such as [Setting Name], and click [Create].
| Item | Description | ||
|---|---|---|---|
| Setting Name | Enter a name for the settings | ||
| Linked Attribute Name to Use as Case Key Value | Enter the attribute name from the link destination, to be used as the key value (value for [Case Name]) for each case. Enter the column name from the CSV file to input to the Capture, or the value that is specified for [Attribute Name] under [Attribute] on the [Destination] tab in the [Rule Settings] screen. However, if a value is specified for [Case Name] on the [Rule Settings] screen, the value takes precedence. |
||
| Evidence Name Specification Method | Select a method for identifying the evidence name of the evidence to be updated. Select either [Use Linked Attribute Name] or [Use Specified Value]. |
||
| Use Linked Attribute Name | Selecting this option enables the use of the attribute value to be input from the link destination. | ||
| Linked Attribute Name | Here enter the column name from the CSV file to input to [Capture], or the value that is specified for [Attribute Name] under [Document Attributes] on the [Destination] tab in the [Rule Settings] screen. However, if a value is entered for [Evidence Name] on the [Destination] tab in the [Rule Settings] screen, the value takes precedence. |
||
| Use Specified Value | If selected, enter the name of the evidence to be updated. | ||
| Evidence Name | Enter the evidence name of the evidence to be updated. However, if a value is entered for [Evidence Name] on the [Destination] tab in the [Rule Settings] screen, the value takes precedence. |
||
| Evidence Attribute and Linked Attribute Mapping | Specify a mapping relationship by entering which evidence attribute from evidence to be updated should reflect which attribute value input from the link destination.
|
||
Note
Up to 20 relationships can be set.
Refer
For the [Rule Settings] screen, refer to "6.1 Rule Settings".
Editing a Capture Link Settings Configuration
Important
"Capture" and "Rules" described on this page refer to the features in the old product Smart Workstream Data Entry option. These are provided in File Management as compatibility features available only to customers who have purchased the old product.
1.
Click [Update] for the Capture Link Settings configuration to edit.
The [Update Capture Link Settings] screen appears.
2.
Change items such as [Setting Name], and click [Update].
Deleting a Capture Link Settings Configuration
Important
"Capture" and "Rules" described on this page refer to the features in the old product Smart Workstream Data Entry option. These are provided in File Management as compatibility features available only to customers who have purchased the old product.
1.
Select the checkbox of the Capture Link Settings configuration to delete, and click [Delete].
Note
More than one Capture Link Settings configuration can be selected for deletion.
The [Confirm] screen appears.
2.
Click [OK].
The selected Capture Link Settings configuration is deleted, then the [Complete] screen appears.
3.
Click [Close].
Importing a Capture Link Settings Configuration
Important
"Capture" and "Rules" described on this page refer to the features in the old product Smart Workstream Data Entry option. These are provided in File Management as compatibility features available only to customers who have purchased the old product.
1.
Click [Import].
The [Import Capture Link Settings] screen appears.
1.
Click [Select].
The [Open] screen appears.
2.
Select the configuration to import, and click [Open].
Note
Up to 20 configurations can be imported including the ones already set.
Exporting a Capture Link Settings Configuration
Important
"Capture" and "Rules" described on this page refer to the features in the old product Smart Workstream Data Entry option. These are provided in File Management as compatibility features available only to customers who have purchased the old product.
1.
Select the checkbox of the Capture Link Settings configuration to export, and click [Export].
The selected Capture Link Settings configuration is exported as an XML file.
Note
The file name is in the following format: processCaptureDefinitions_{yyyyMMddHHmmss}.xml.