Adding Users from Microsoft Entra ID
The procedure for Microsoft Entra ID (Microsoft Azure ActiveDirectory) is described in this example.
For Microsoft Entra ID (SCIM provisioning), see To federate with Microsoft Entra ID(SCIM Provisioning) (Federation Type 10 or 11) in the Tenant Administrator's Guide.
For Microsoft Entra ID (SAML), see To federate with Microsoft Entra ID(SAML) (Federation Type 9, 11, or 12) in the Tenant Administrator's Guide.
- This operation is performed by the service administrator of FUJIFILM BI Direct.
- Log in to FUJIFILM BI Direct.
- Click [Tenant Management].
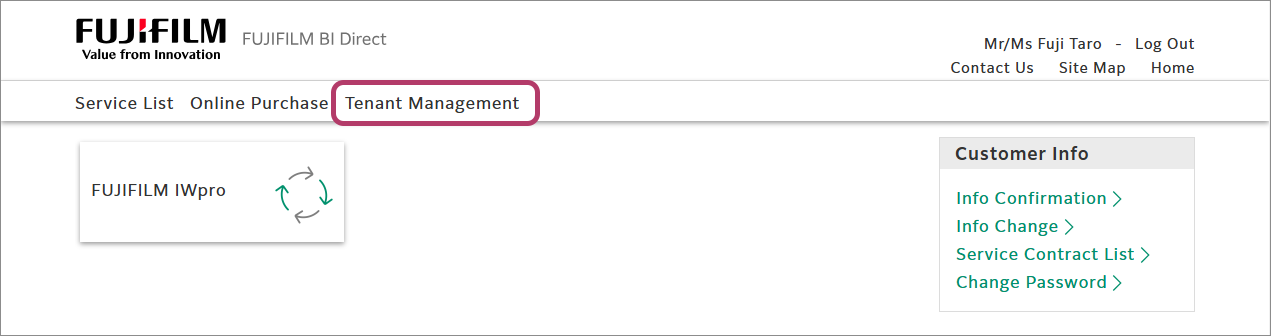
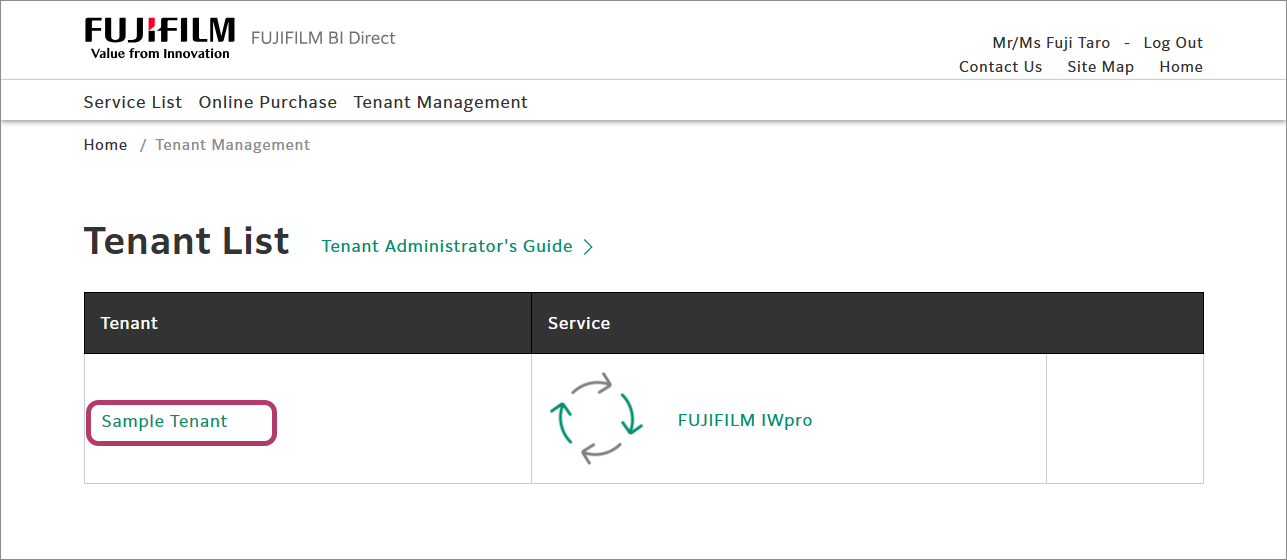
- Click the FUJIFILM IWpro tenant name.
- Click [Remote ID Federation Management] in the menu.
- Click [Add Authentication Provider].
- Select [Microsoft Entra ID] (or [Microsoft Azure Active Directory]) in the pull-down menu, then select [Establish ID federation and sync user information of authentication provider].
- Click [Add].
- Configure [User Invitation Policy] as follows.
Item Description Invitation to Service Select [Select and Invite]. Service to Invite Select [FUJIFILM IWpro] and the displayed service. - Click [Accept and Proceed].
- Click [Settings].
- In the remote ID federation management list, click [Connect] for [Microsoft Azure Active Directory].
- When the [Microsoft Entra ID] login screen is displayed, log in as an account with the Microsoft Entra ID global administrator role.
- Check the information, and click [Consent].The "FUJIFILM BI Direct for administrators" service principal is added to the tenant being used.
- Confirm that [Connected] is displayed as the connection status for [Microsoft Entra ID] (or [Microsoft Azure Active Directory]) in [Remote ID Federation Management] in [Tenant Management] in FUJIFILM BI Direct.
Configuring the Microsoft Entra ID Administrator Settings
- Log in to the "Microsoft Entra admin center" as an account with the global administrator role.
- Click [ID] > [Applications] > [Enterprise applications] from [Home].
- Click [FUJIFILM BI Direct for Administrator].
- Click [User and group assignments].
- Click [Add user or group], and follow the procedure below to add the user to display in FUJIFILM BI Direct.
- Click [None Selected].
- Select the user to add, then click [Select].
- The user must be added to Microsoft Entra ID in advance.
- Click [Assign].
- Click the added user, then click [All] in [Edit properties].
- Check [First name], [Last name], and [Email], and enter the required information if they are blank.If [First name], [Last name], or [Email] is left blank, an error will occur in the remote ID federation management of FUJIFILM BI Direct described on the previous page.
Example entry for account using Universal Print:UPN Last name First name E-mail fuji_taro@example.com fuji taro fuji_taro@example.com fuji_hanako@example.com fuji hanako fuji_hanako@example.com - Click [Save].
- It may take some time to reflect the settings.