Teams/SharePoint
Configuring Microsoft Teams/SharePoint Online
- This operation is performed by the administrator of Microsoft Teams or SharePoint Online.
- Global administrator permissions are required to allow access.
Registering FUJIFILM BI Direct as an App
- Access the following URL in a Web browser, then log in with an administrator account for Microsoft Teams or SharePoint Online.
- App creation permissions are required.
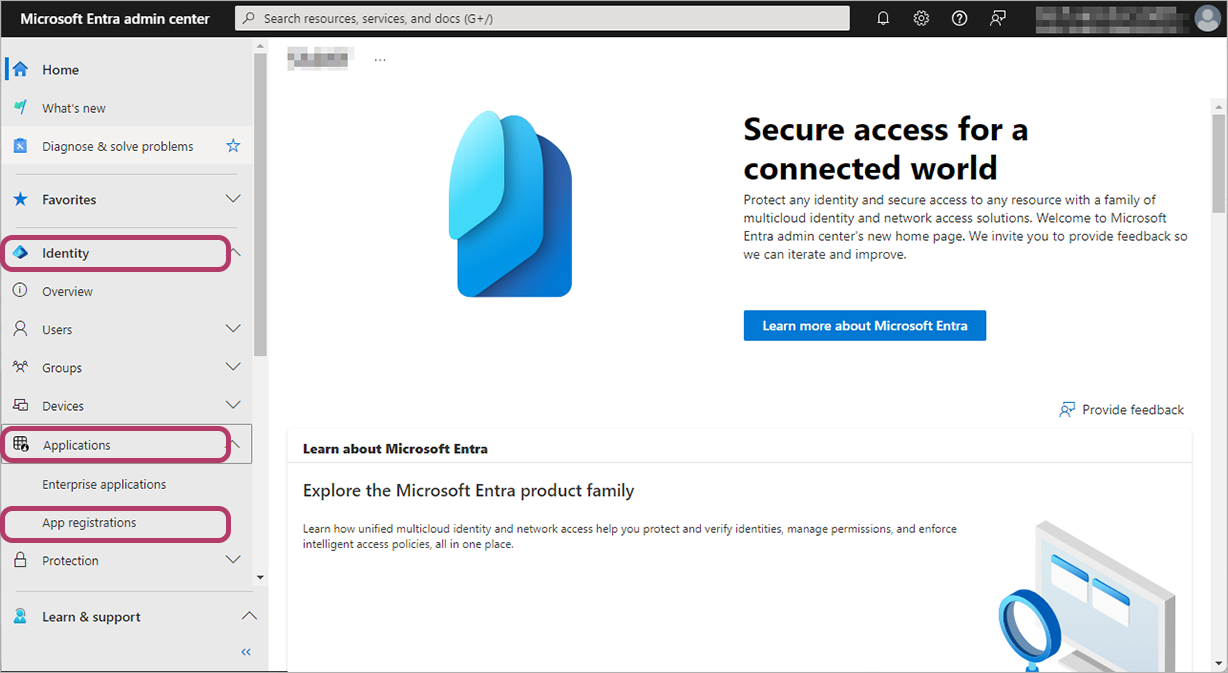
- Click [Identity] > [Applications] > [App registrations] in the portal menu.
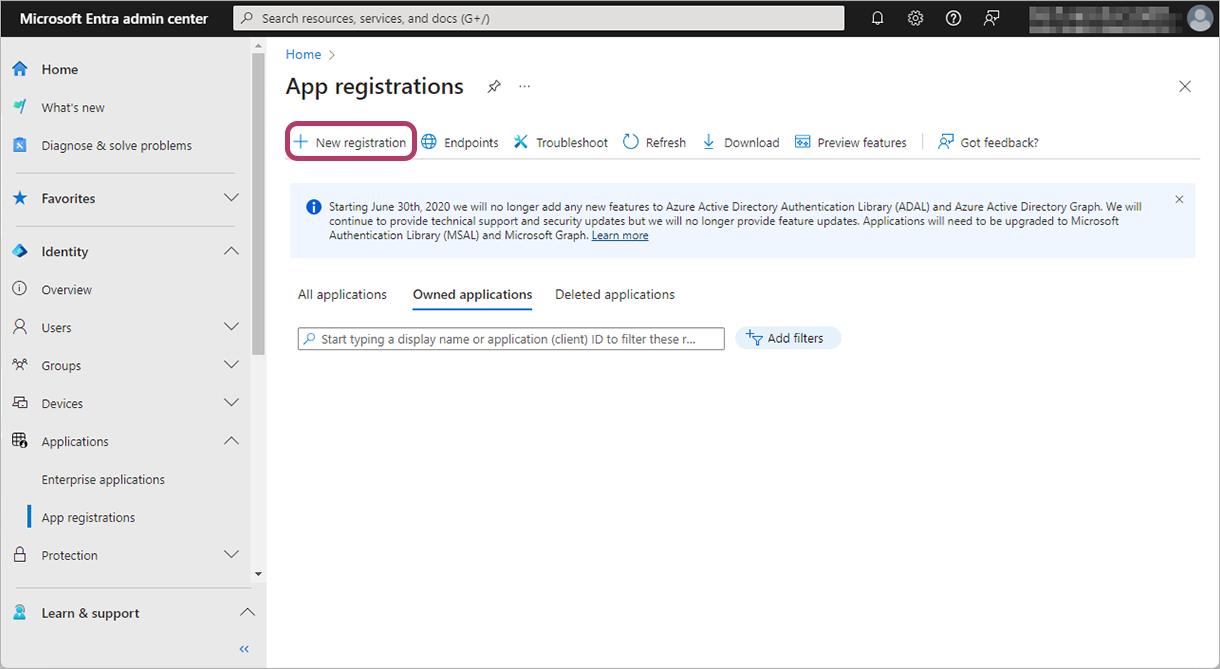
- Click [New registration].
- Enter a name of your choice in [Name].Example: "For FUJIFILM IWpro"
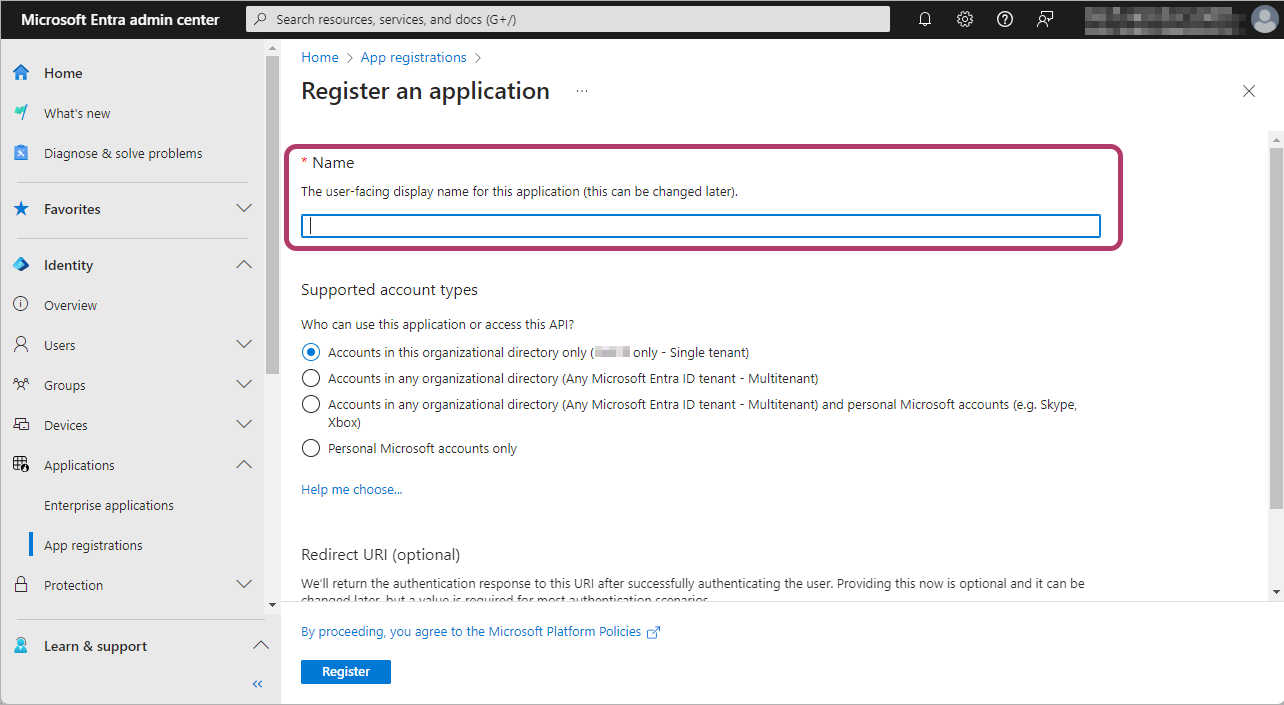
- The application name used here is not used in FUJIFILM IWpro. Register a name that is easy for the Microsoft Teams or SharePoint Online administrator to identify.
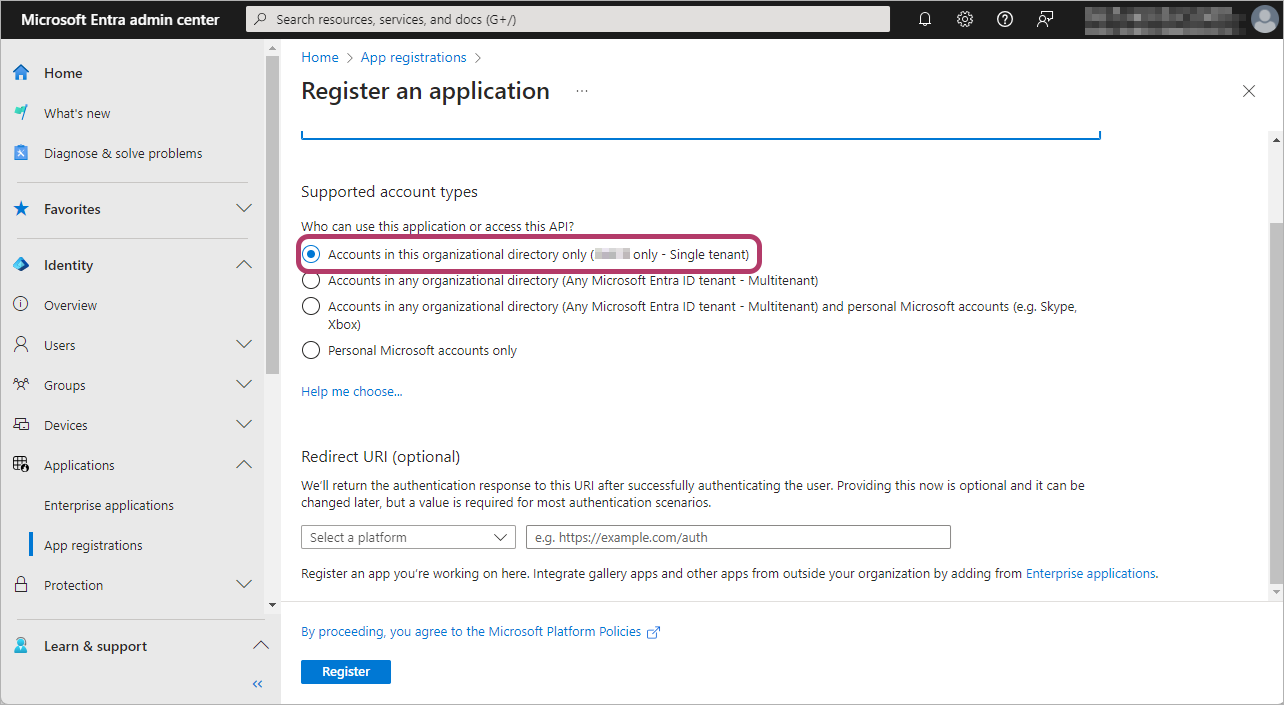
- In the supported account types, select [Accounts in this organizational directory only ({organization name} only - Single tenant)].
- Select [Web] in the platform selection of the direct URI, and enter the following value.https://direct-fb.fujifilm.com/ap2/service_tenant/access_cloud
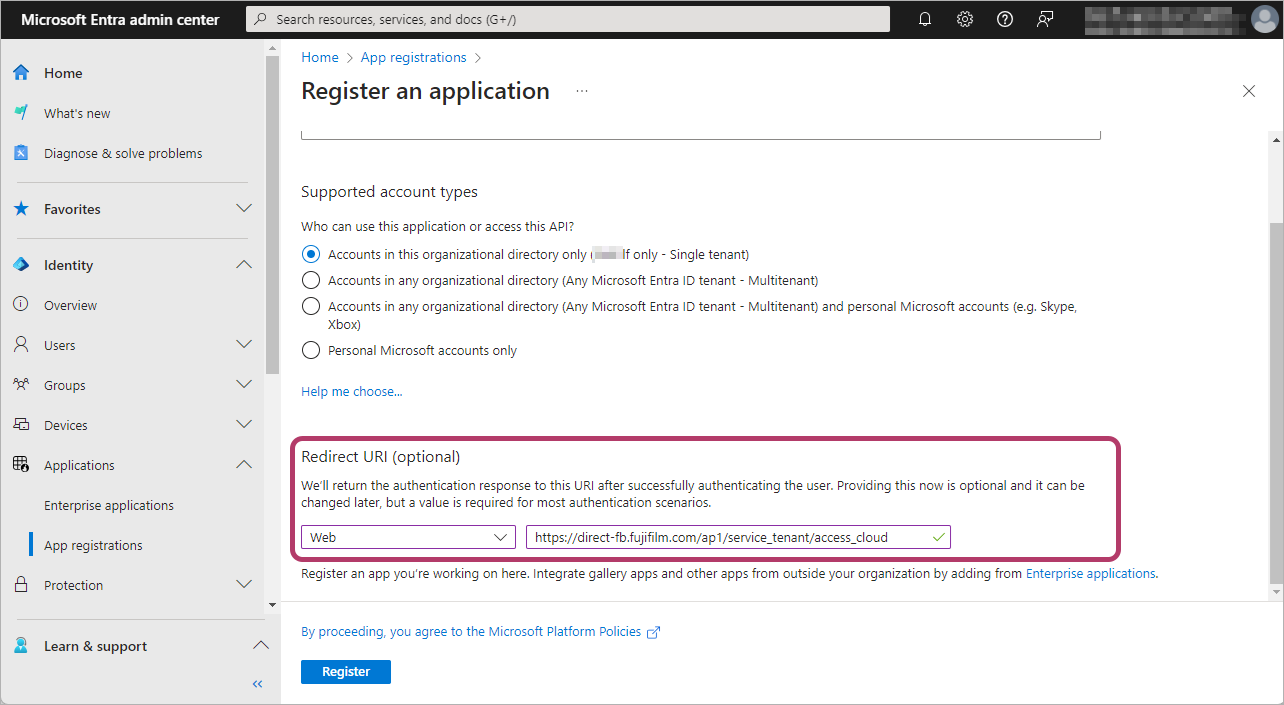
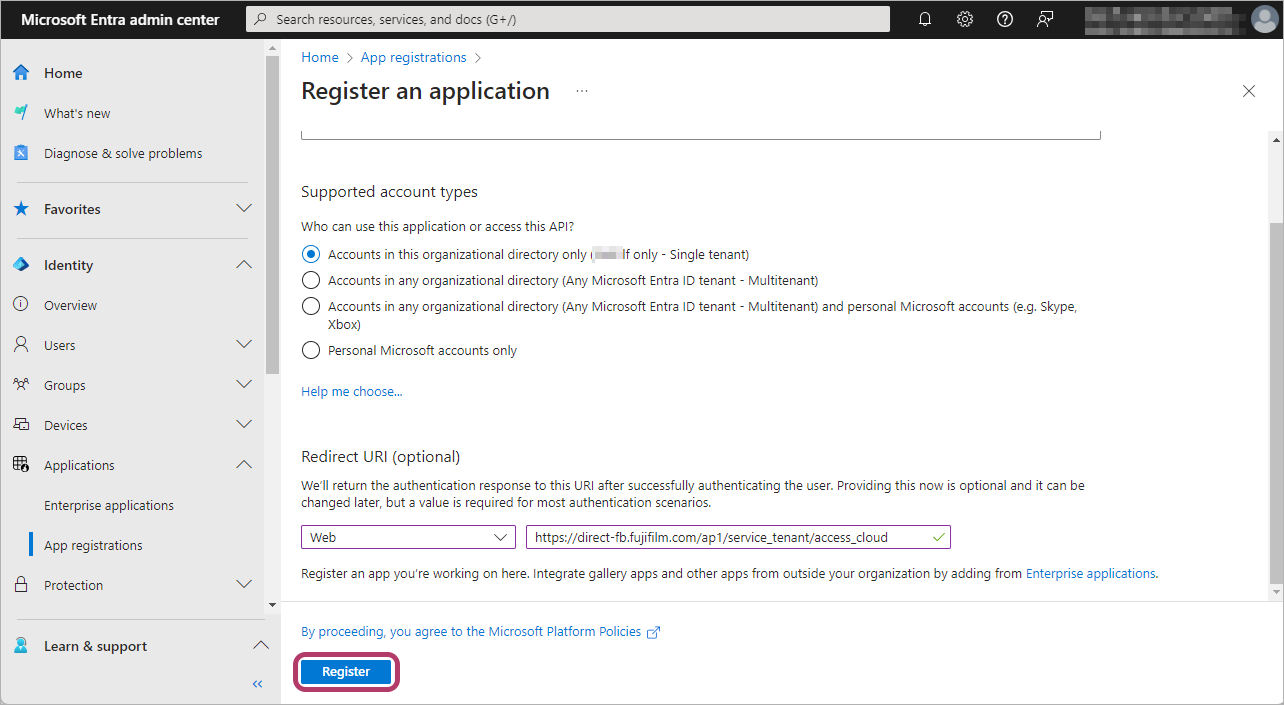
- Click [Register].
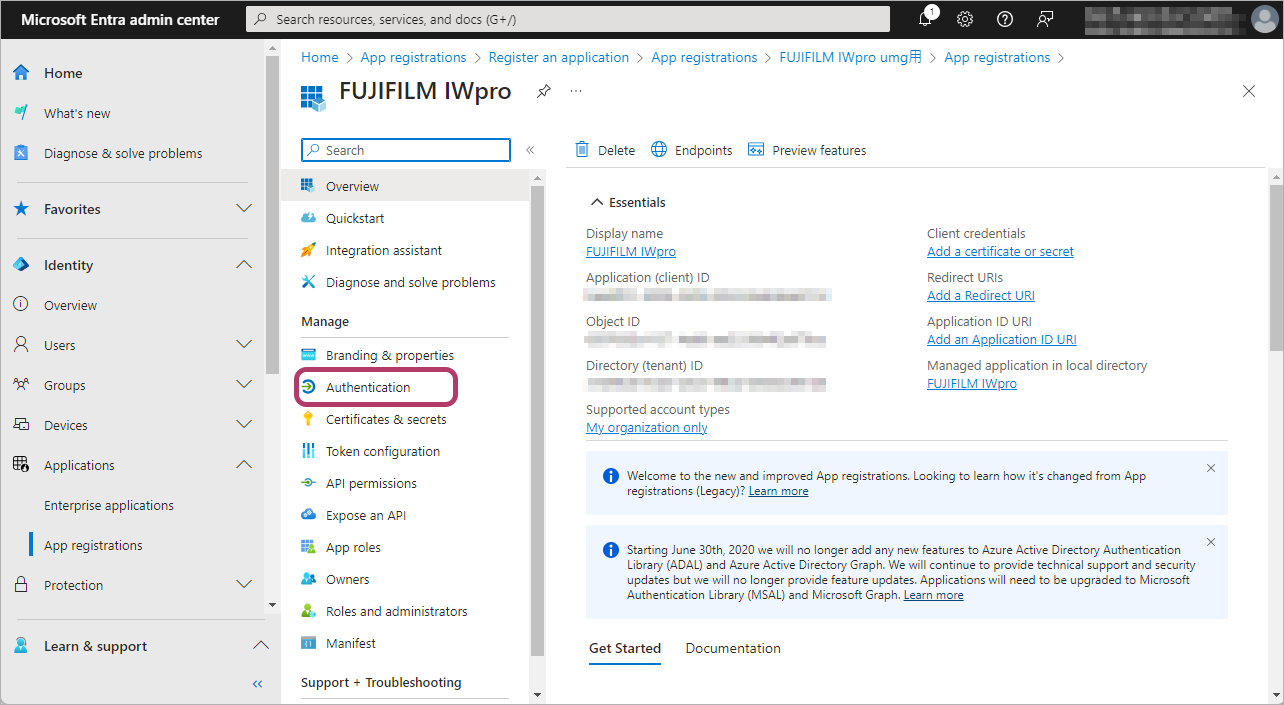
Configuring App Authentication Settings
Configure authentication for the registered app, then make a note of the string in [Value] in [Client secrets], which is required for linking with FUJIFILM BI Direct.
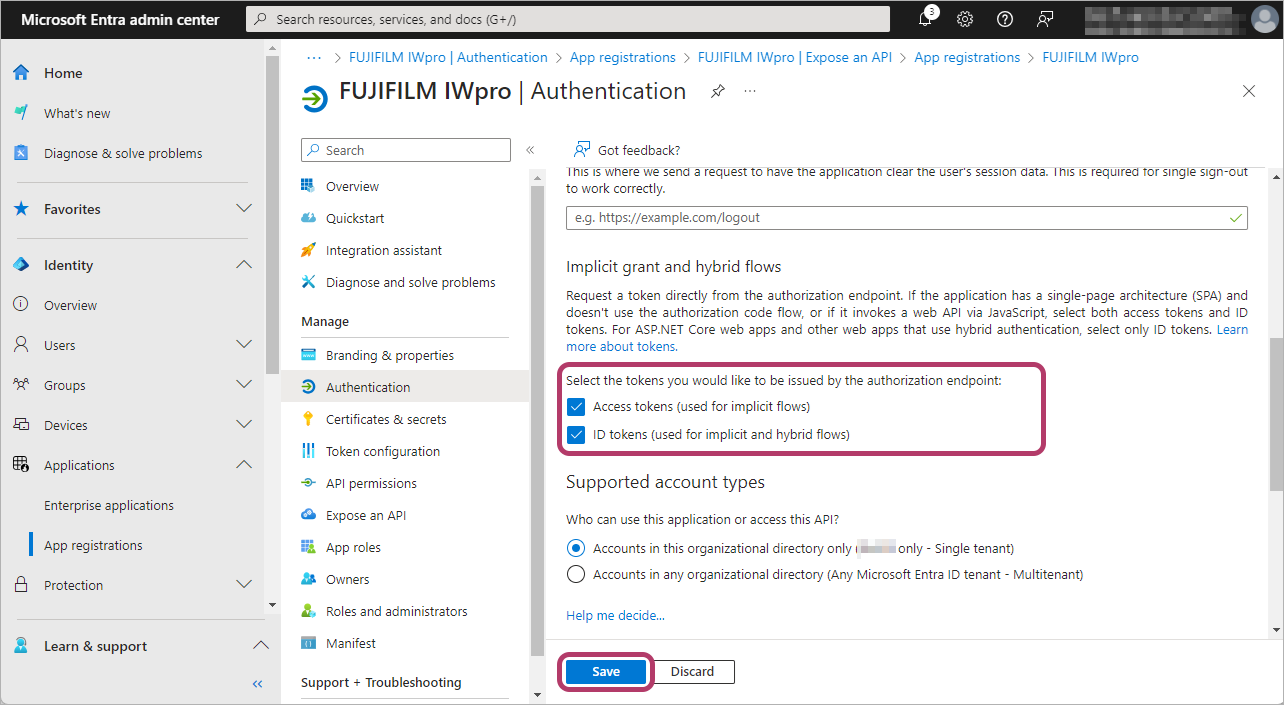
- Click [Authentication] in the menu.
- Select [Access tokens (used for implicit flows)] and [ID tokens (used for implicit and hybrid flows)], then click [Save].
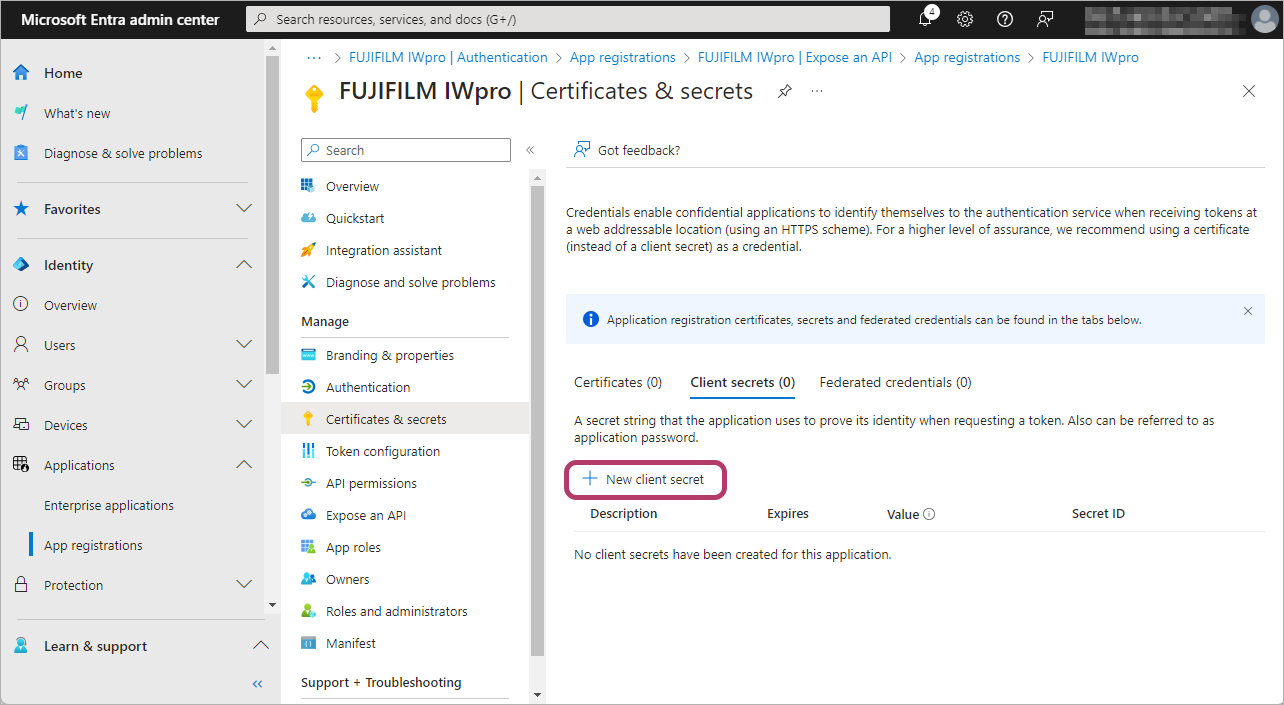
- Click [Certificates & secrets] in the menu.

- Click [New client secret].
- Enter a description in [Description], then click [Add].Example: "For FUJIFILM IWpro"
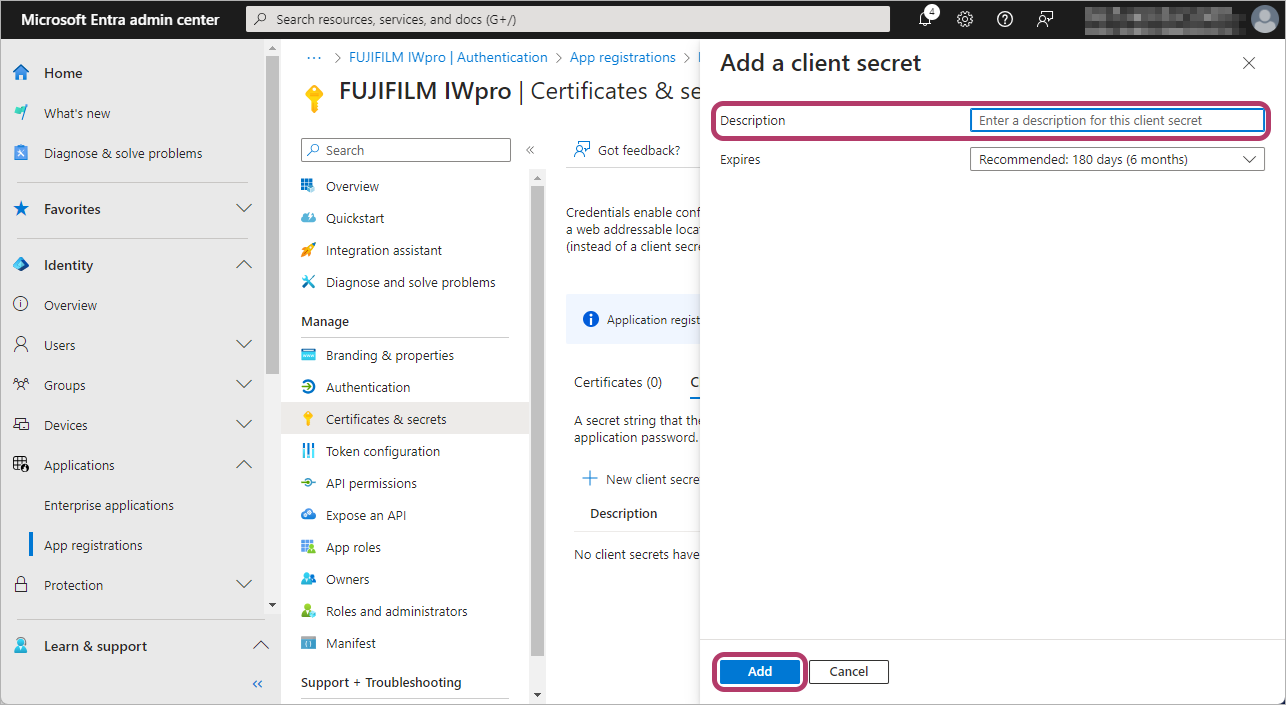
- By default, a client secret expires after six months. You can extend this to a period of up to two years.
- A link error will occur once the client secret expires. If an error occurs, follow the procedure in Updating a Microsoft Entra Client Secret.
- Make a note of the string in [Value] in [Client secrets].
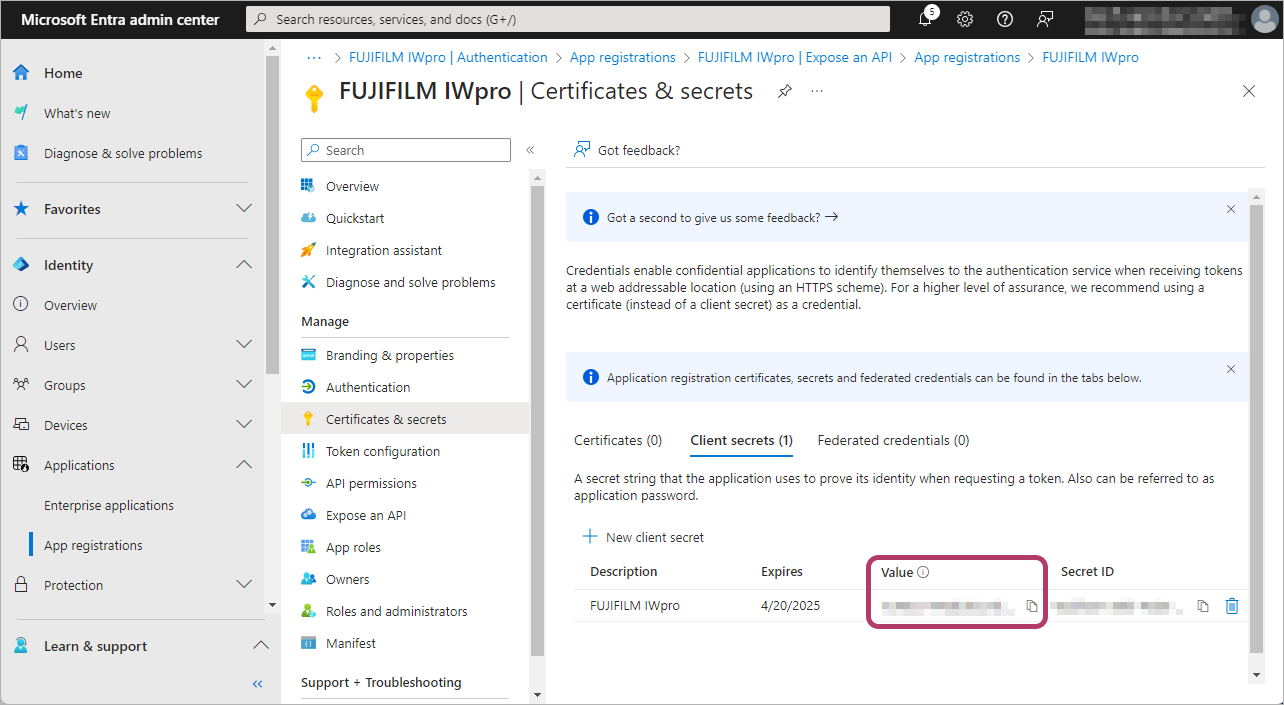
- [Client secrets] contains the [Value] and [Secret ID] settings. The string in [Value] is used.
- The value of the client secret cannot be displayed after refreshing the [Certificates & secrets] screen. If you did not make a note of the string in [Value], create a new client secret.
Configuring Linked Items
Configure the items required for linking with FUJIFILM BI Direct.
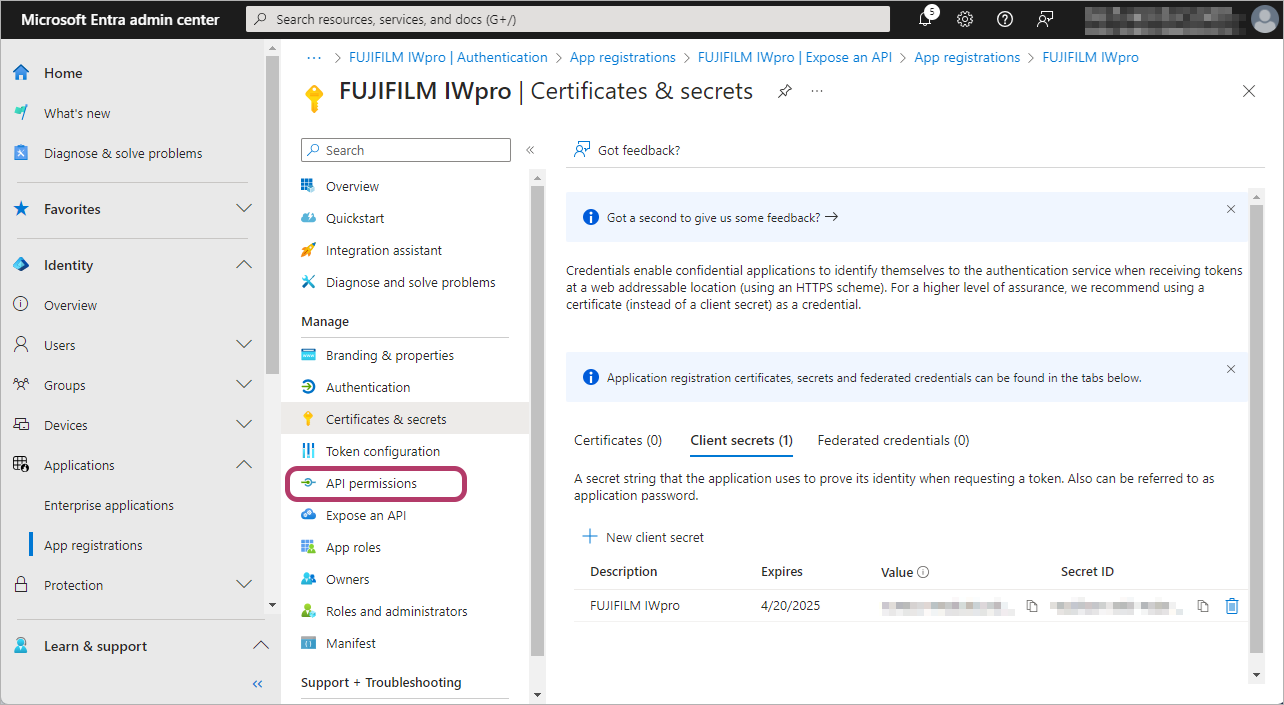
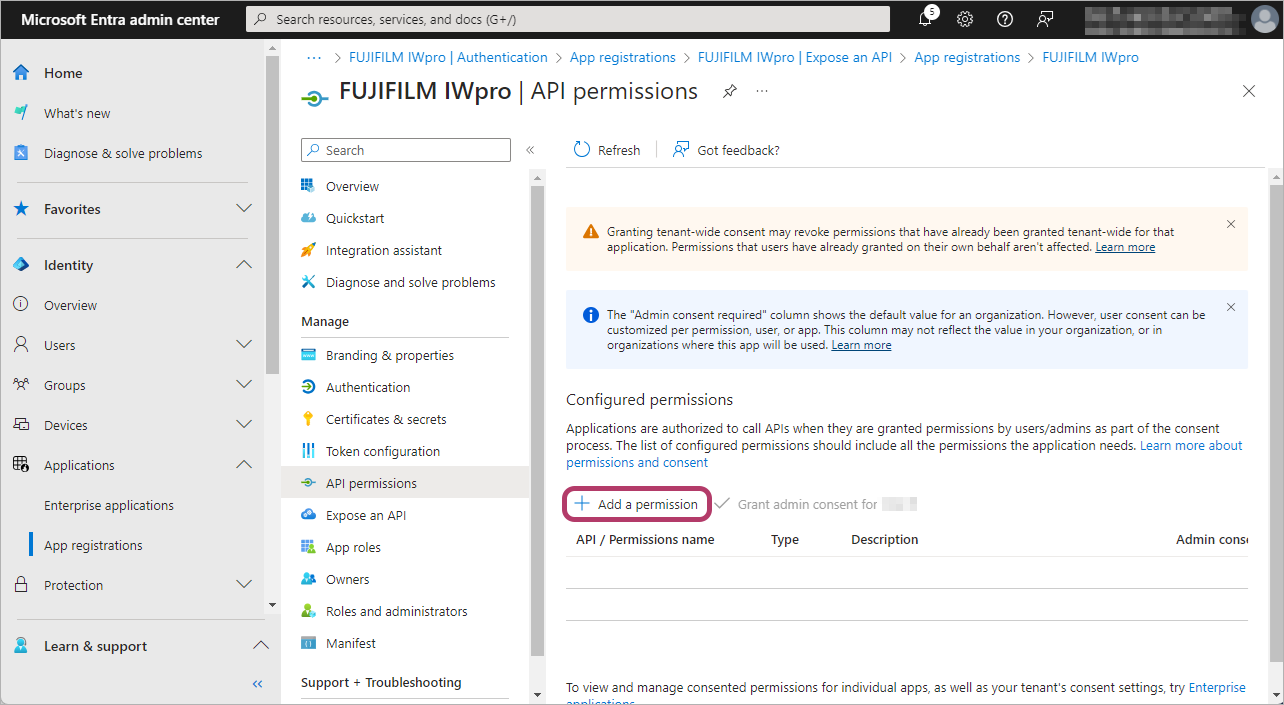
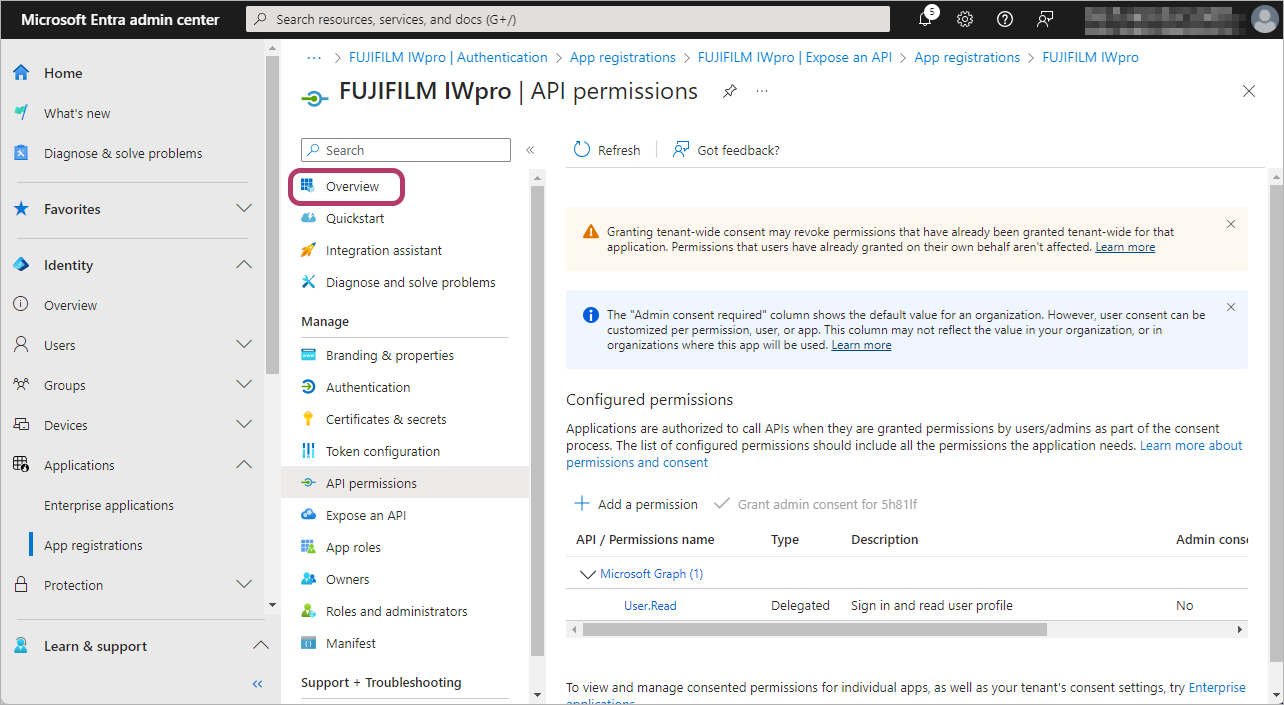
- Click [API permissions] in the menu.
- Click [Add a permission].
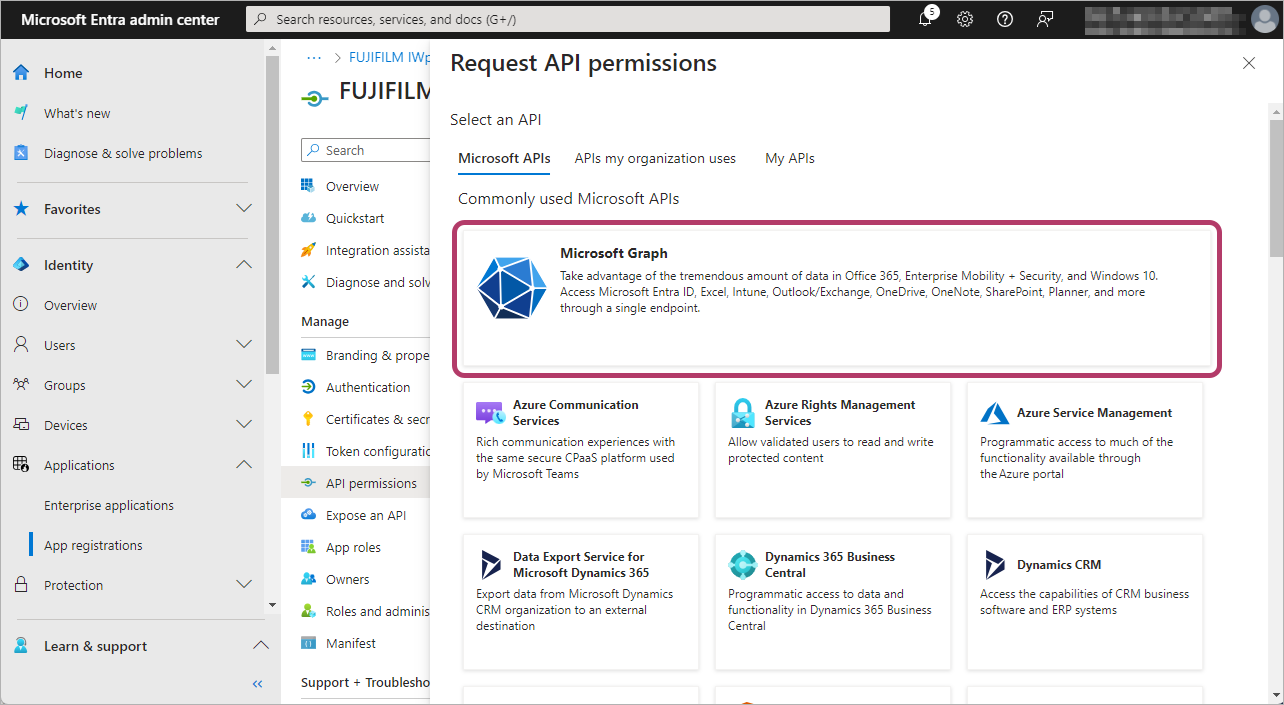
- Click [Microsoft Graph].
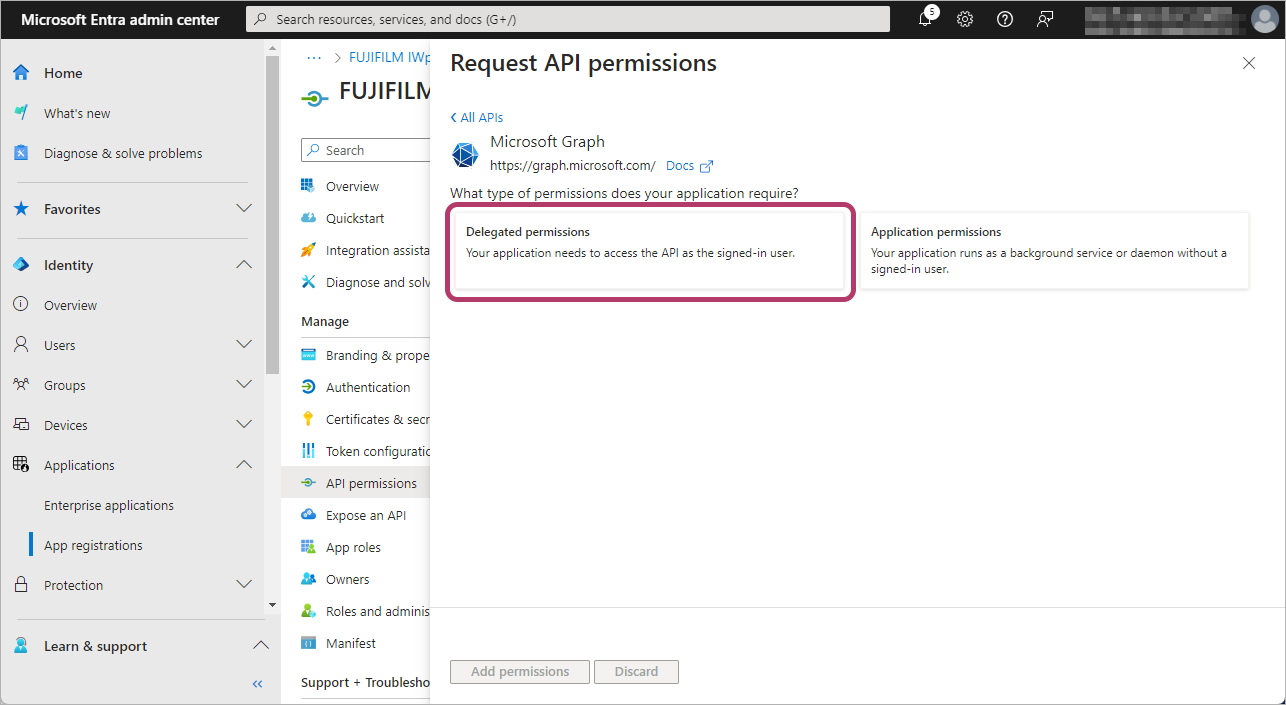
- Click [Delegated Permissions].
- Select all the following check boxes, then click [Add a permission].
- [OpenId permissions] > [offline_access]
- [Channel] > [Channel.ReadBasic.All]
- [ChannelMember] > [ChannelMember.Read.All]
- [ChannelMessage] > [ChannelMessage.Edit]
- [ChannelMessage] > [ChannelMessage.Read.All]
- [ChannelMessage] > [ChannelMessage.Send]
- [Files] > [Files.ReadWrite.All]
- [Sites] > [Sites.Manage.All]
- [Sites] > [Sites.ReadWrite.All]
- [TeamMember] > [TeamMember.Read.All]
- [Team] > [Team.ReadBasic.All]
- [User] > [User.Read]
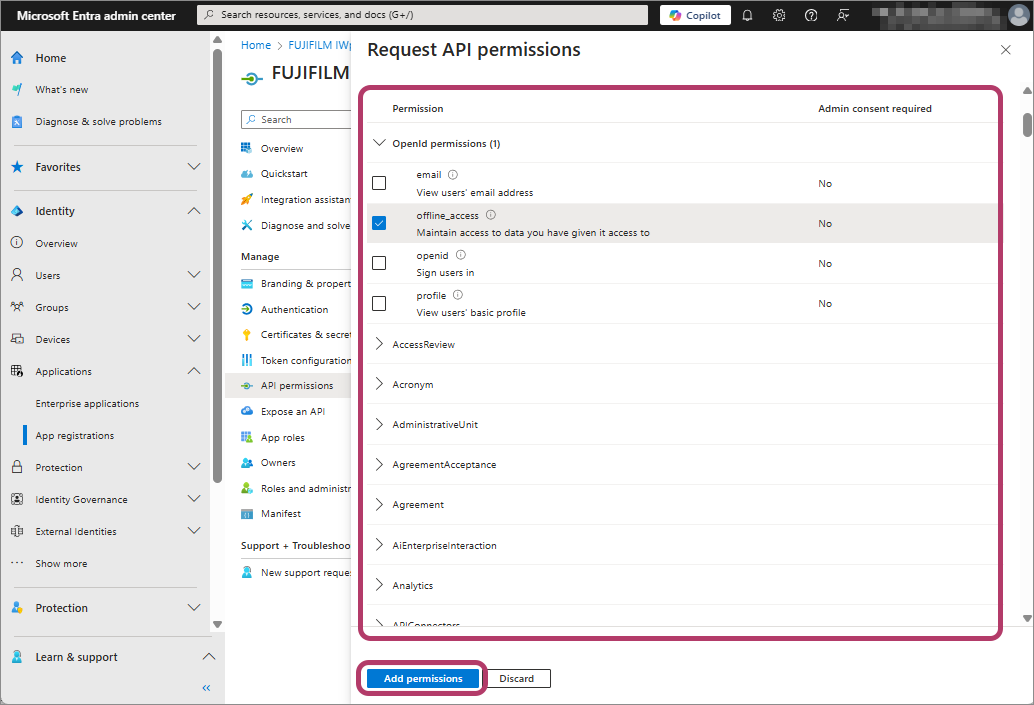
- Select [Grant admin consent for {account name}], then click [Yes].
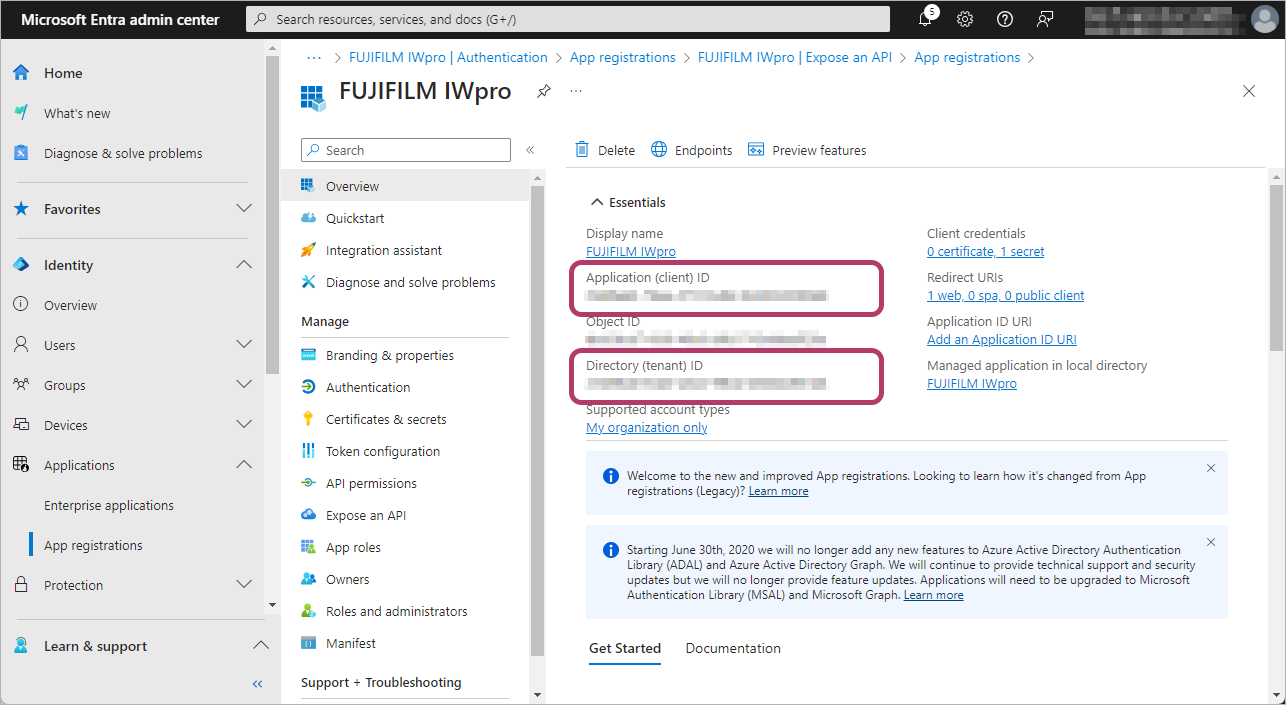
Making a Note of the Required Information
Make a note of the following values required for linking with FUJIFILM BI Direct.
- Application (client) ID
- Directory (tenant) ID
- Click [Overview] in the menu.
- Make a note of the values in [Application (client) ID] and [Directory (tenant) ID].
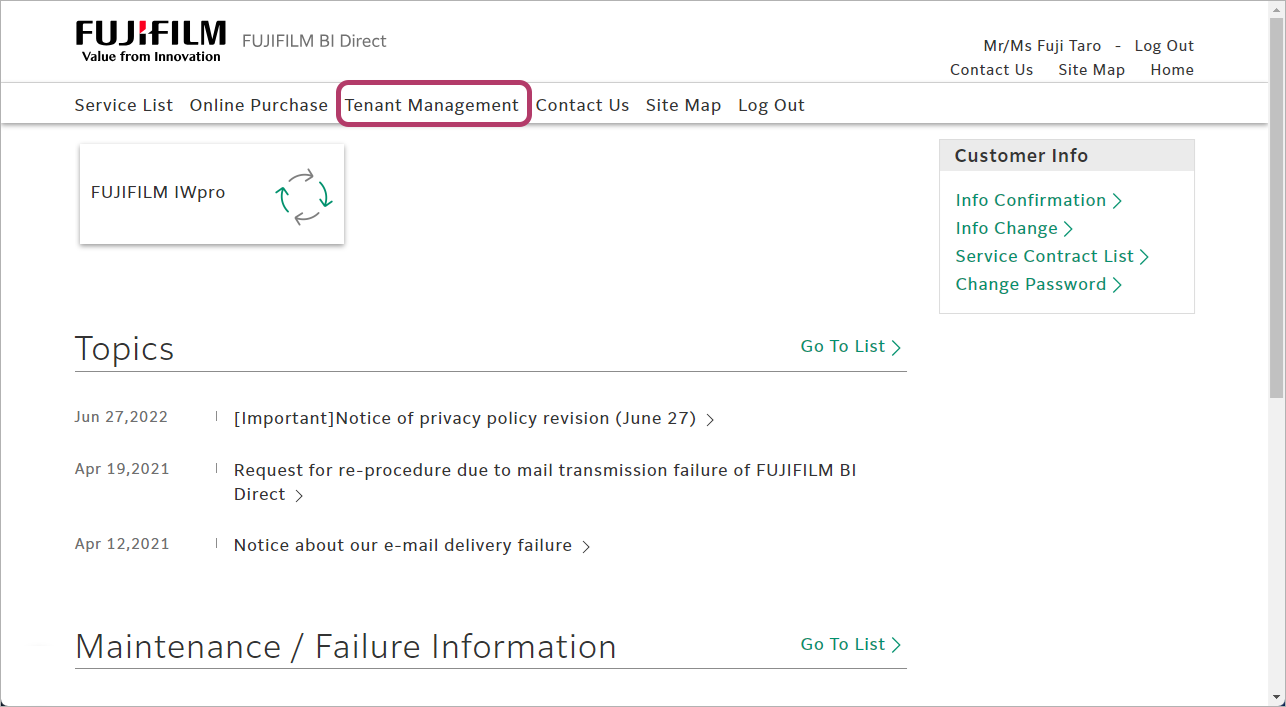
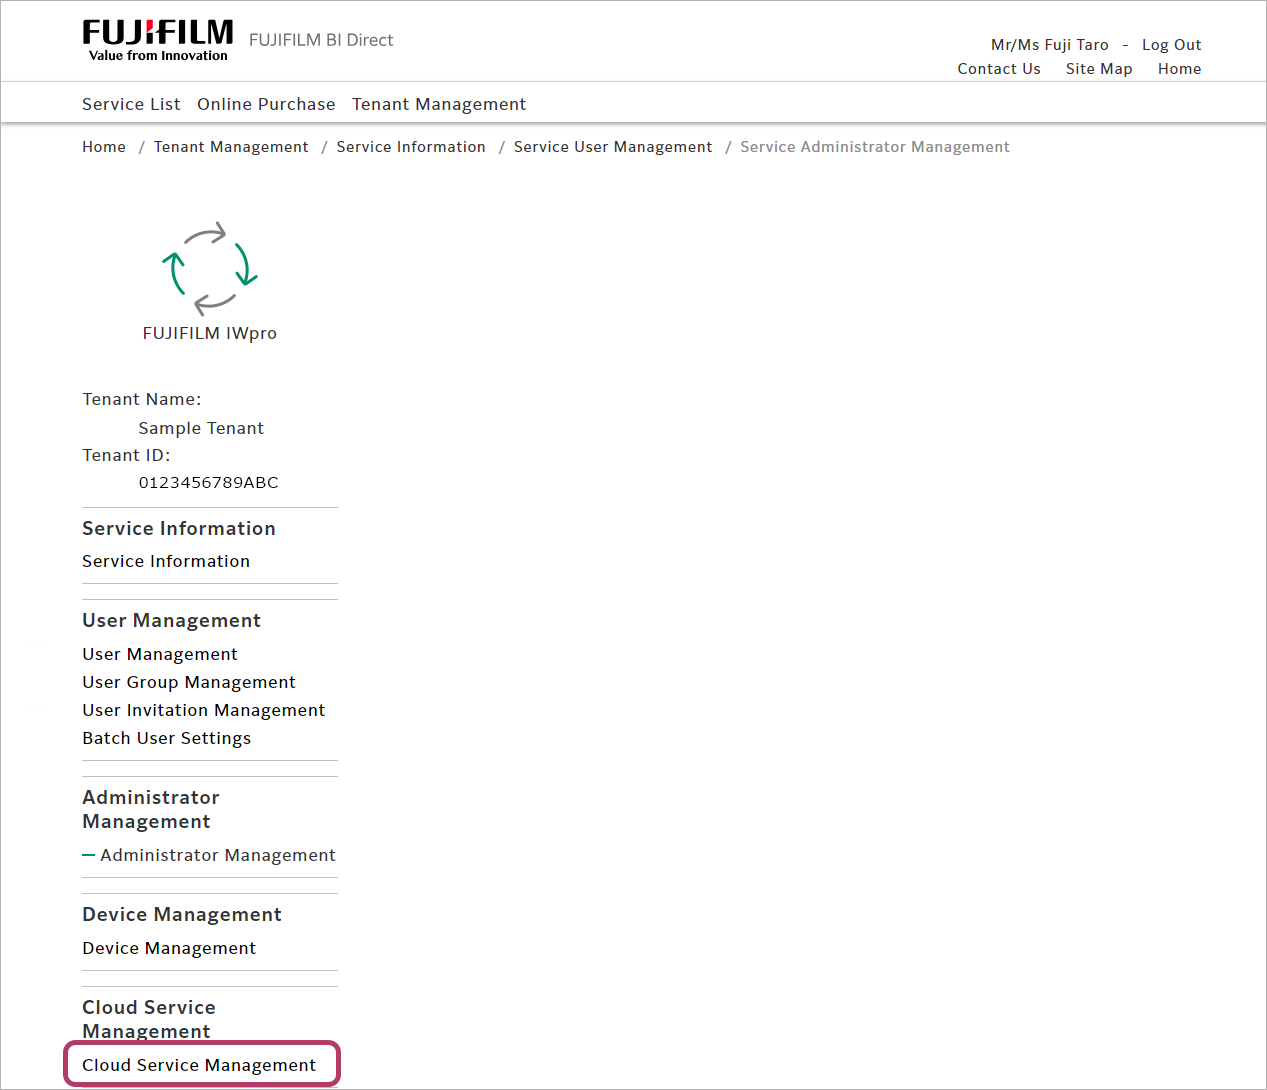
Linking FUJIFILM BI Direct with Microsoft Teams/SharePoint Online
- This operation is performed by the service administrator of FUJIFILM BI Direct.
- Log in to FUJIFILM BI Direct.
- Click [Tenant Management].
- Click [FUJIFILM IWpro] in the [Service] field.
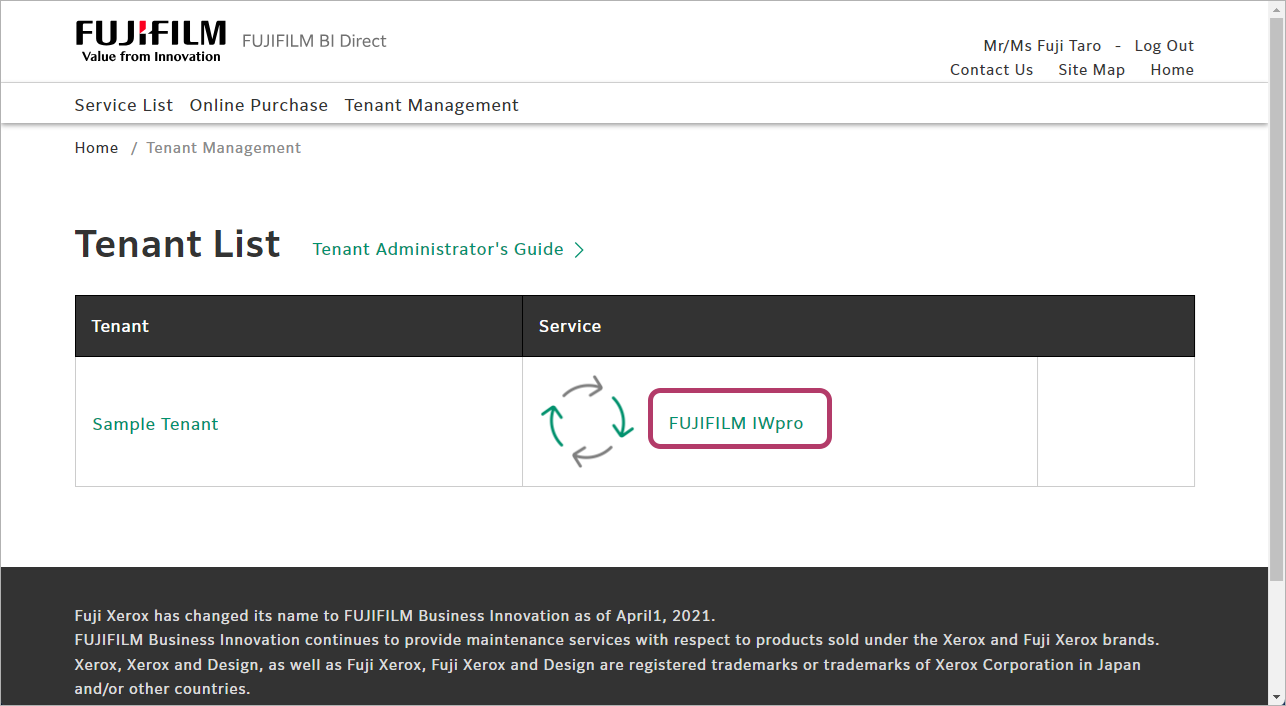
- Click [Cloud Service Management] in [Cloud Service Management].
- Click [Settings] for [Microsoft Teams / SharePoint Online] in the cloud service management list.
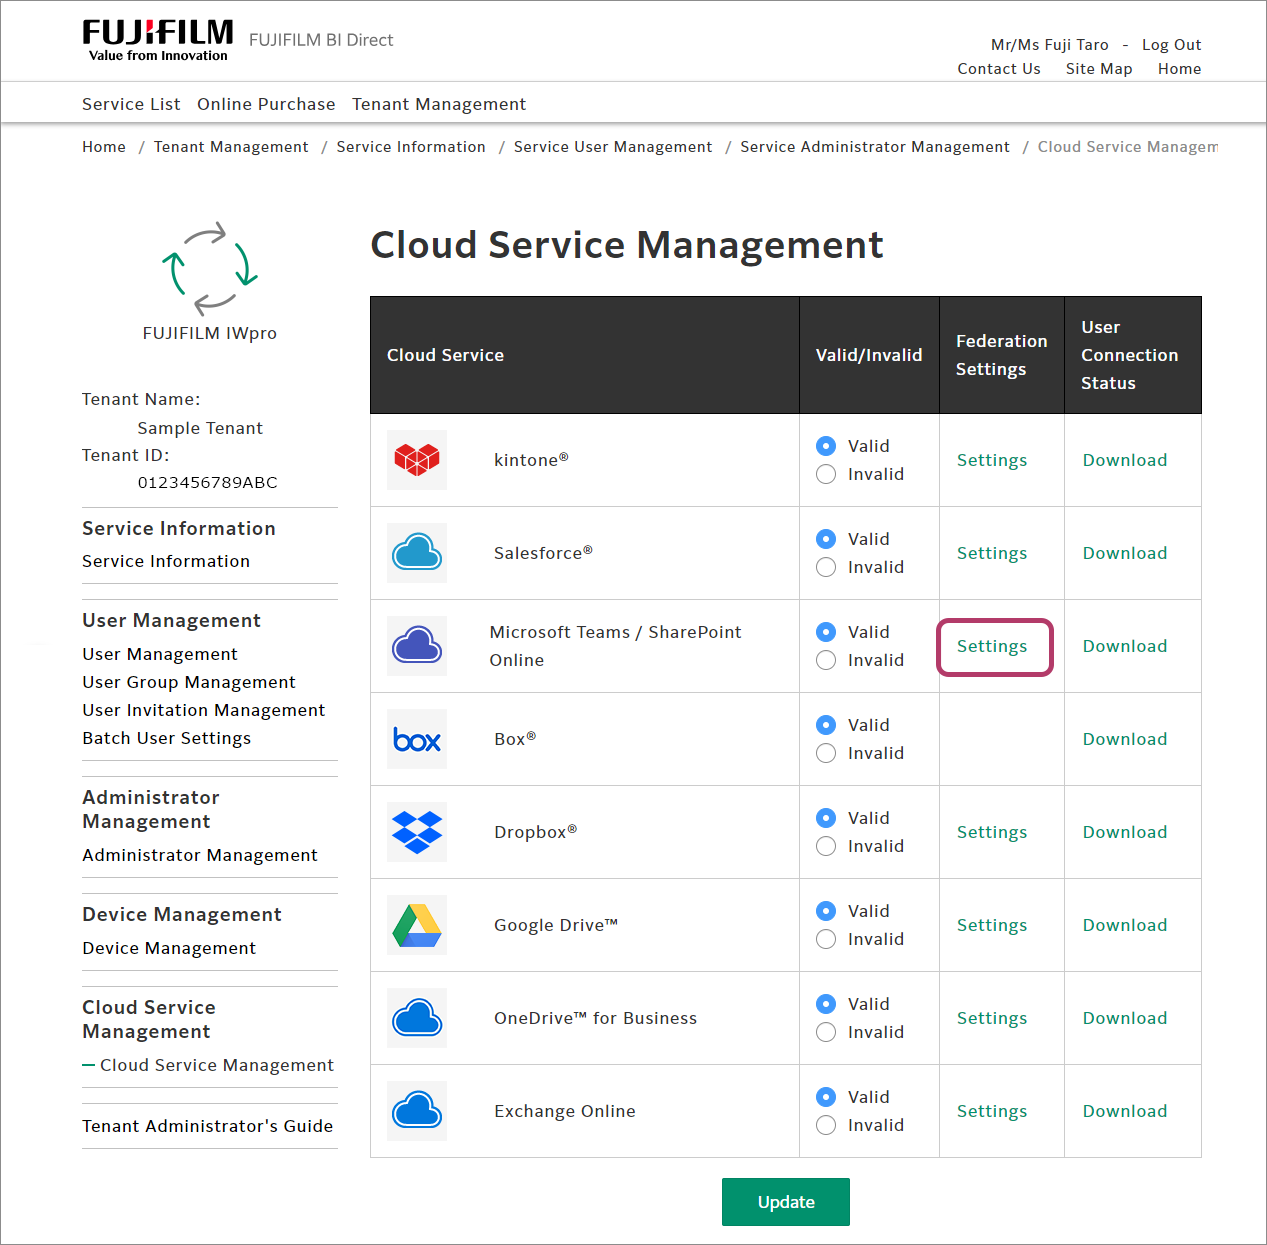
- Configure the following settings, then click [Update].
Item Input Value Application (Client) ID Value in [Application (client) ID] Client Secret Value in [Client secrets] Approval EndPoint https://login.microsoftonline.com/{value in [Directory (tenant) ID]}/oauth2/V2.0/authorize Token EndPoint https://login.microsoftonline.com/{value in [Directory (tenant) ID]}/oauth2/V2.0/token 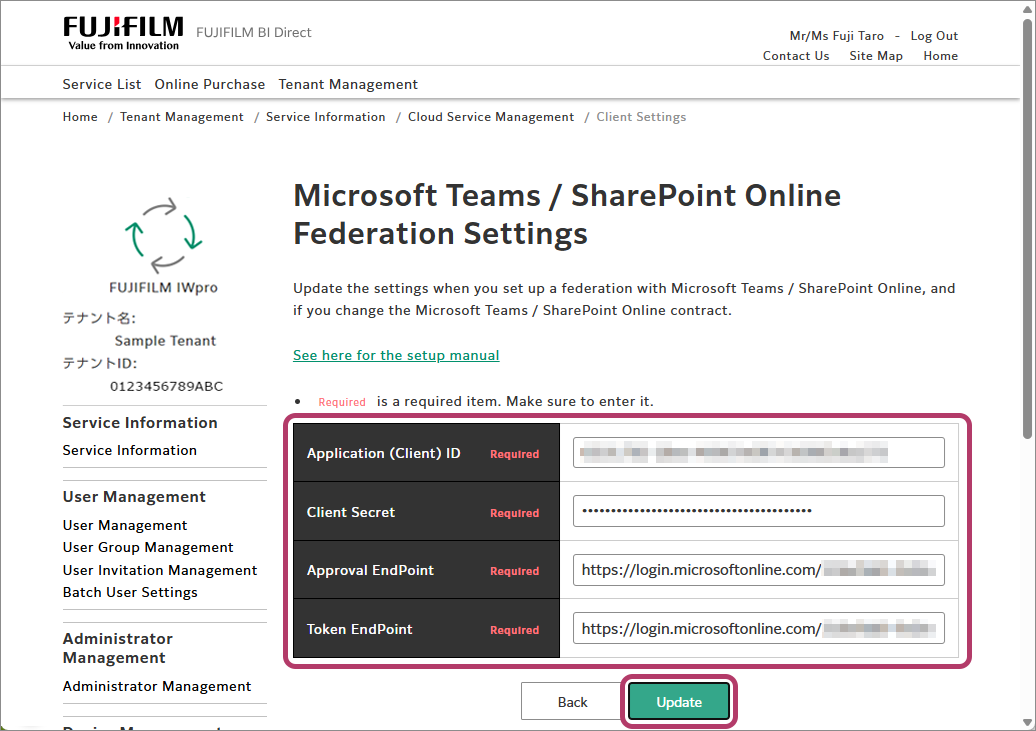
- Click [OK].